


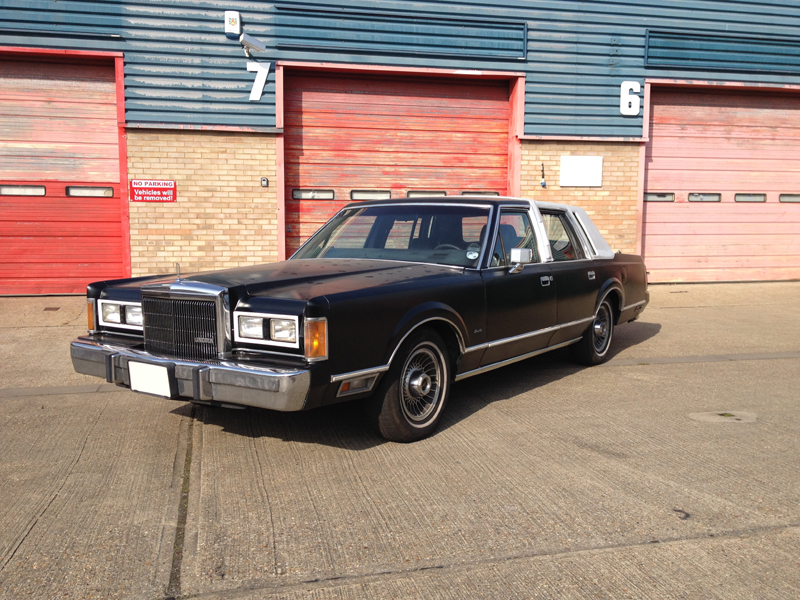
1989 Lincoln Town Car
The owner of this car bought this car into us to carry out a 5.0 HO conversion. The car originally left the factory with a Ford 5.0 engine, which all though a good engine, doesn't make much power, roughly 160bhp. The 5.0 HO conversion brings the power roughly up to 225bhp, a significant increase in power and a well worthwhile upgrade. The conversion mainly consists of sourcing a pair of cylinder heads more commonly found on the fox body Mustang GT but can also be found on a few other cars such as the Ford Thunderbird, along with the camshaft, intake manifold, throttle body, exhaust manifolds, fuel injectors and the engine control unit. The conversion is quite a popular conversion and also allows for further upgrades to be carried out on the engine now that it has some more popular parts on it along with the ability to convert the intake to system to a mass air set up in the future for further tune ability.So this is the car as it came into us:
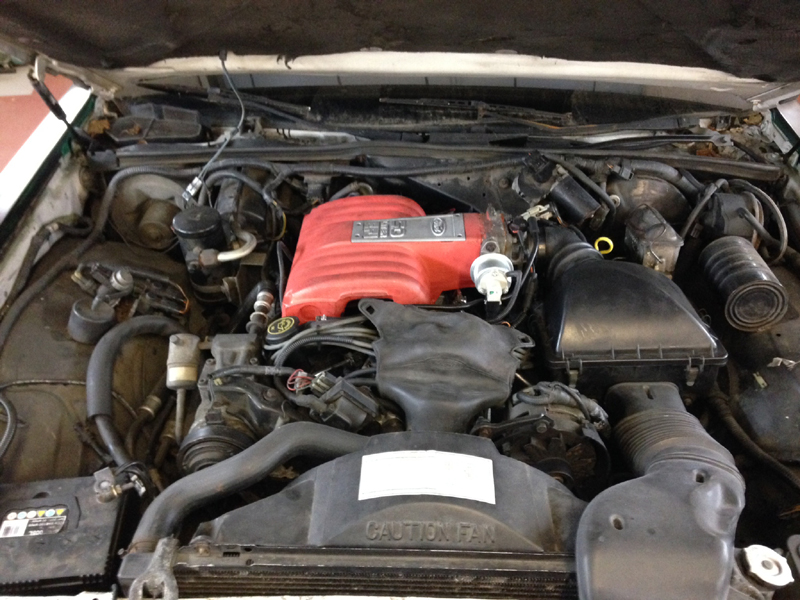
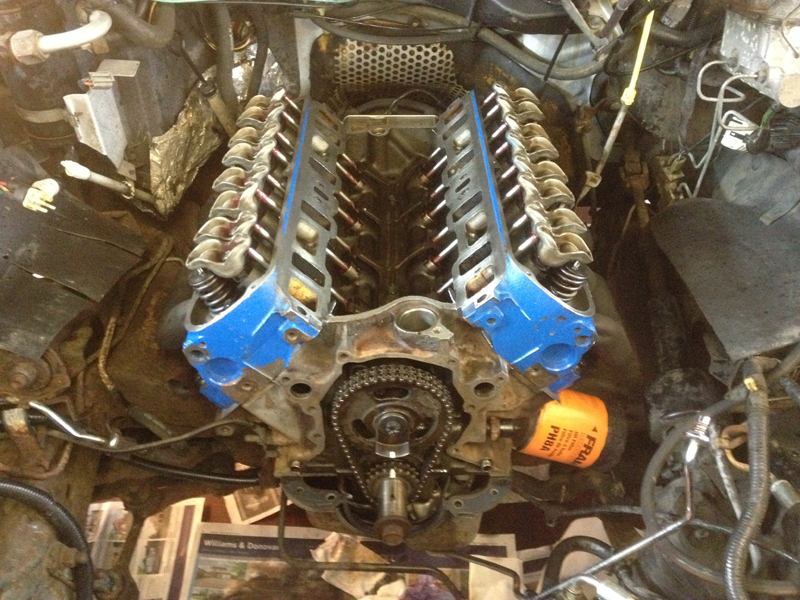
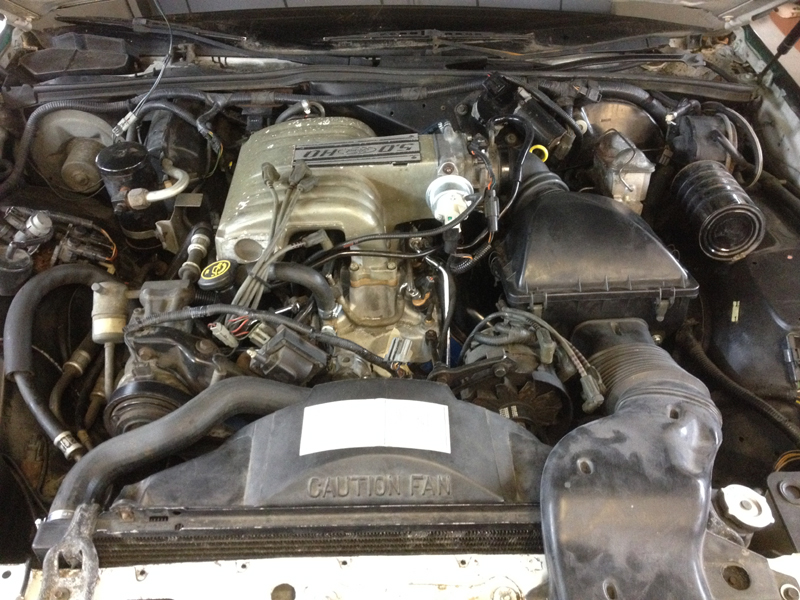
An under bonnet shot before we started work on the car, unlike the earlier carburettor cars there isn't much room in the engine bay to work:
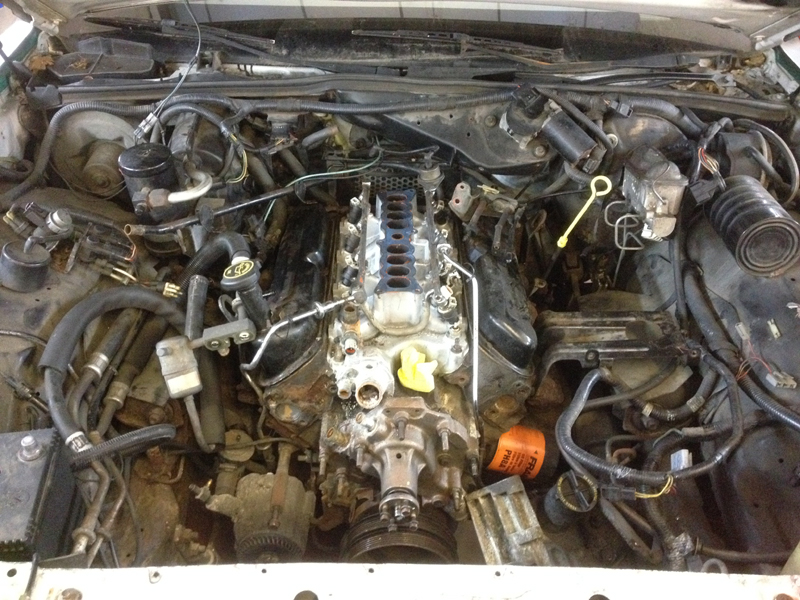
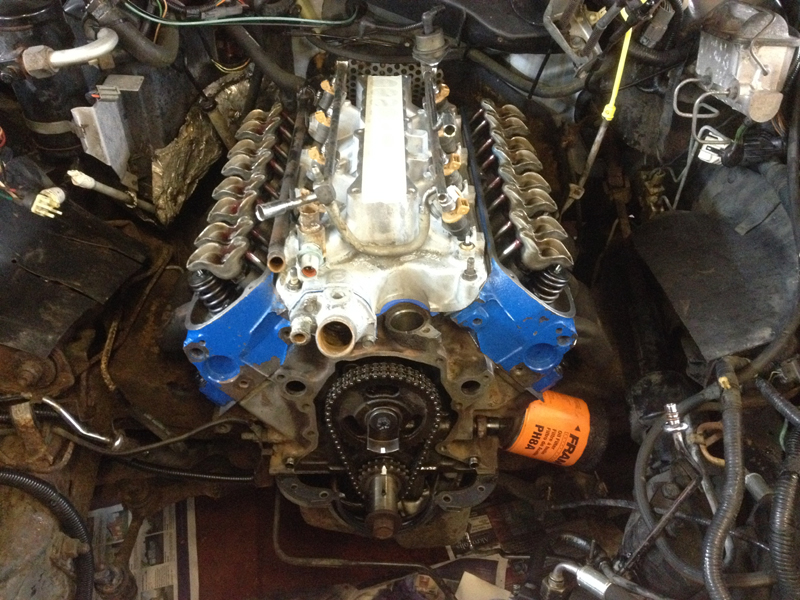
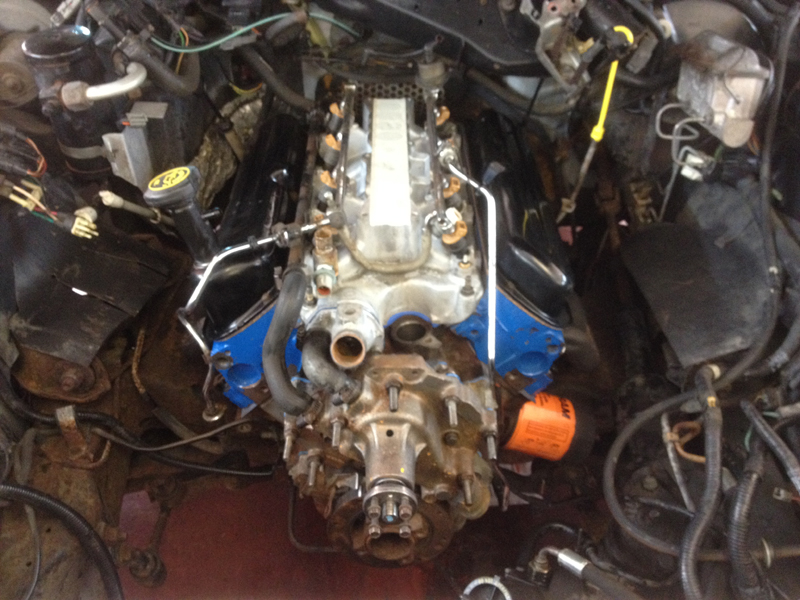
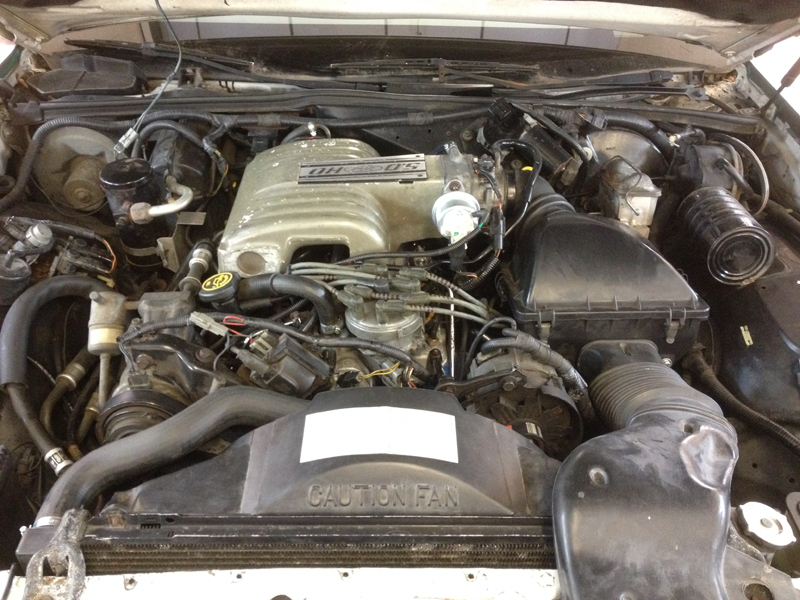
After a few hours work, the engine bay now looks like an earlier carburettor car engine wise with the exception of the fuel injection intake manifold:
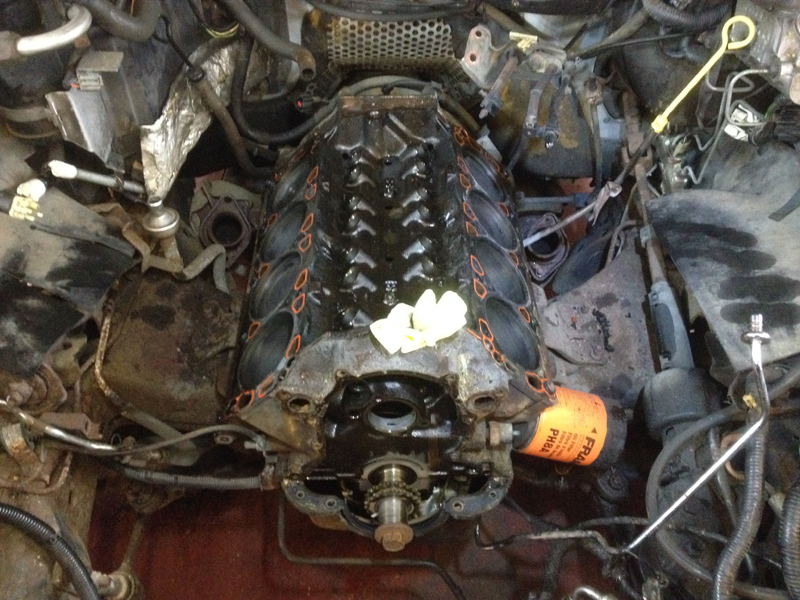
The engine is finally stripped down as much as it needs to be; the only thing left to remove at this point is the front part of the exhaust system. The engine is now ready to start being cleaned up before it can start being re-assembled:
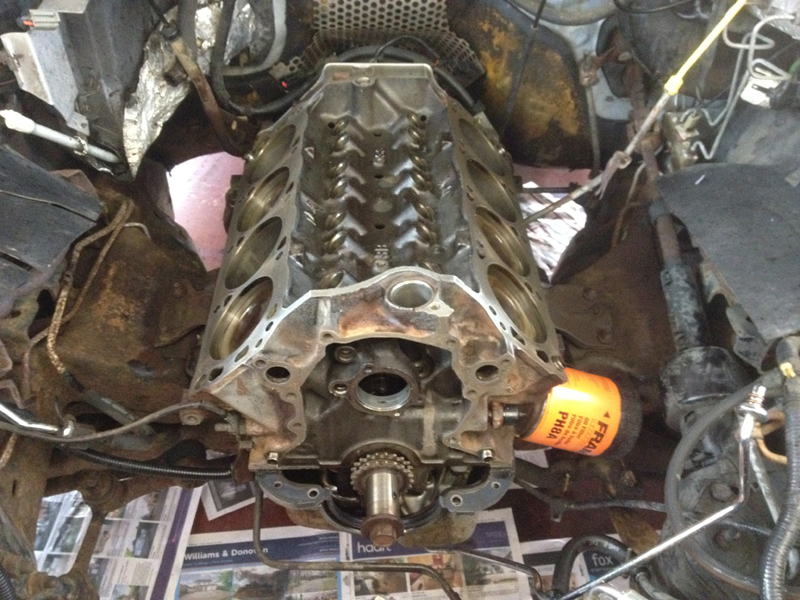
With all the old gaskets removed, the gasket faces were carefully cleaned making sure no dirt of bits of old gasket entered the engine. Then the engine and entire engine bay were degreased and cleaned and the engine inspected for any imperfections or cracks in the block:
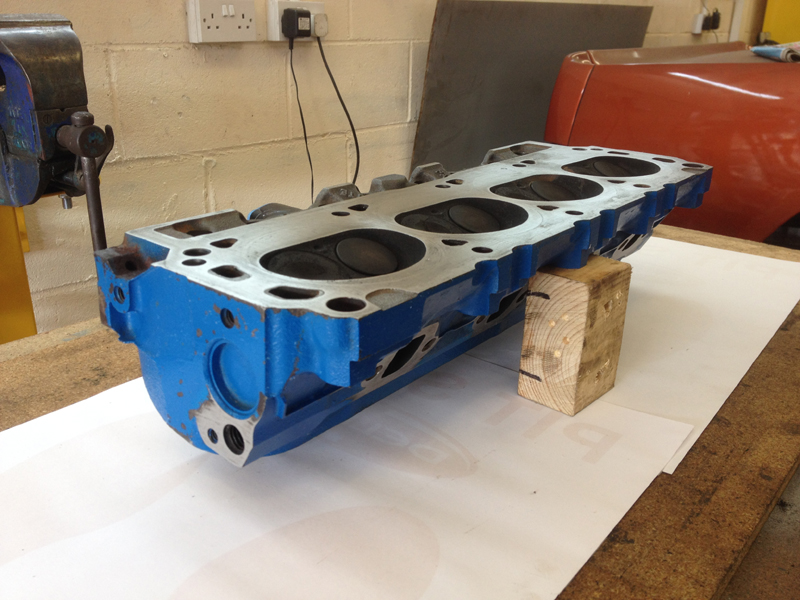
The 5.0 HO cylinder heads are used items from another vehicle and were given the same treatment as the engine itself:
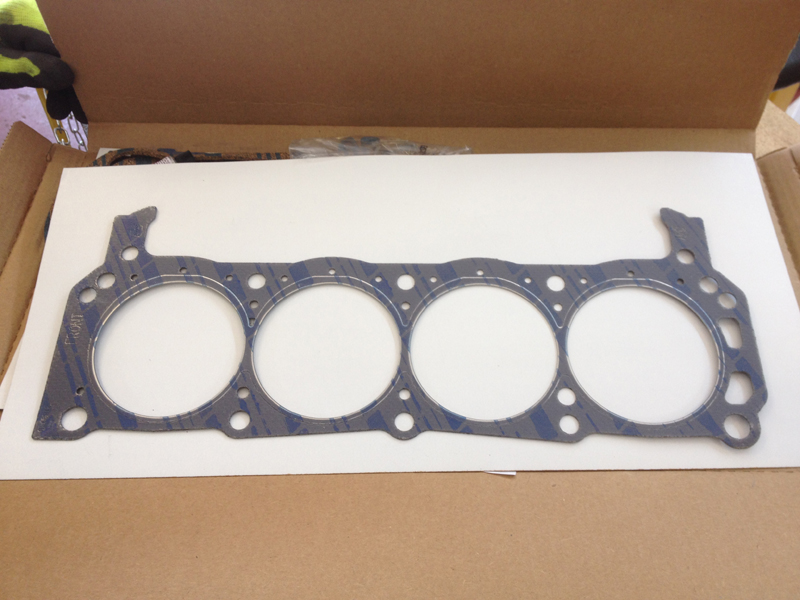
A top end rebuild gasket set was provided by the customer, we recommend FelPro gaskets and these are exactly what the customer supplied. Here is one of the new head gaskets:
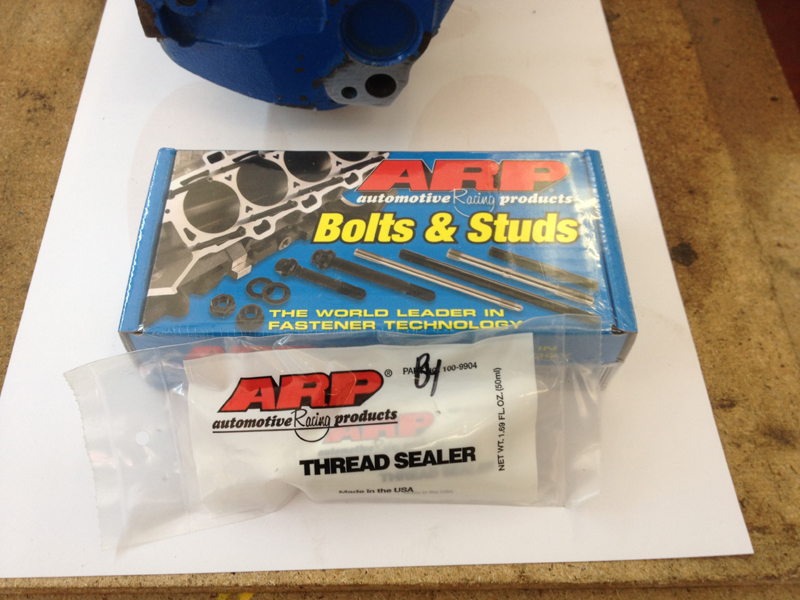
We also recommend replacing the stock head bolts with ARP head bolts. They are of superior quality to the original bolts and can be re-used many times if need be. The bolt kit comes with a special lubricant to use on the bolt threads and undersides of the bolt heads but the thread sealer is available separately. It must be used on the lower cylinder head bolts as these bolts go straight into the water gallery on the engine block:
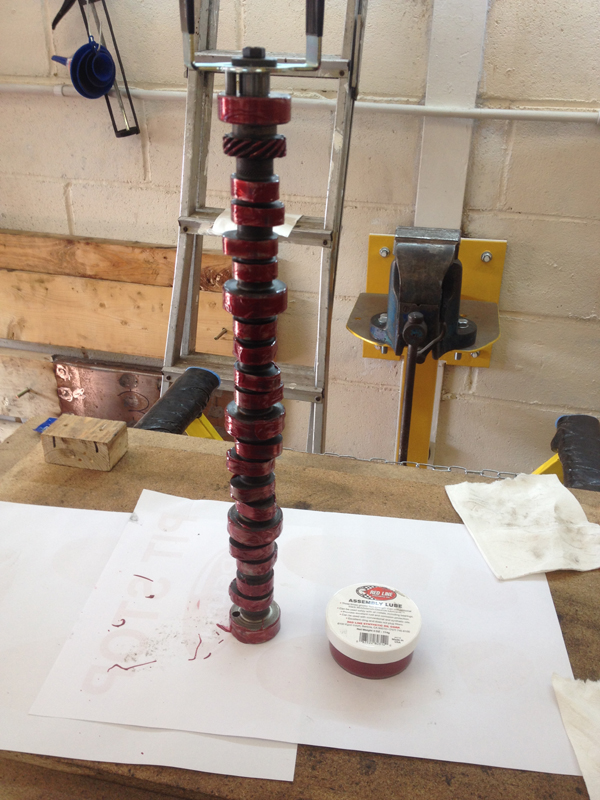
With the new cylinder heads installed its time to install the new camshaft. Again this is a used item, but we checked it out and it�s pretty much as good as new. Even though the camshaft has already been run in, we apply Redline engine assembly lube to it, just to make sure its got enough lubrication on initial start up and during the engine assembly:
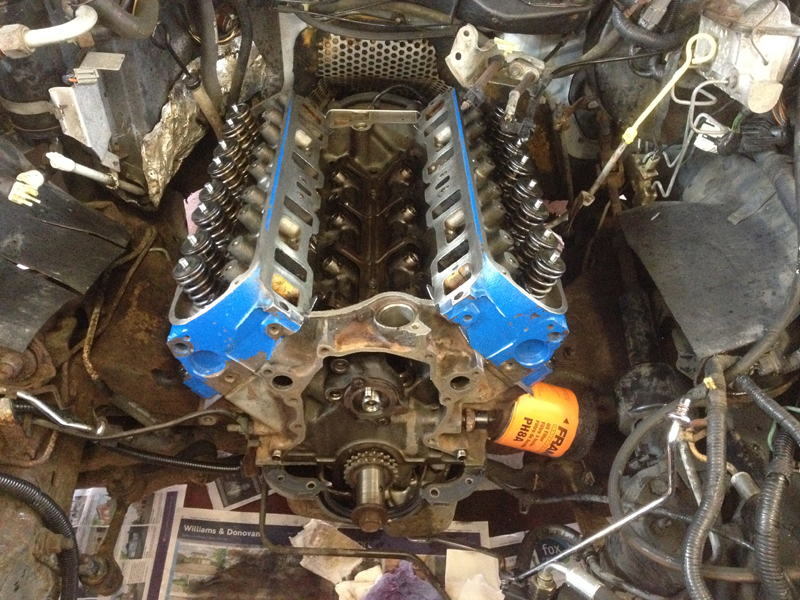
With the camshaft back in the engine, the hydraulic lifters can be installed, along with the dog bones and spider cage. The engine is starting to look a bit more like an engine again and is ready for the timing chain to go back on:
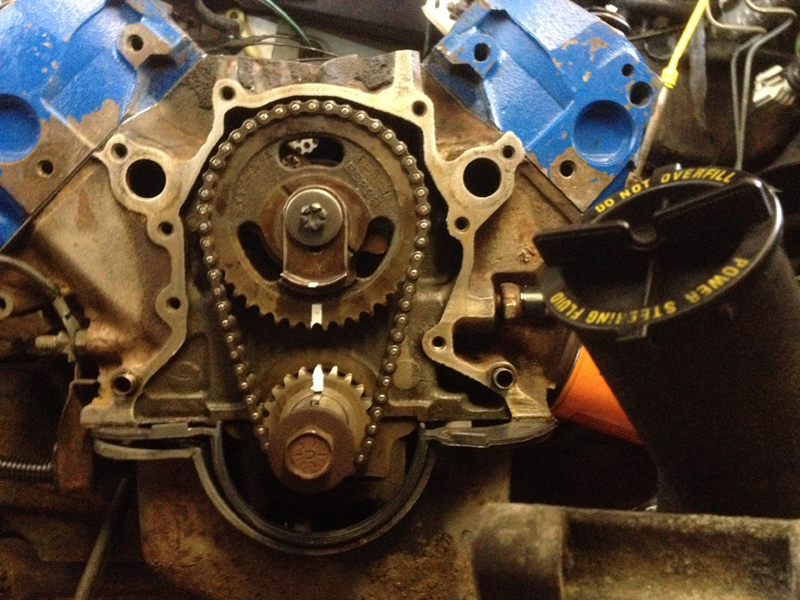
The timing gears are first cleaned and then the timing marks are high lighted so that it�s easier to see them when installing the timing set:
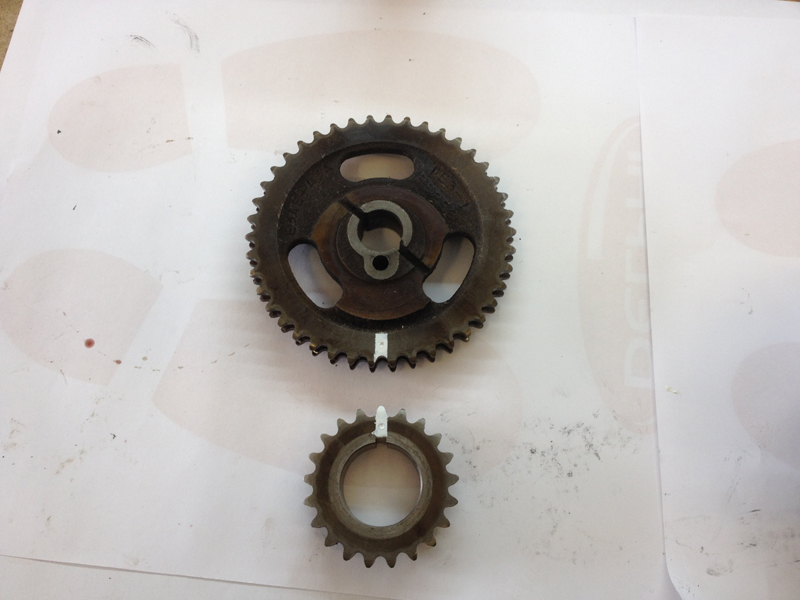
The timing gears are then installed along with the chain which was also cleaned up. Before the engine is turned over by hand oil will be applied to the chain and gears:
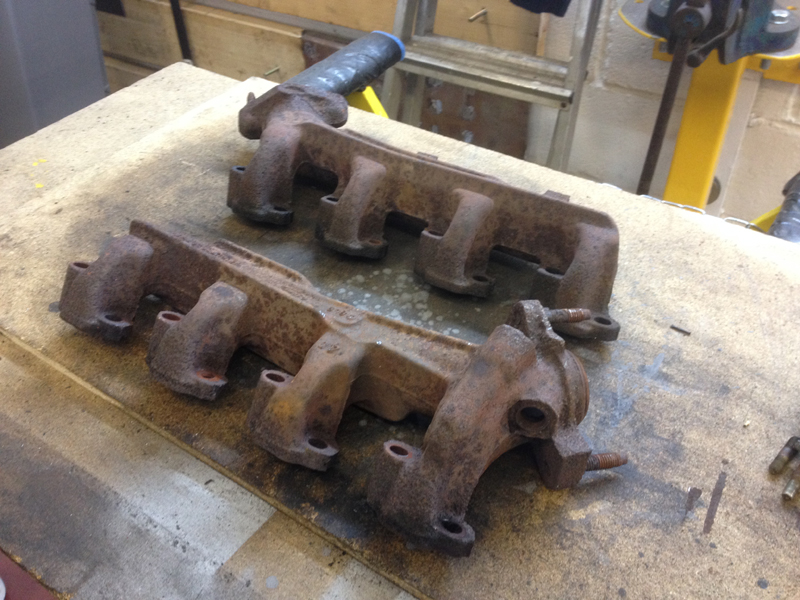
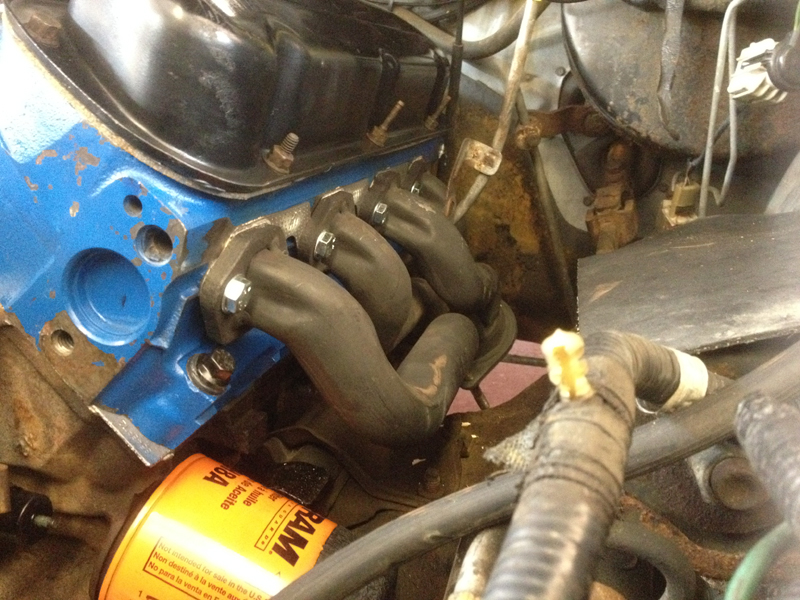
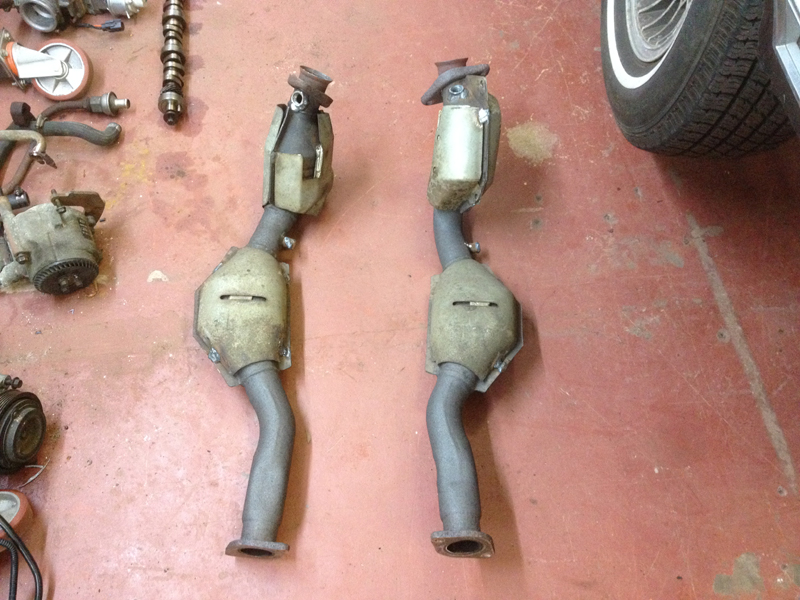
Next step was to fit the exhaust manifolds, here is a photo of the stock Town Car manifolds:
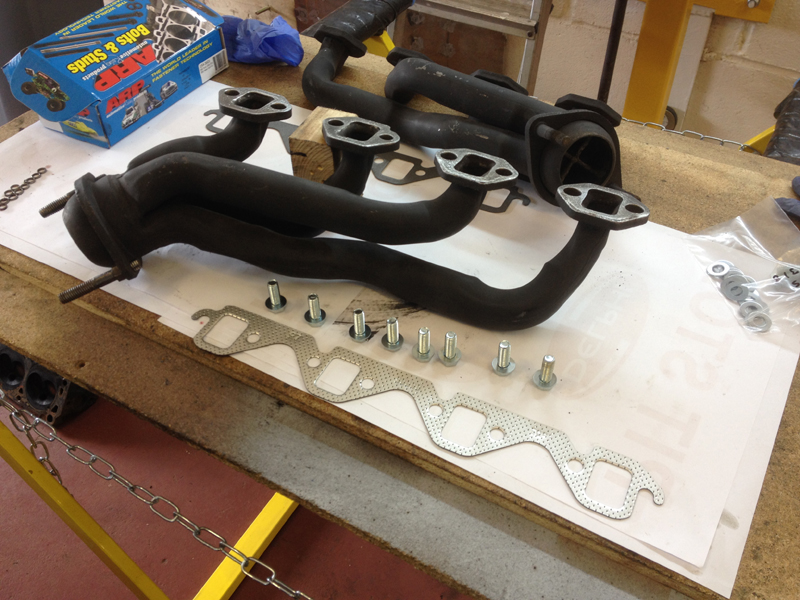
And here is a photo of the manifolds used on a Fox body Mustang with the 5.0 HO engine. There better flowing and made from mild steel instead of cast iron, and they weigh a considerable amount less. Both manifolds received a quick clean up and were given new gaskets and bolts:
After the exhaust manifolds where installed it was time to fit the pushrods and rockers. We strip all the rocker assemblies down, clean the parts individually, and then re-assemble them with engine assembly lube:
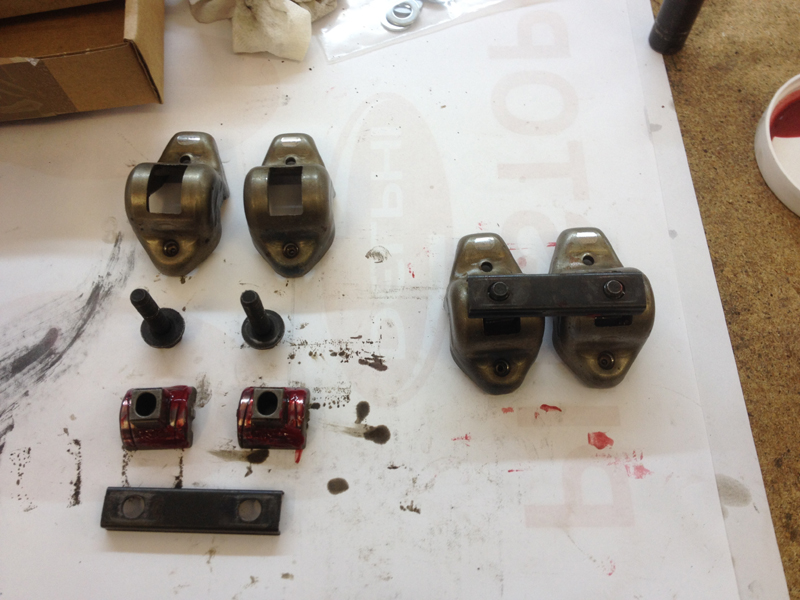
With all the rockers assembled and ready to go in, the pushrods also receive a small amount of assembly lube and are fitted, then the rockers are fitted and the hydraulic lifter pre-load is set on each rocker:
With the rockers installed, its time to fit the lower intake manifold, this was cleaned up along with the thermostat housing. The thermostat was also replaced before the manifold was fitted. The injectors where also replaced with items from a HO engine, the stock injectors run at 14 pound. The HO ones run at 19 pound. The 14 pound items have a grey plastic body, the 19 pound ones have an orange body. The fuel rail itself is the same on both engines:
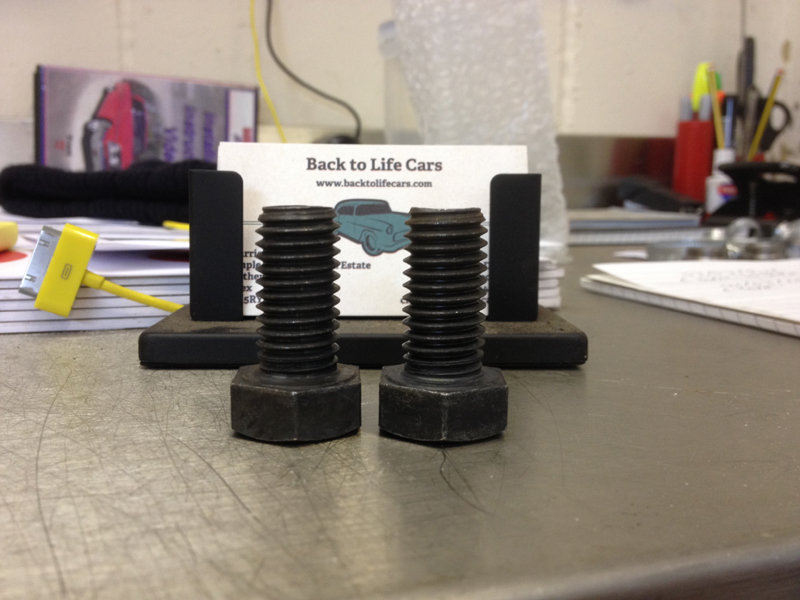
On this particular car we will be removing the smog set up from the engine and exhaust. One of the things that needs to be done to achieve this is remove the thermactor pipe that goes between the rear of each cylinder head. At this point in the project this is as simple as not fitting it back on, but you are left with a hole in the rear of each cylinder head in which exhaust gases will be pumping out off. The holes in the cylinder heads are threaded as they are also used as the holes for the mounting points for the auxillerys such as the alternator or air conditioning pump. So blocking the holes off is simple, you need two 5/8 UNC X 3/4" bolts:
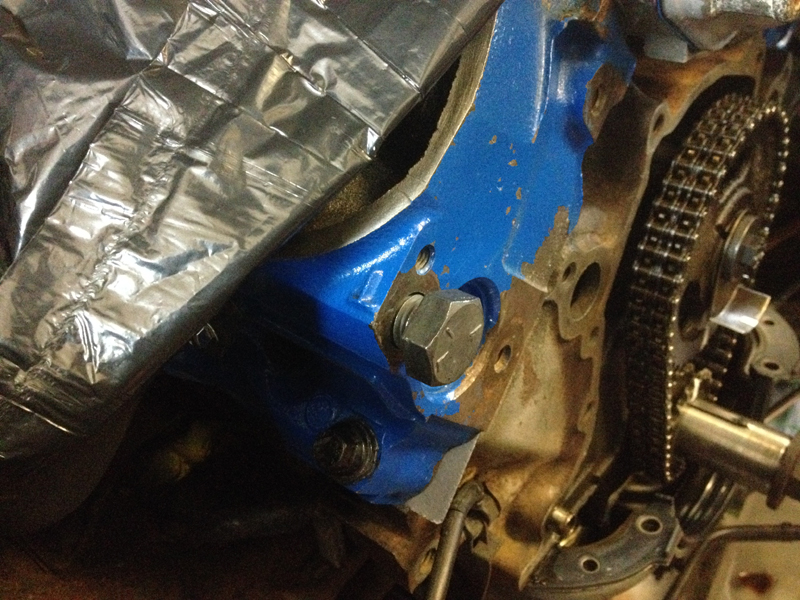
This next photo shows the hole that needs to be blocked off. This is showing it in the front of the cylinder head simply because space is tight in the back of the engine bay and we simply couldn't get a decent shot with the camera, the hole in the rear of the cylinder head is in the exact same place as the front, just have a feel down there for it. We used ARP thread sealer on the bolts and fitted them and done them up nice and tight, that�s the smog set up in the heads them self blocked off. Even though the holes in the heads go really deep, the threads them self don't, if your doing this at home don't use a bolt any longer than 3/4" as there is no thread just after that point and your bolts won't be fitted correctly:
With the smog holes in the rear of the heads blocked up it was time to install the rocker covers. The stock ones can be used here, the HO ones are different, they are cast aluminium items but they only differ in appearance, they offer no extra clearance over the stock items. It was also time to install the timing chain cover and water pump so that the engine can be sealed up. We have left the distributor out at this point so that we can prime the oil system properly before firing the engine up:
Just a photo of the driver's side exhaust manifold installed:
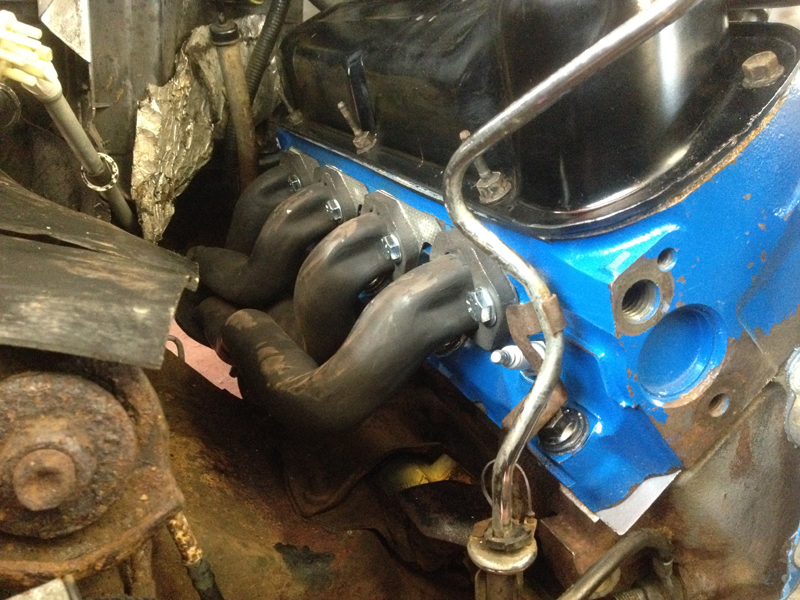
And the passenger side one. These things are so much lighter than the stock items, flow better and look awesome too:
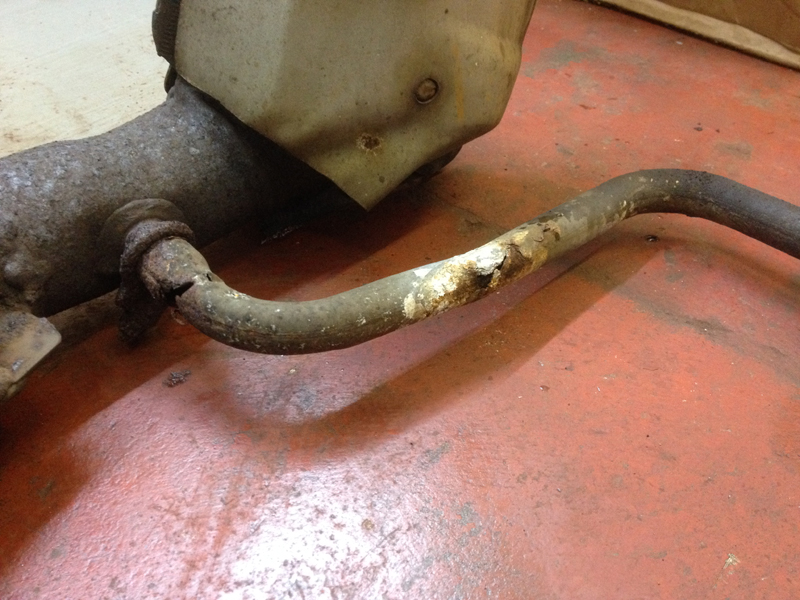
Now it was time to tackle the exhaust system. The Y pipe was completely rusted out, it had holes all over it and needed to be replaced:
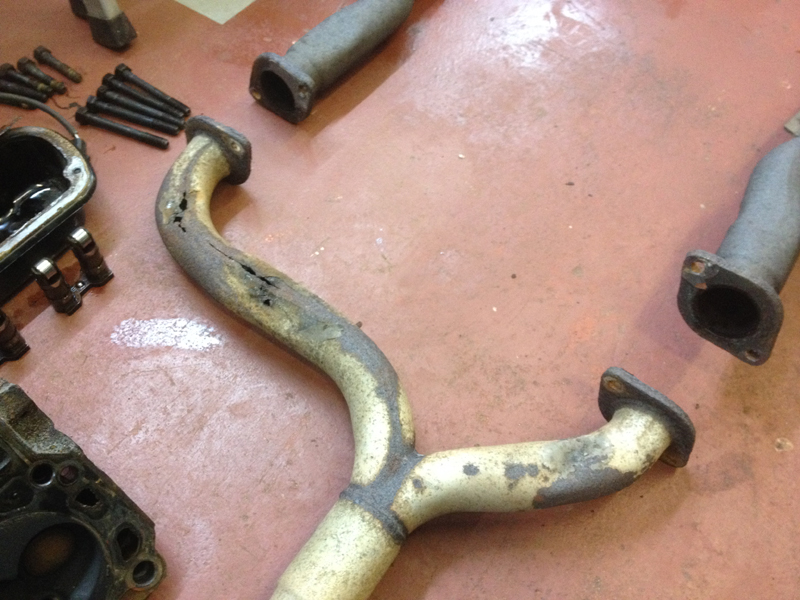
We took the original Y pipe over to a local exhaust place and had them fabricate a new section. To ensure it would fit correct, they left a small amount of extra pipe on either end and left the flanges off so that we could weld it all up on the vehicle:
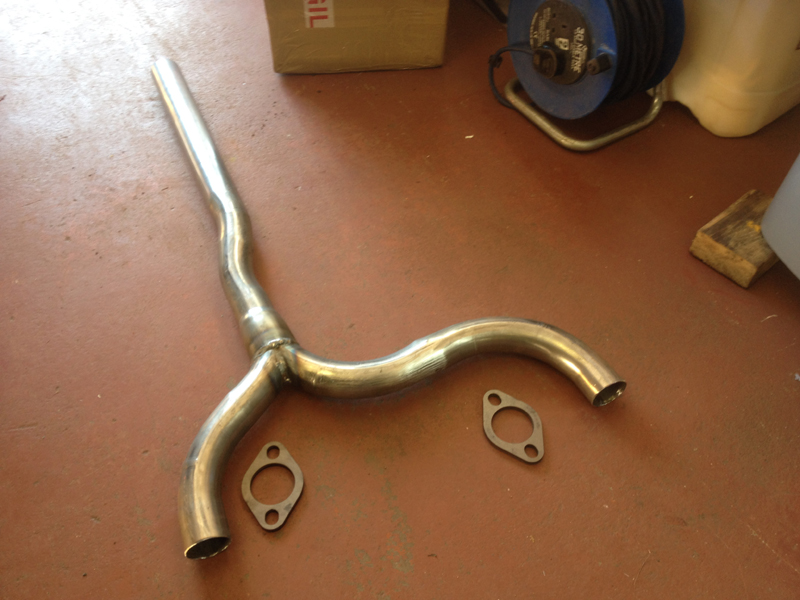
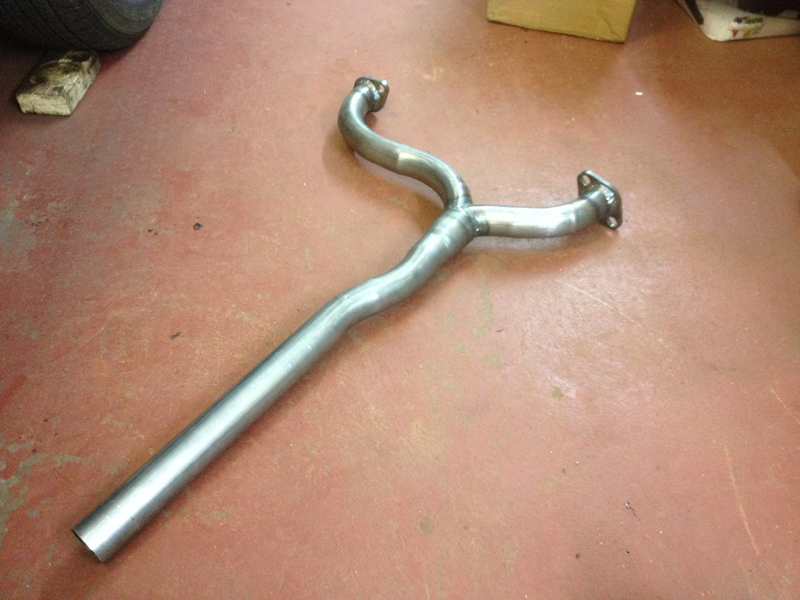
After trial fitting the new Y pipe on the car, the pipes were cut to length and the flanges tack welded on. The pipe was then removed from the car and we fully welded the flanges on:
The original exhaust manifolds have the lambda sensors in the end of the manifolds the new manifolds do not. The HO engine cars have the sensors lower down in the exhaust system, so to get around this problem we need to weld in some lambda sensor bosses in the down pipes but before the catalytic converters, as you can see there wasn't much room before the catalytic converters, but there was just enough. First step was to mark out where the boss in each pipe needed to be:
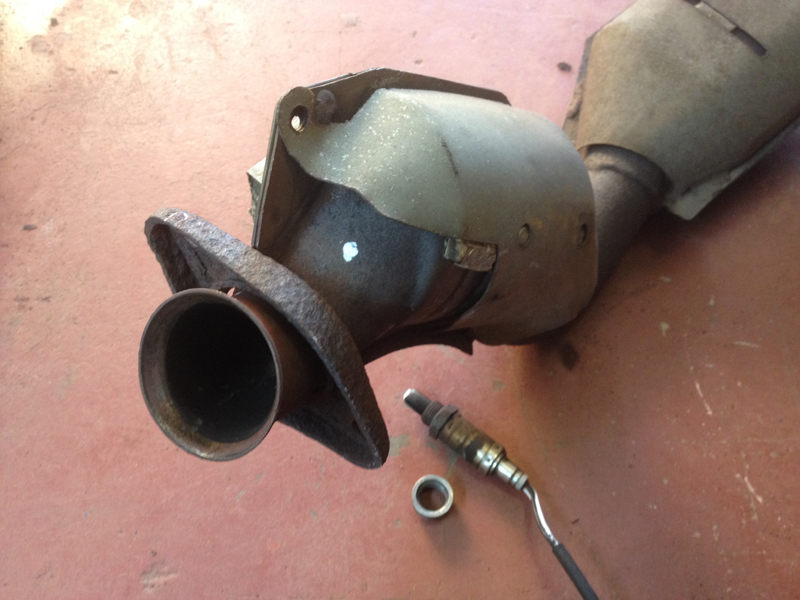
Then a hole was made in the exhaust using a hole saw and the boss welded in:
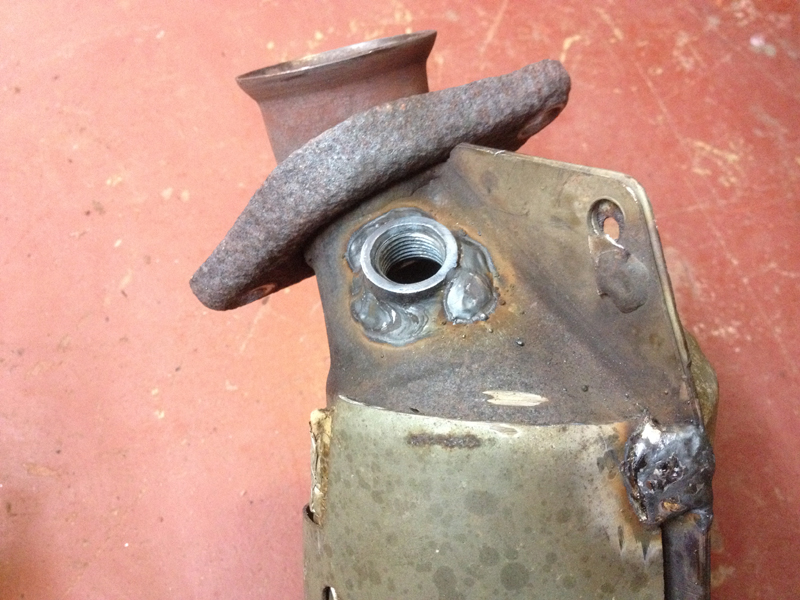
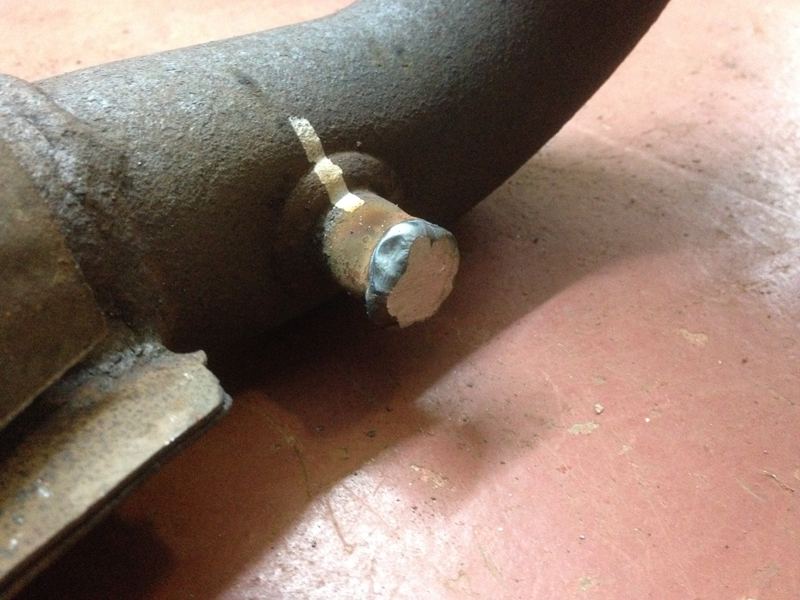
This next photo is the main reason a decision was made to remove the smog set up. The smog pipes into the exhaust where completely rusted out and broken in places and it just wasn't worth getting them replaced since UK laws don't even require the set up to be fitted onto the vehicle:
We removed the smog pipes from the down pipes and placed the head of a bolt in the hole and welded it shut:
Both down pipes received the same treatment, the lambda sensor locatations are slightly different to either side due to clearance issues under the bonnet, but as long as there both before the catalytic converters and after the exhaust manifold collectors, that�s was matters. We also re-welded the heat shields back on in several places because 1 had completely fallen off and the others had cracked welds and were going to fall off soon:
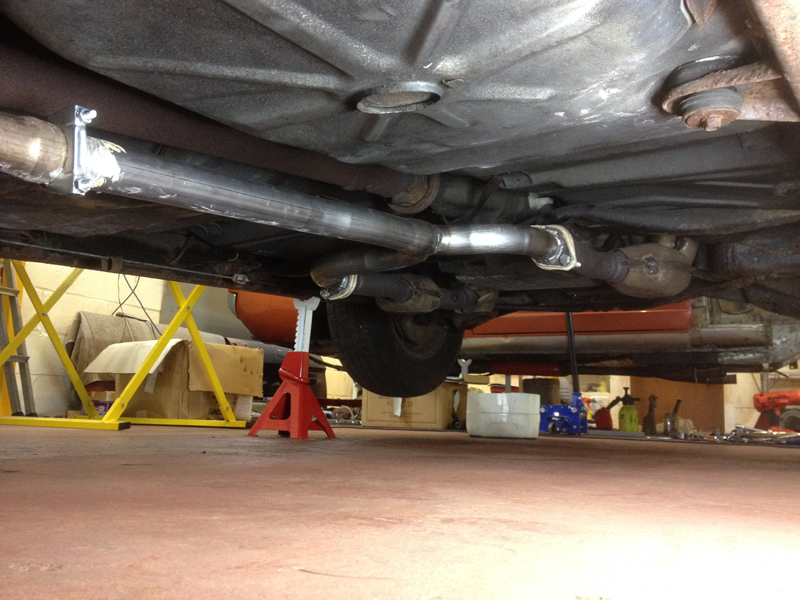
With the down pipes finished it was time to fit the exhaust system back on the car:
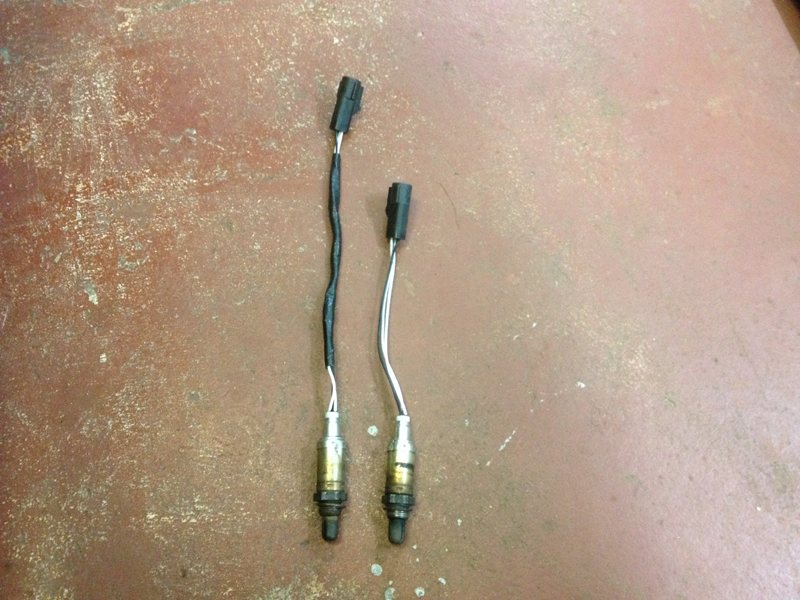
The lambda sensor on the passenger side plugged straight back into the wiring loom from its new location. The driver�s side however needed to be extended a small amount. The correct type of wire was used to extend the sensor wiring and then the heat sleeve from this sensor a spare sensor was used to protect the wiring. This photo shows the sensor with the extended wiring next to an original spare sensor for the car that the heat sleeving was taken from:
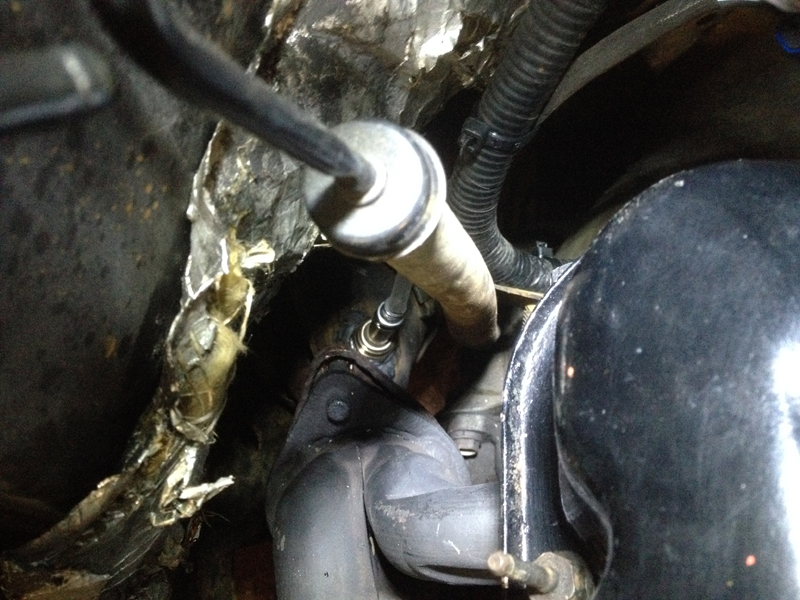
Just a photo to show how tight things are with the passenger side lambda sensor installed:
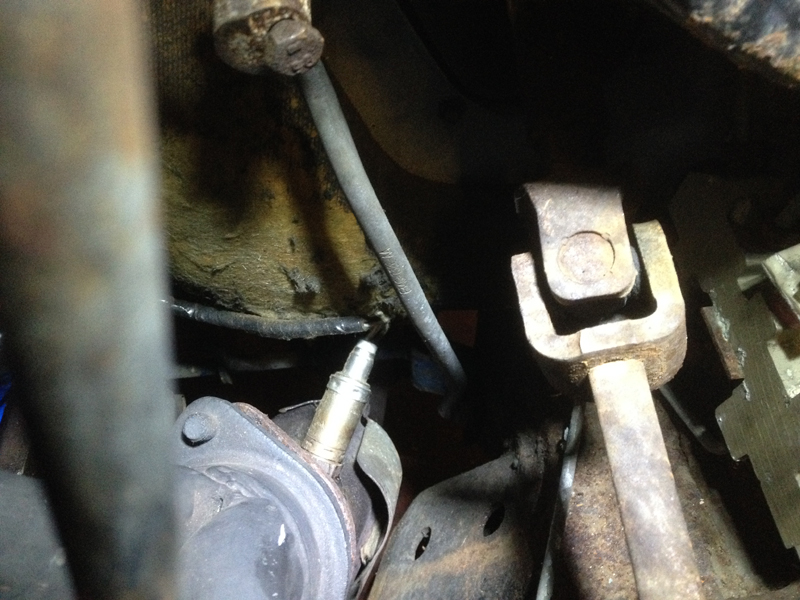
And the same for the driver's side:
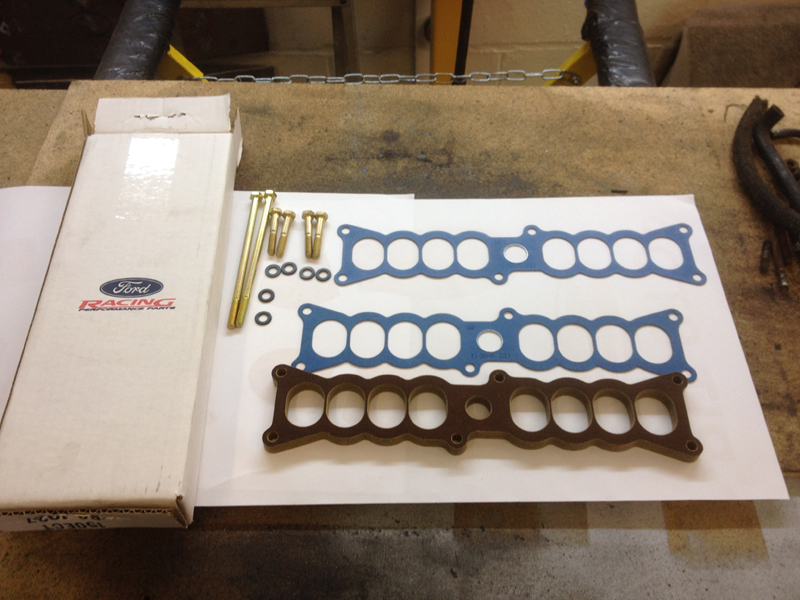
The next step was to install the upper intake manifold. Because the HO upper intake has a larger diameter throttle body, 60mm as opposed to the original 50mm a spacer is needed between the upper and lower intake to ensure that the intake manifold clears the fuel line. The spacer is also a phenolic spacer, which acts as a thermal heat reducer and reduces the amount of heat being transferred from the engine into the upper intake. This kit is a genuine Ford Racing kit and is of excellent quality:
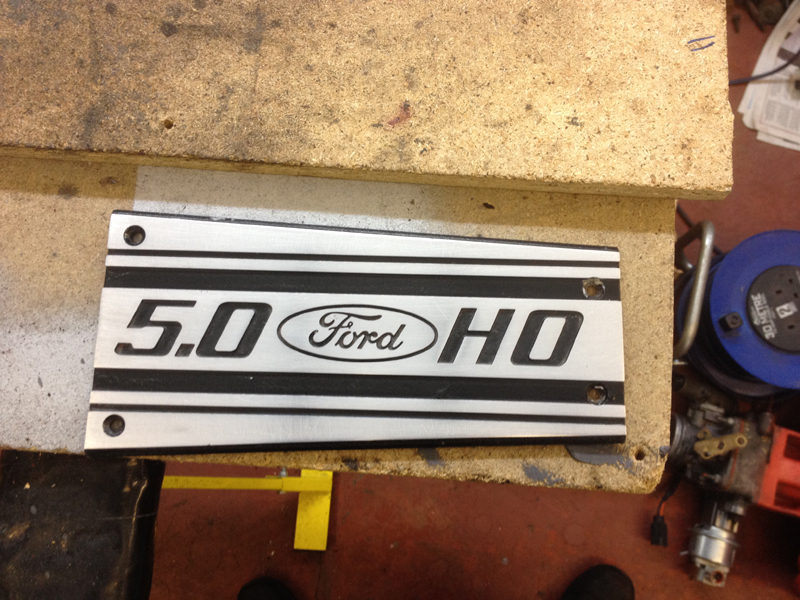
The badge on the upper intake is also a cover, which hides the 2 central bolts holding the upper intake on. On the left is the stock item. On the right is the HO item:

Before fitting the cover we decided to give it a quick polish:
Before we can fit the upper intake we needed to fit the wiring loom that goes below the upper intake. We also had to replace all the vacuum lines that go on the underside of the upper intake, as these were all split and will cause lots of problems when the car is running again. So with the loom fitted, the vacuum pipes replaced, spacer and top cover ready to go, it was time to fit the upper intake:

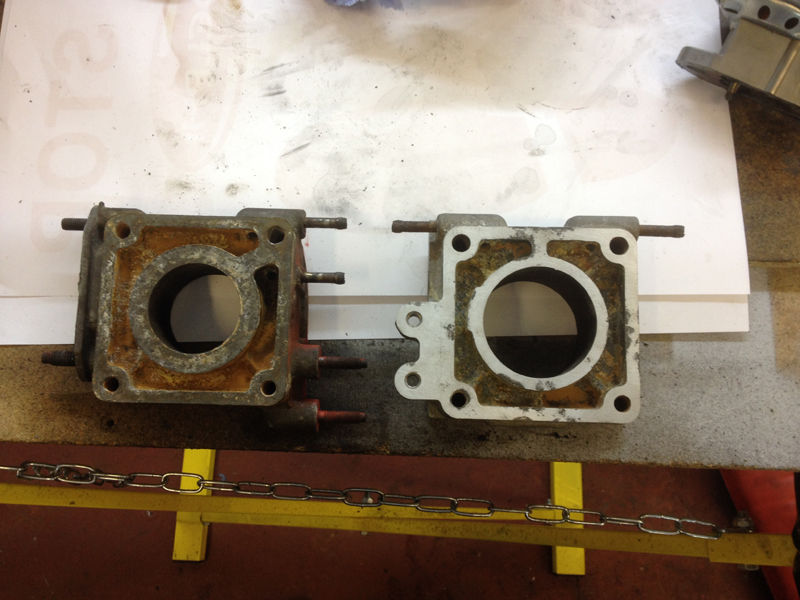
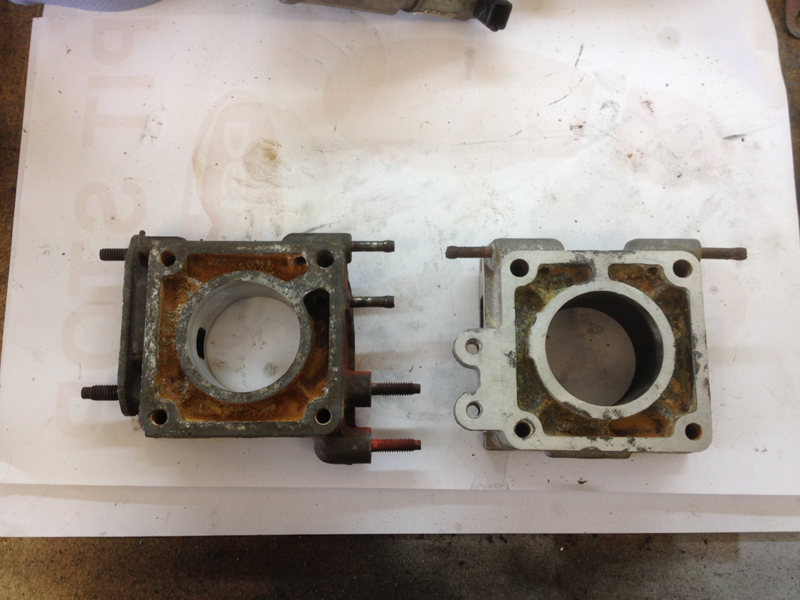
Once the upper intake is in place we can go about putting the rest of the engine back together, first step being the throttle body and EGR spacer. There is a problem here though, the EGR spacer from a Mustang doesn't work with the Town Car throttle linkage, the original Town Car one is on the left and the new Mustang one on the right. Visible differences can be seen between the castings apart from the centre hole size being different:
The simplest solution to the problem was, to have the original spacers centre hole bored out to the same size as the Mustang HO one:
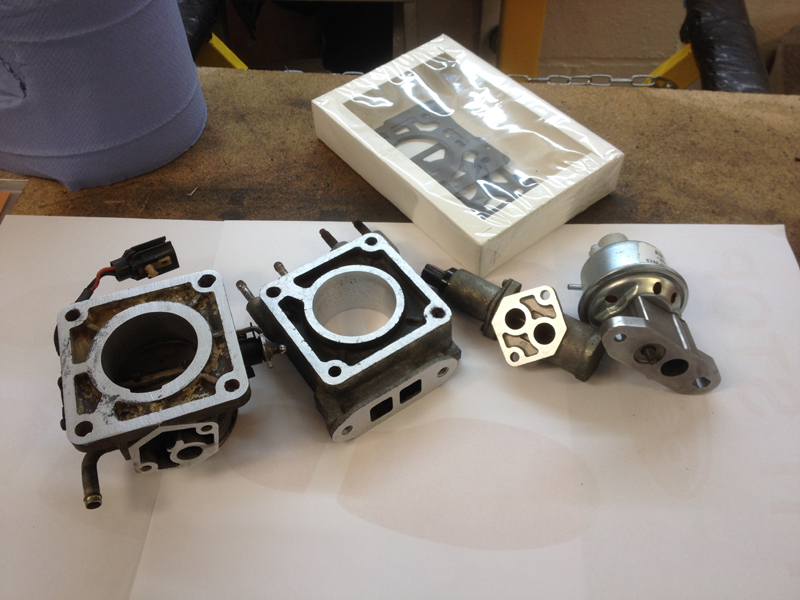
Once the spacer had been modified we cleaned all the gasket faces on the EGR spacer, throttle body, EGR valve and idle speed control valve ready to have the new gaskets fitted. We also gave the EGR spacer a quick soda blast to remove all the red paint from it and clean the waterways and all the holes out on in:
With the entire throttle assembly bolted back up it was time to fit the rest of the engine back together. We leave the distributor out for the time being with the hole covered up so that we can prime the oil pump before initially starting the engine:
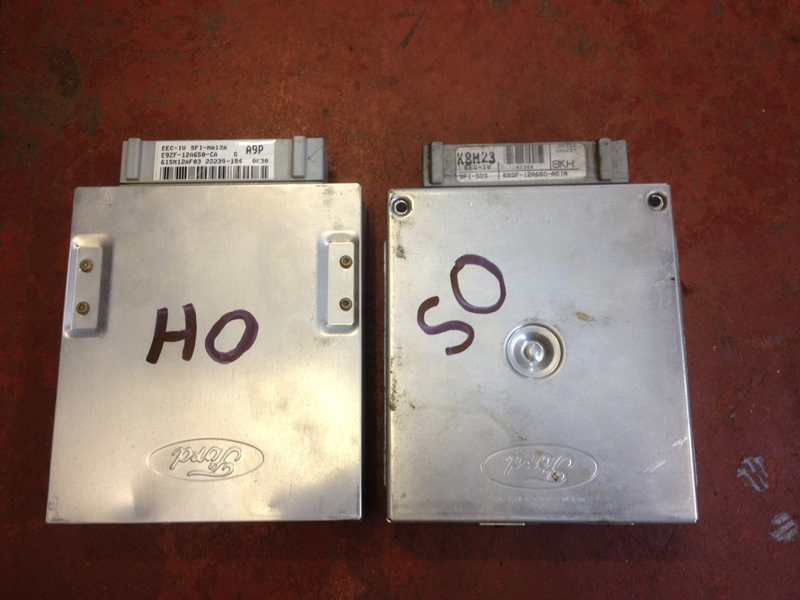
One last job to do before starting the engine is to swap the car computer or ECU over. The HO engine uses a different ECU to a standard engine, from the outside they are pretty much visually the same but its the insides and the programming that are different:
With the ECU swapped over the car is given a final check over, the cooling system filled with fresh coolant and the engine filled with fresh oil. Next the oil pump is primed via the oil pump driveshaft accessible through the hole in the engine block where the distributor goes. The distributor is then fitted and the firing order swapped from the SO engine to the HO engine and the engine is started up. All that is left to do is test and tune the engine and then the car is ready to be returned to the customer:
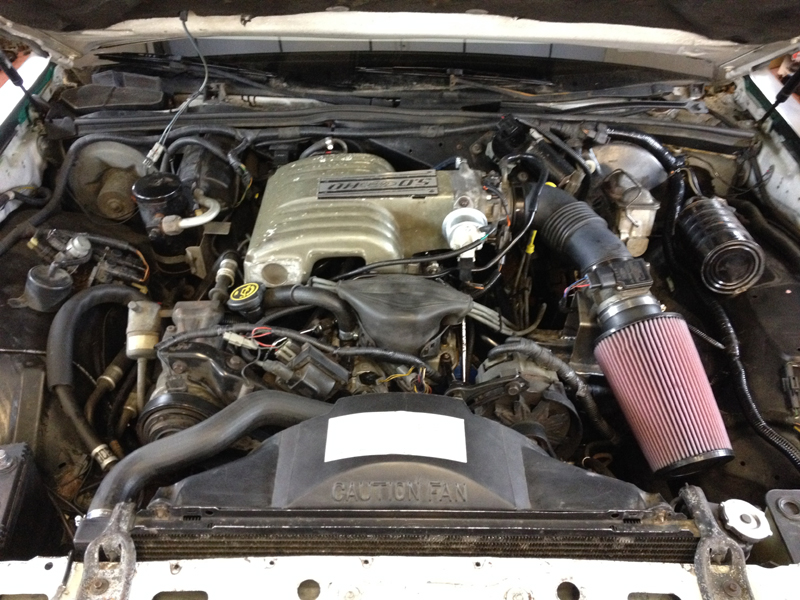
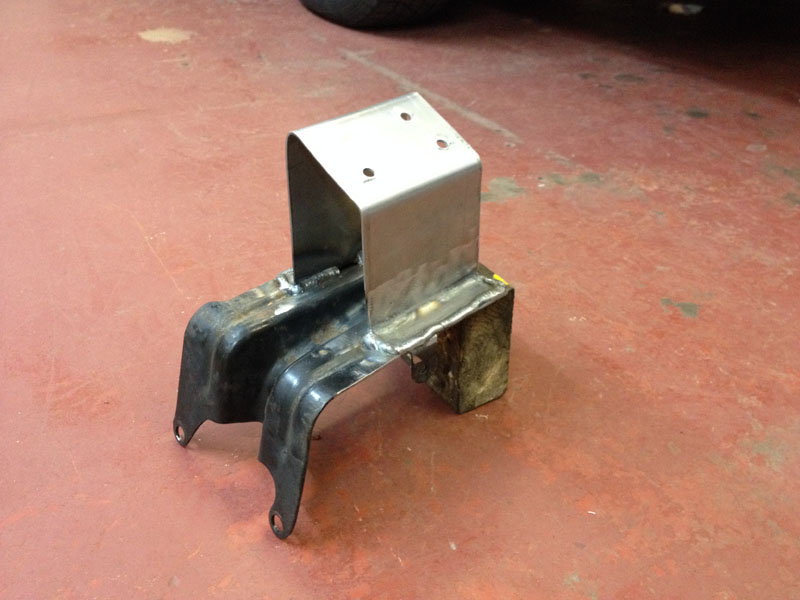
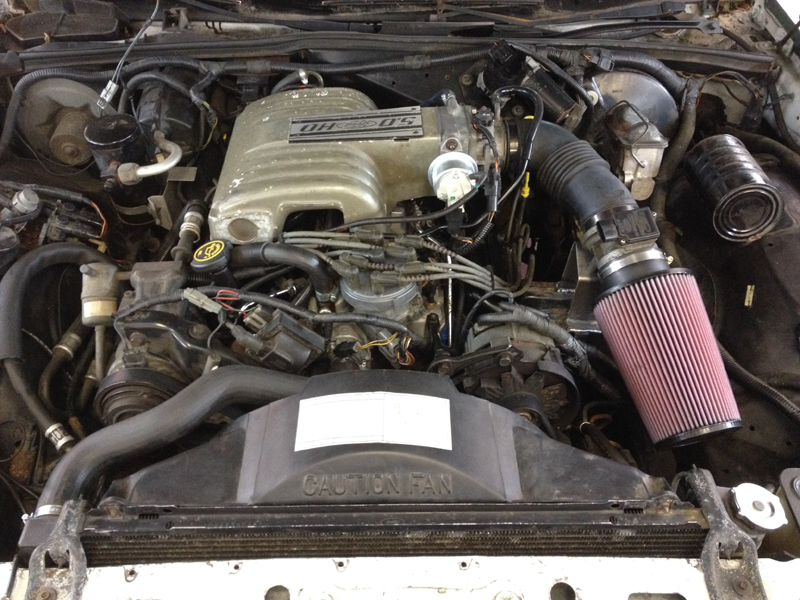
During the test and tune phase it was discovered that the new HO ECU is from a car which runs a MAF (mass air flow) sensor set up. The set up that was originally on the car uses a MAP (manifold absolute pressure) sensor set up. The car will run with this set up and idle just fine but when driving the engine won't produce its peak power, run a little rough and stall when coming to a stop because the cars ECU is unable to calculate correctly the amount of air flowing into the engine. It will also bring on the check engine light as the computer is seeing a fault by not receiving the correct signal from the correct sensor. So with this in mind we had to convert the car to run on a MAF sensor set up. The customer supplied us with the correct sensor, intake pipe work and air box from a Fox body Mustang, unfortunately the air box and cold air intake from the Mustang do not fit the Lincoln Town Car without a lot of modification. A simpler solution was to take some measurements, fabricate a bracket to support the MAF sensor and weld it to the original air box bracket and then use a universal K&N cone air filter for the filtration side of things. Here is the modified bracket:
And this is the set up all mounted back onto the car. We also removed the cruise control set up because with this ECU and sensor set up the cruise control will no longer function and since the cruise control on this particular vehicle did not function in the first place, the customer chose to have it removed to tidy up the engine bay a little:
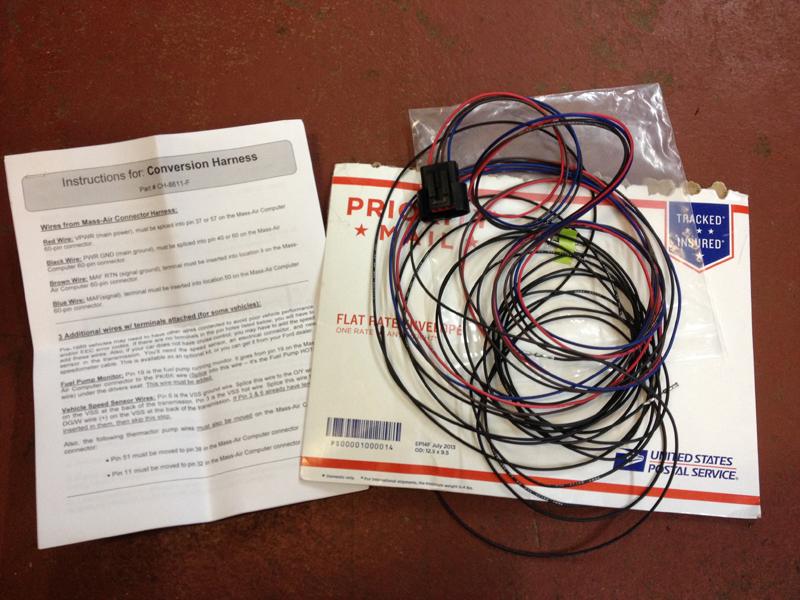
This is the wiring loom that is needed for the conversion; luckily it comes with a full set of instructions to help guide us with the install:
Once the wiring loom is installed, we can finally finish testing and tuning the engine. Now that the car is complete and running perfect it can be returned to the customer ready to be enjoyed: