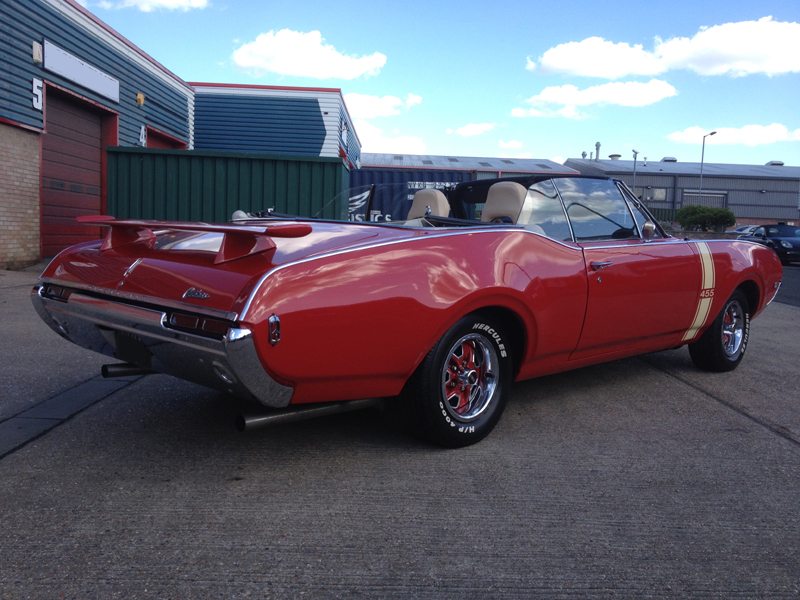


1968 Oldsmobile Cutlass Convertible
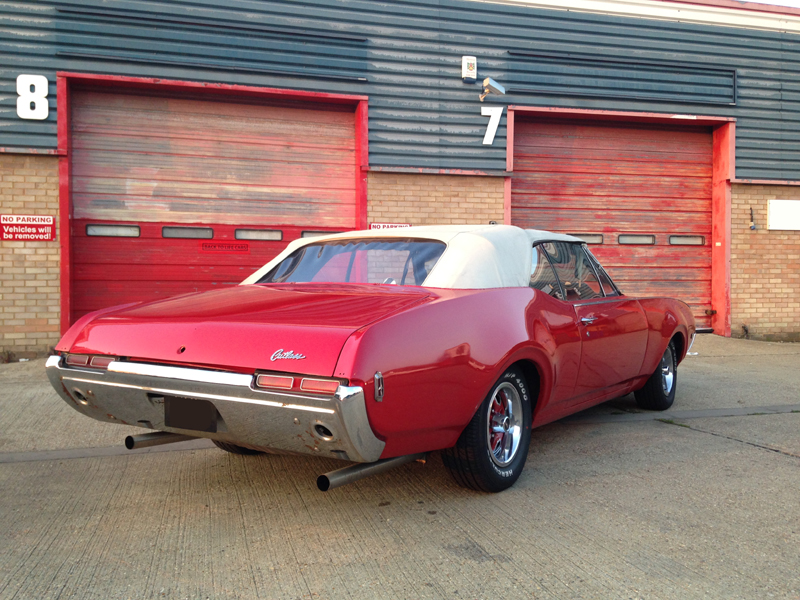
This car was brought into us with the intention of carrying on with the cars allready under way restoration. It has allready had alot of work done to it but still requires alot more doing to make it a useable car. Also some of the work that has previously been done will need tidying up or re-doing in places.This is the car as it came into us, some of the more notable things that need doing are, the convertible roof doesn't work, bits of trim need fitting properly:

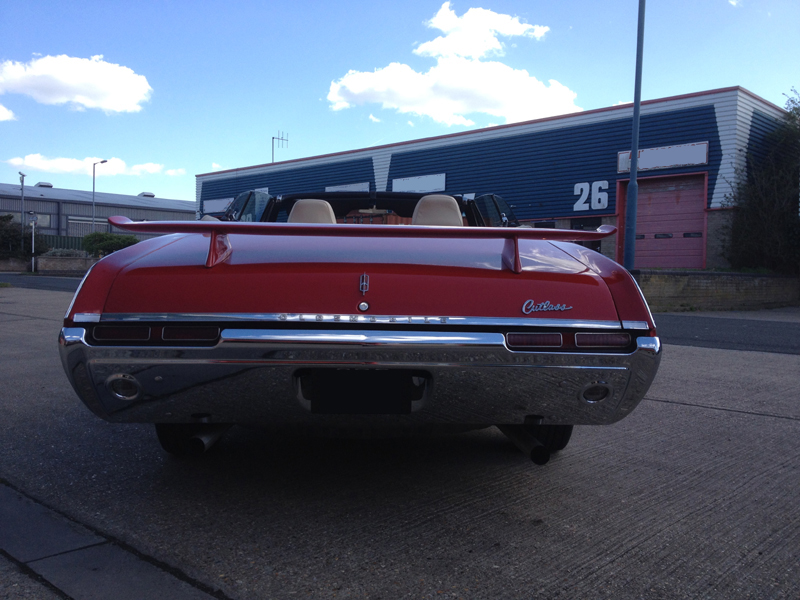
A shot from the rear, the bumper needs re-chroming, quarter panel trims missing, boot lock missing, rear lights not working on the passenger side, these are just some of the jobs that need doing:
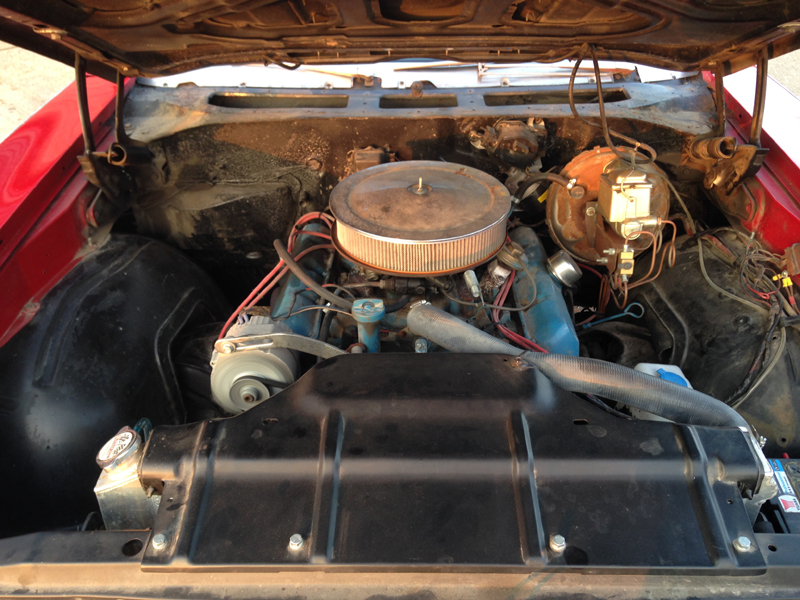
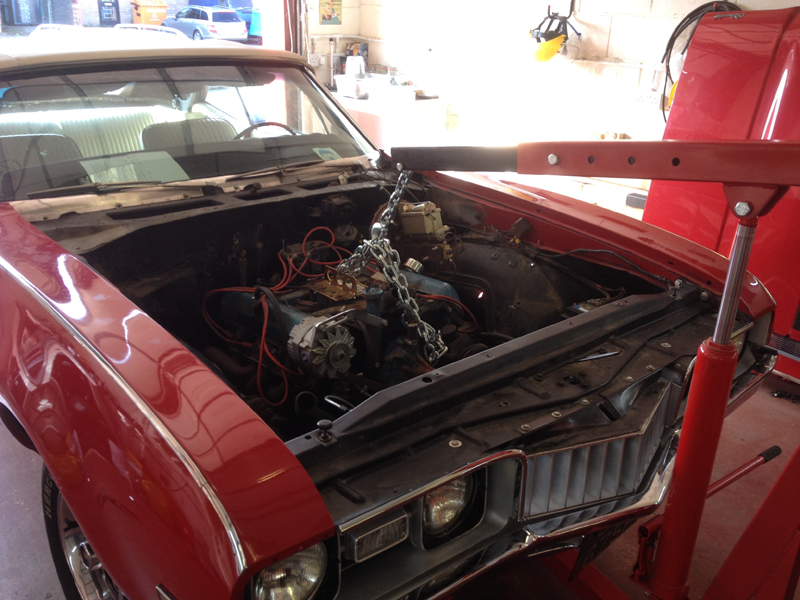
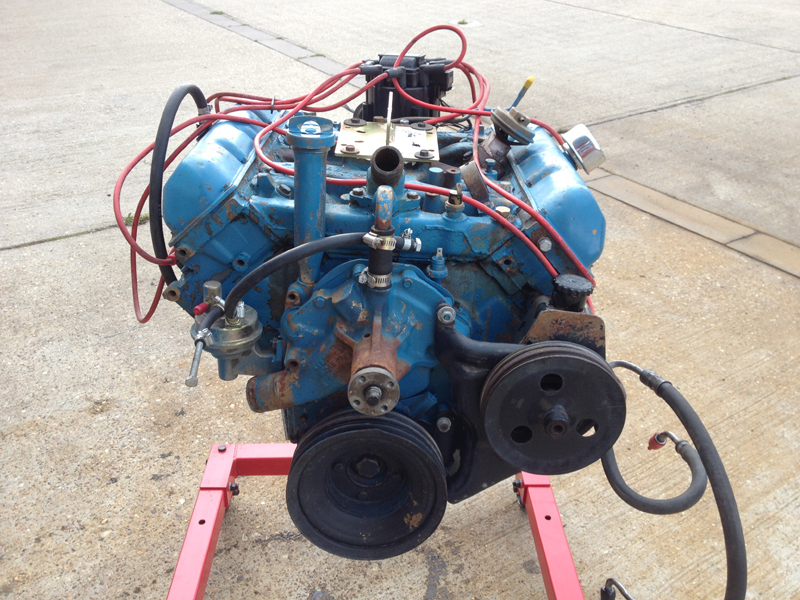
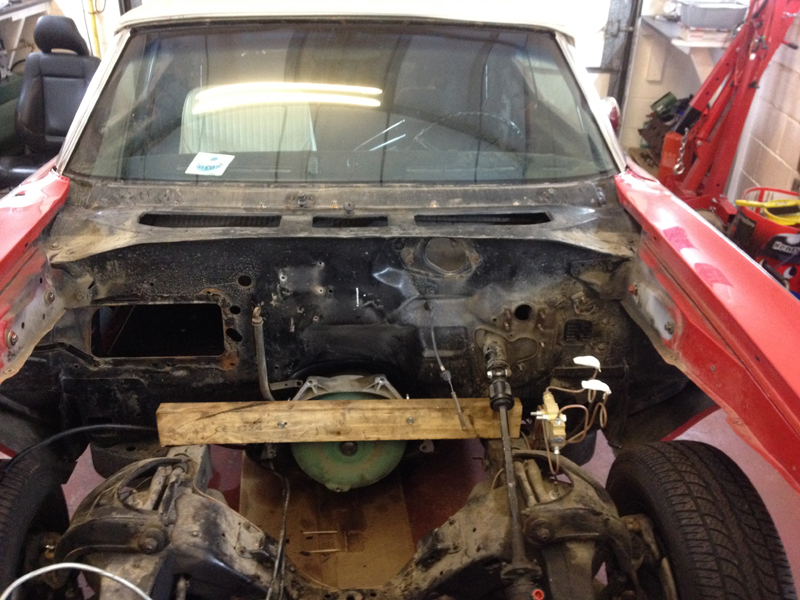
Under the bonnet before we started work on the car, the engine has been replaced at some point with a 1975 455 cubic inch motor. We plan to remove the engine, fix the all the oil leaks, repaint the engine in the correct colour for the 1968 year model and tidy up a few other bits and pieces oln the engine itself. Also whilst the engine is out we will repaint and detail the engine bay and fix all the under bonnet wiring:
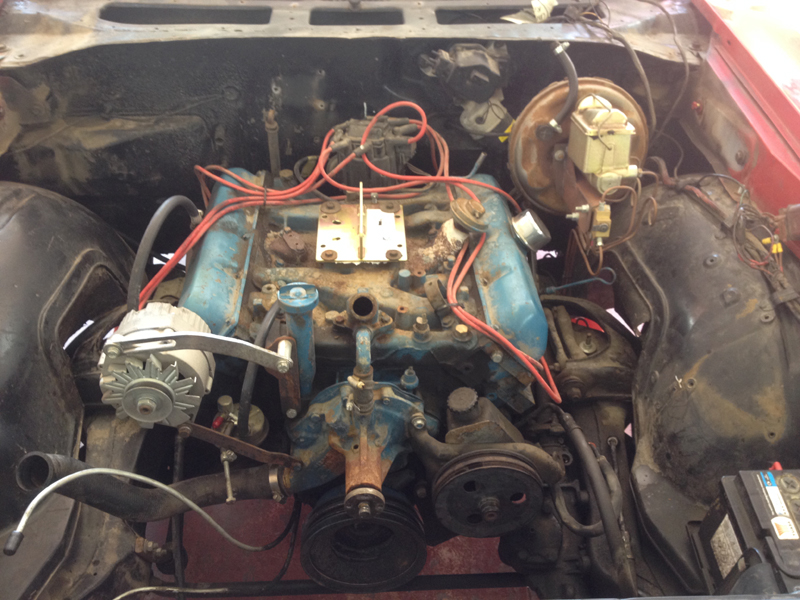
Everything that is needed to be removed from the engine has been removed and we are just about ready to pull this big beast from its home, before we started stripping the engine bay down we ran a cooling system flush and engine oil flush through the system just to help loosen up any dirt or debry inside it, so that once the engine is out it makes it easier to clean everything up inside the engine itself:
Our engine crane all hooked up ready to do its thing:
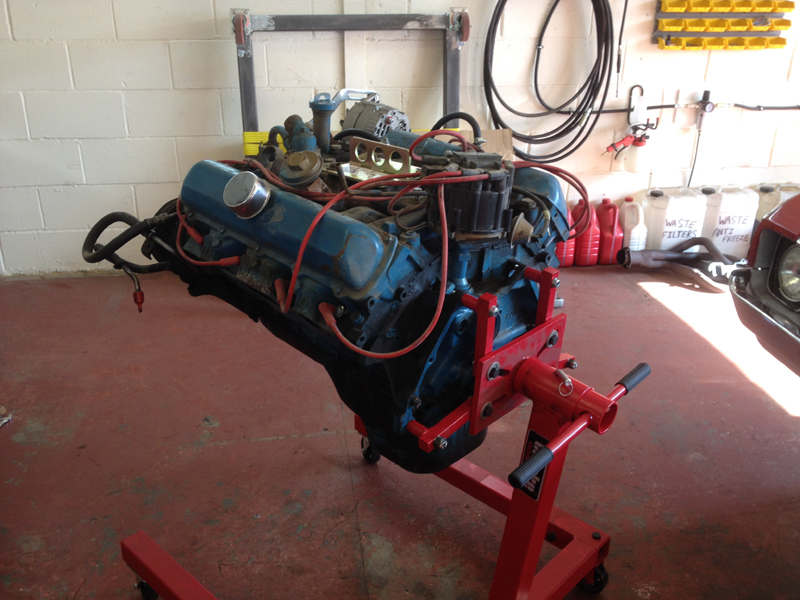
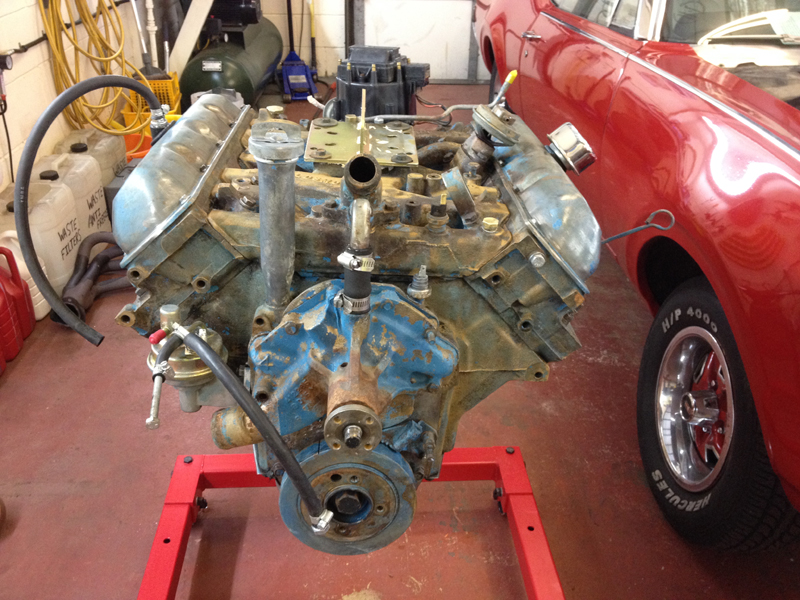
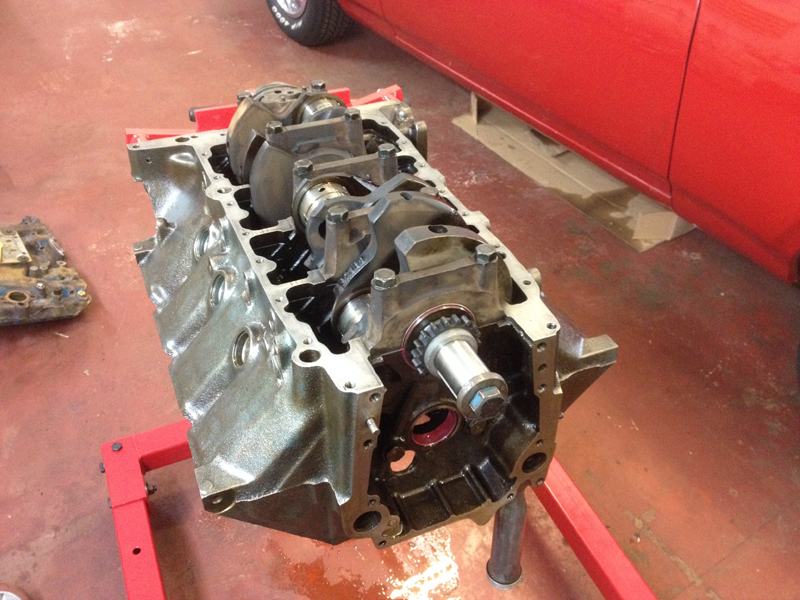
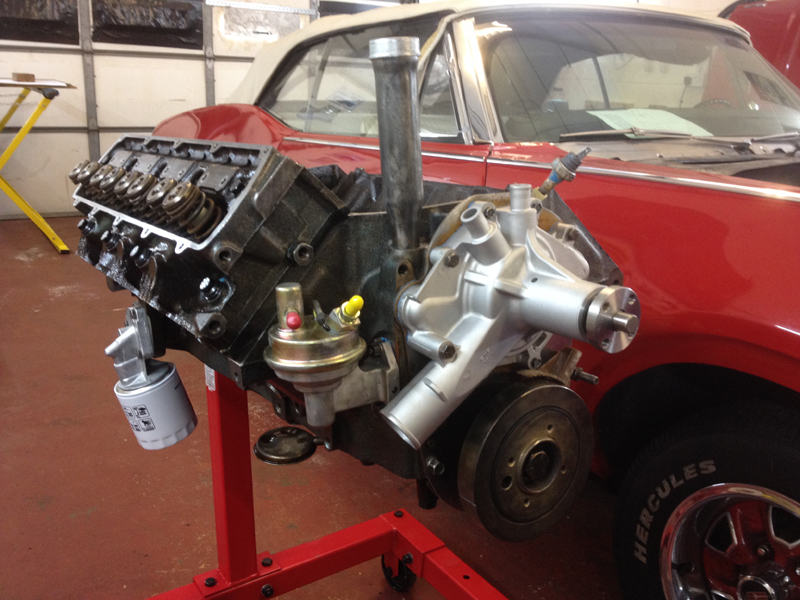
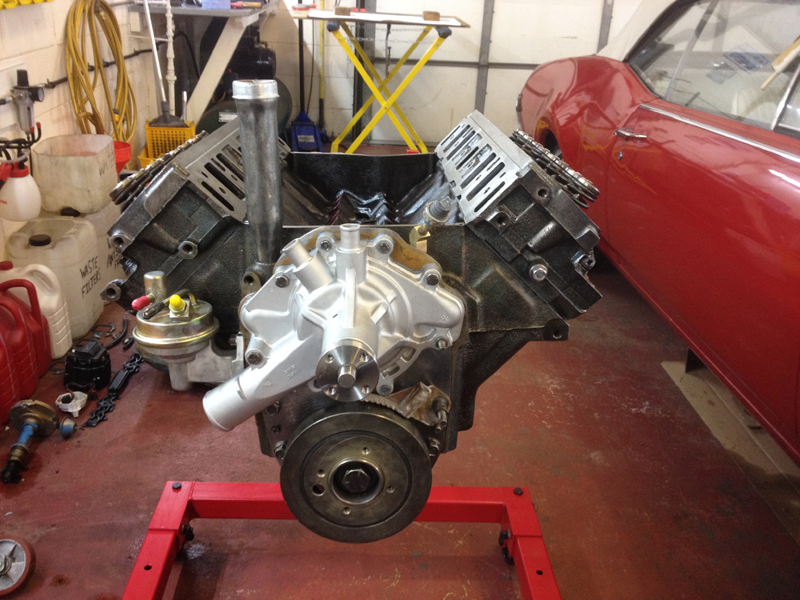
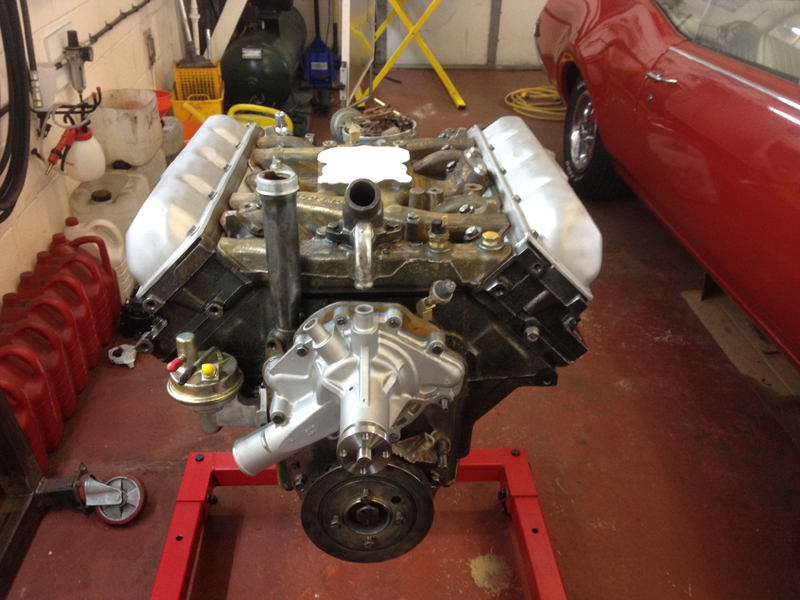
Once we have lifted the engine out, we removed the flywheel and bolted it onto our engine stand ready to start work on the engine:
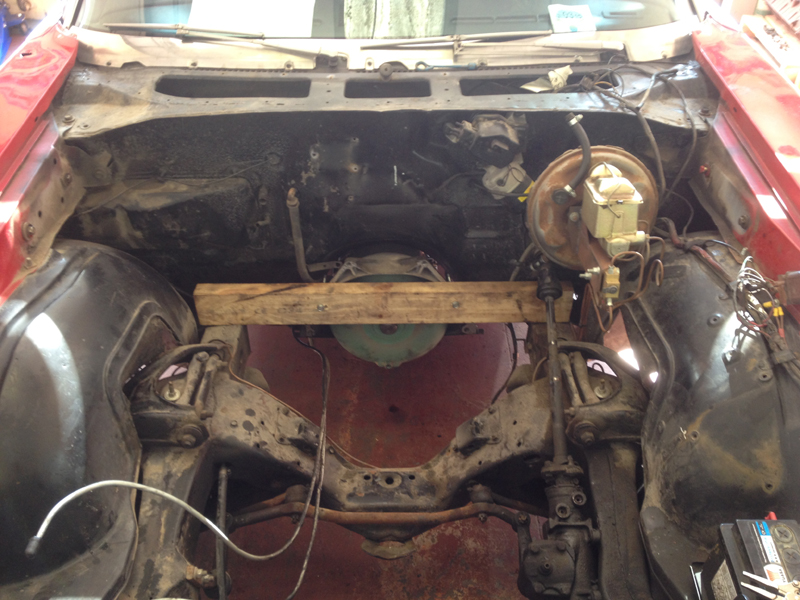
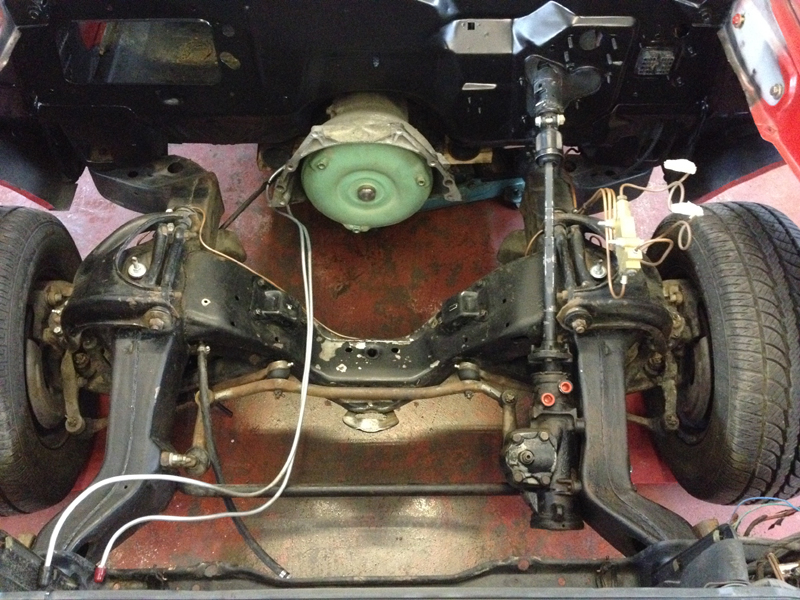
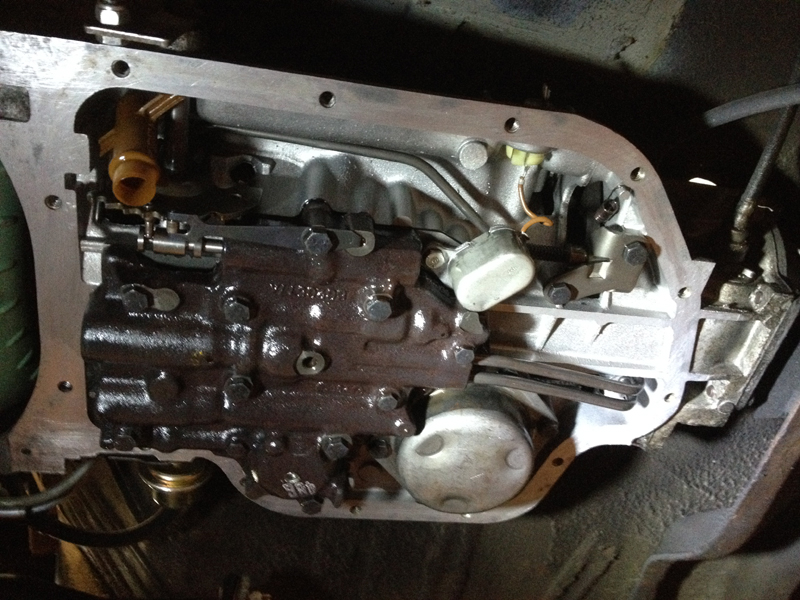
Just a quick note to be made for anyone else reading this and wanting to take on such a project themselves, if you remove the engine and leave the transmission in place, you need to support the transmission otherwise it tries to pivot forward and can damage either the mount or the output shaft seal, we simply use a thick piece of wood accross the chassis rails and bolt it to the bellhousing:
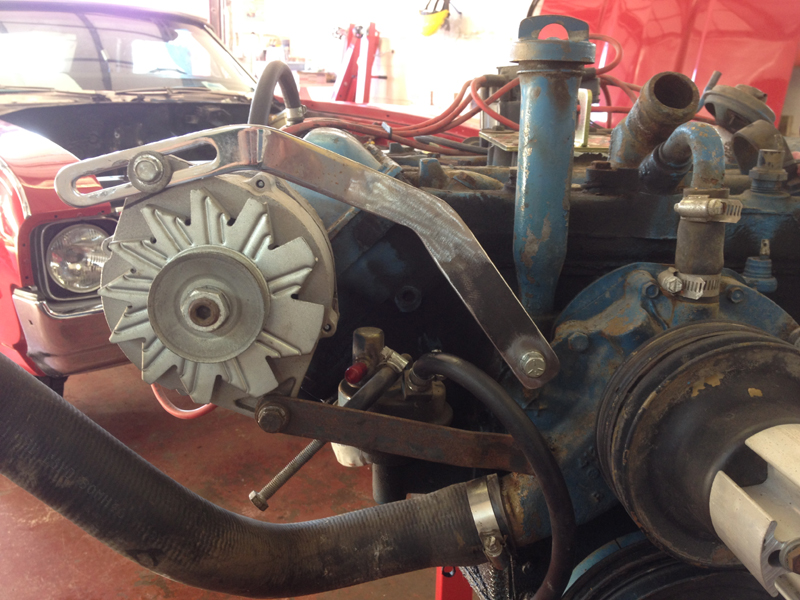
The alternator in this car was originaly an externally regulated item, but during the cars engine swap someone has fitted a more modern internally regulated alternator, the conversion was done very badly and whoever done it managed to wire in the external regulator inline with the new alternator causing all sorts of issues aswell as making a bracket which looked out of place, was too bulky, rusty and said "FORD" on the back of it in big letters aswell as positioning the alternator up quite high:
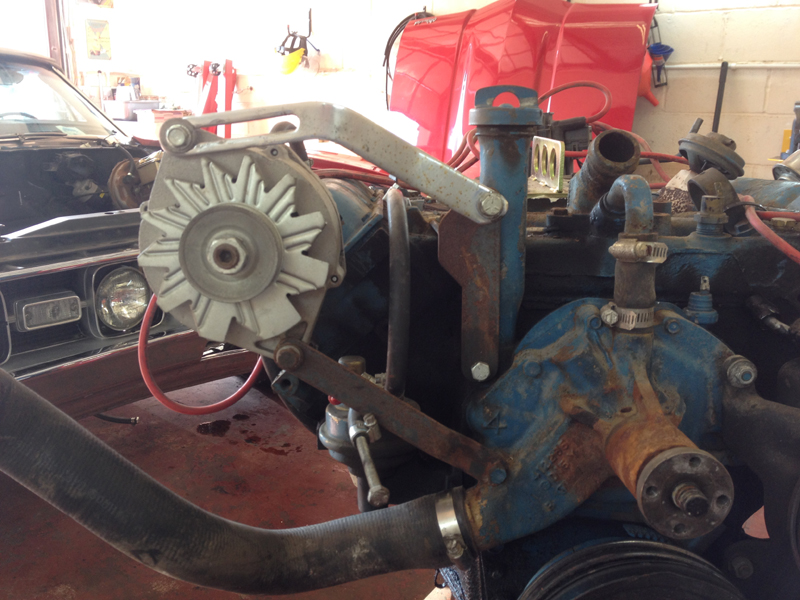
We took this oppertunity to modify the exsisting bracket and lower the alternator giving it a cleaner, more at home look, we will powder coat the brackets black and paint the alternator black too along with re-doing the wiring for the unit aswell before the engine goes back in the car:
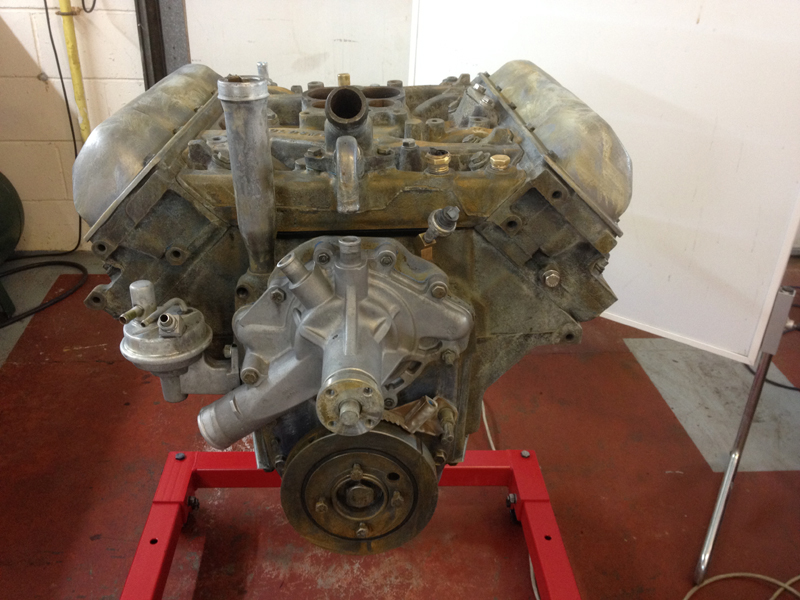
Before going any further we took the engine outside and gave it a good clean up to get all the oil and grease of it:
Once that was done we started to strip the blue paint from the engine. Paint that has been on an engine for this long can be a real stubborn to get off as its been burned on over the years of heat from the engine. We still have a litte bit left to get off in places, but will do so once the engine is in bits to make things easier to get at without other parts being in the way of the area your trying to clean up:
Another thing we wanted to address was the throttle return spring bracket, we felt it was a little over the top and since someone was using an aftermarket double spring set up which was being pulled at a funny angle, we decided to tidy things up a bit:
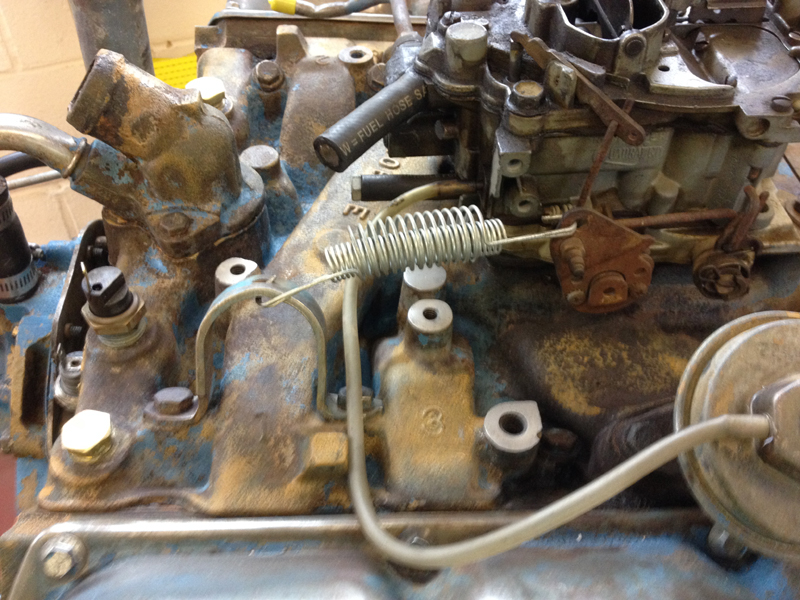
We modified the original bracket and relocated it so that now the spring is pulled straight rather than at an angle, we will also powder coat this bracket black before engine re-assembly:
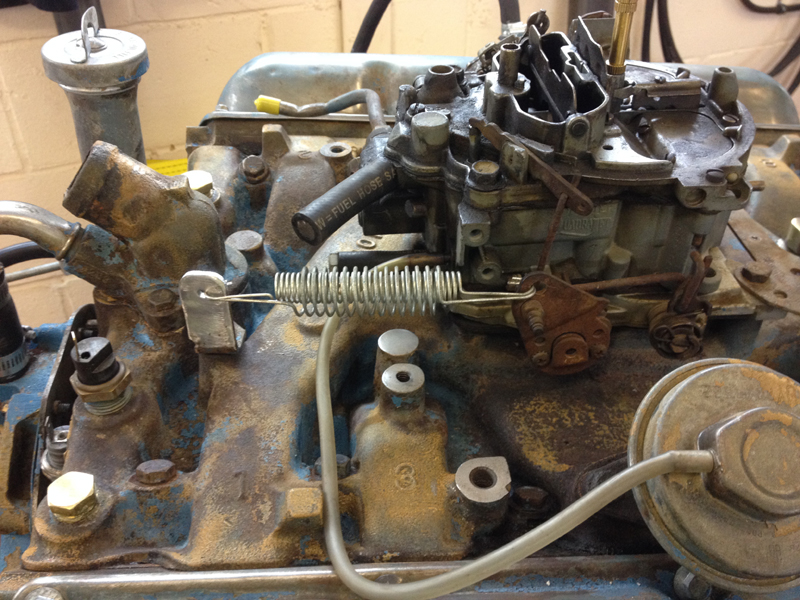
The engines original carburettor has been replaced with a slightly more modern one with an electric choke so the heat riser plate was no longer needed so we decided to remove it and block it off. We also decided to remove the cars EGR valve in a bid to help the cars performance, after all when you buy a car with a 455 motor the last thing going through your mind is fuel economey, plus on these old set ups they contribute to clogging up the intake ports in the cylinder heads with carbon deposits:
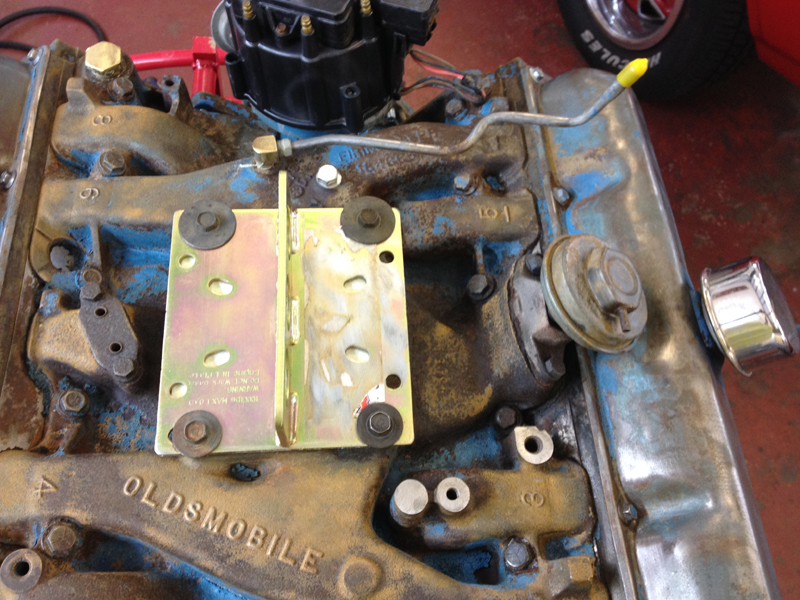
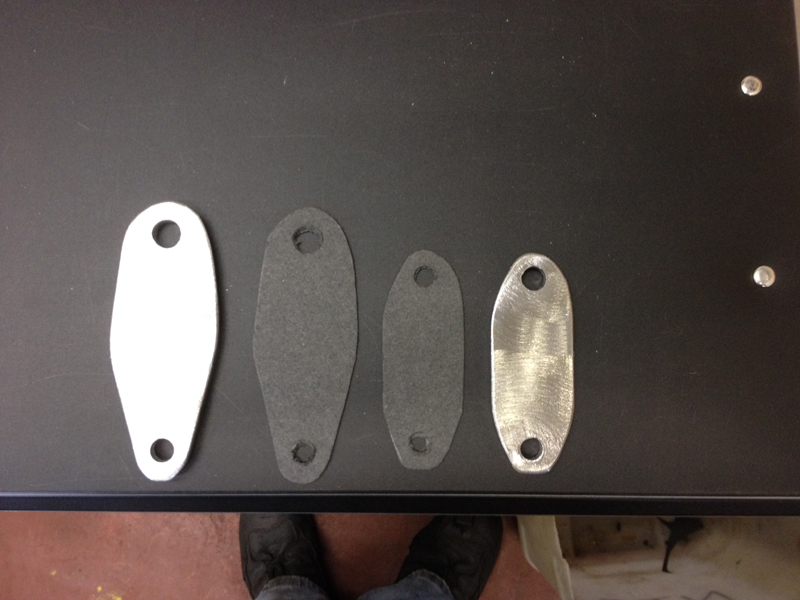
We fabricated the blanking plates and gaskets for them:
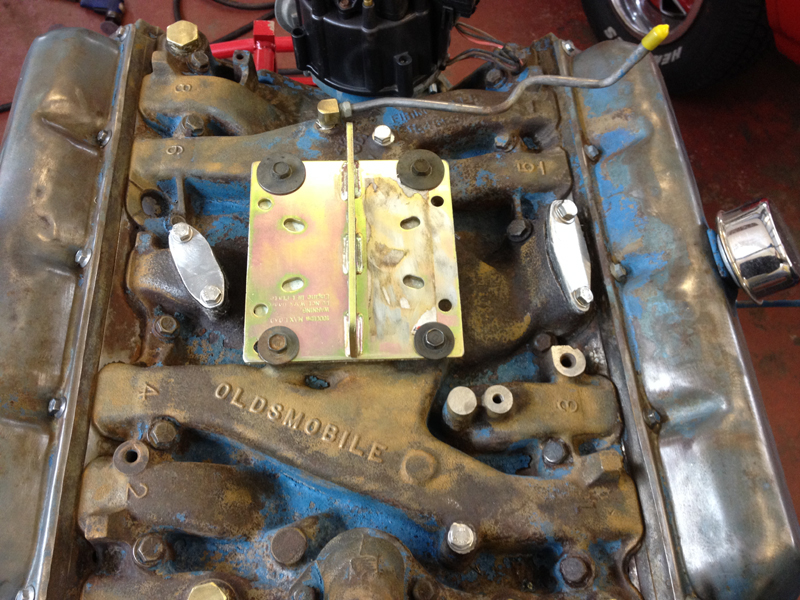
Then installed them at this stage so they get painted along with the engine so that they blend in with the intake manifold:
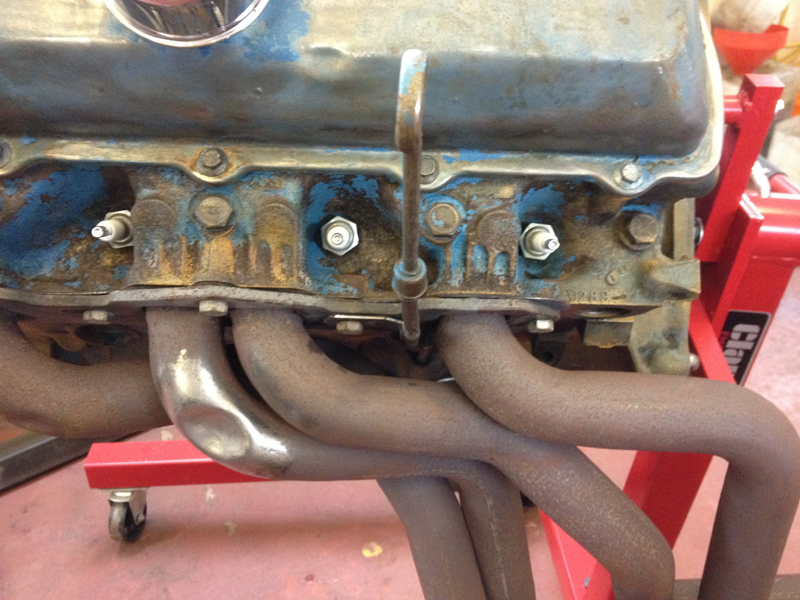
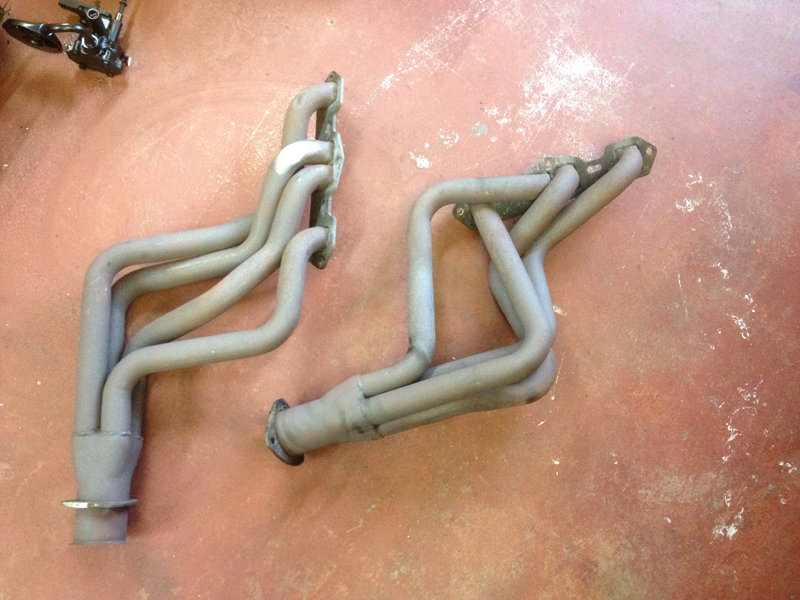
Because the engine isn't the original engine and a much larger one than the car was designed to come with and also the fact that someone has installed a huge set of long tube headers, the primary pipe on cylinder 3 was hitting the steering column:
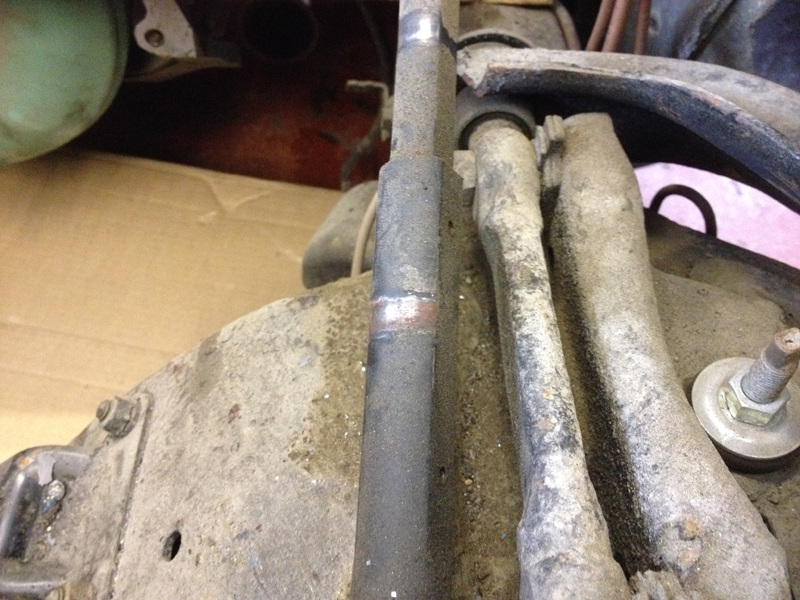
Here is the offending pipe, the shiney mark shows were it has been hitting:
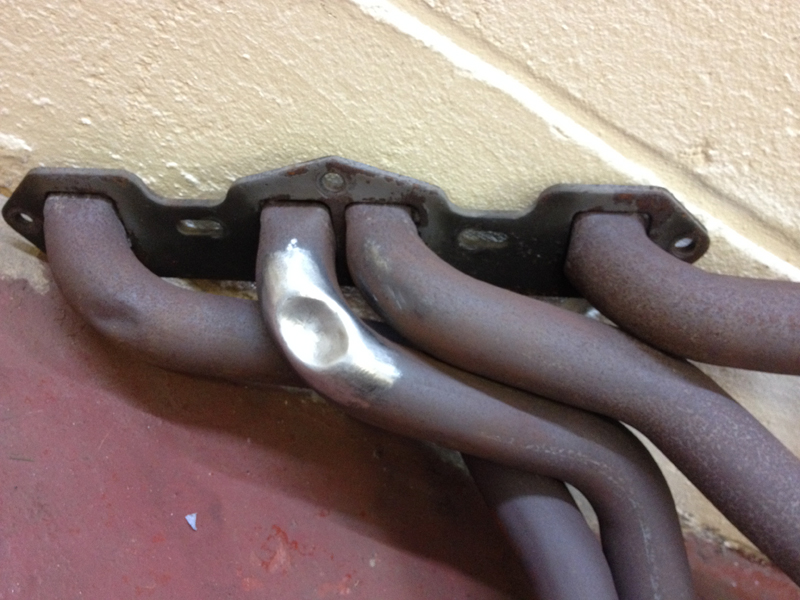
The best solotion to our problem is have a set of custom headers made up. This proves to be a very costly solution though. The engine has standard internals and isn't really pushing out a massive ammount of power and to be honest, the long tube headers are a bit overkill, but look cool and sound awesome, so our solution was one thats been tried and tested over the years by many car builders, heat up the area thats causing an issue and gently reshape it slightly to give you the clearance you need. We plan to sandblast and paint both headers before they go back on the engine but now the owner of this car can relax while driving the car without feeling a clonk through the steering wheel everytime you touch the gas pedal:
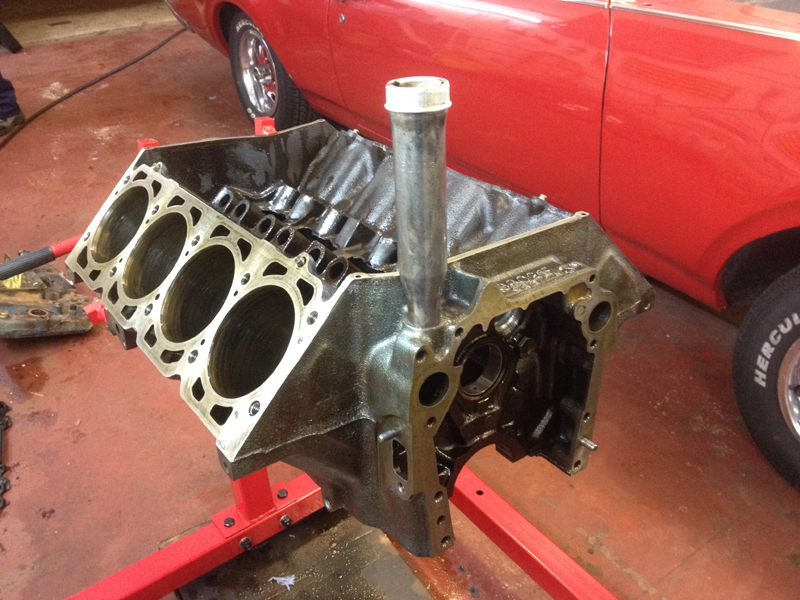
One last problem to address before pulling the engine appart was the dipstick tube. It was bent out of place and loose in the engine without any support, so everytime you pull the dipstick the whole tube comes out with it:
Using a pipe bender we carefully re-shaped the tube to tuck it closer to the engine, giving it a neater appearance and welded a small bracket onto it that will clamp it securely to the engine so that it never falls out again:
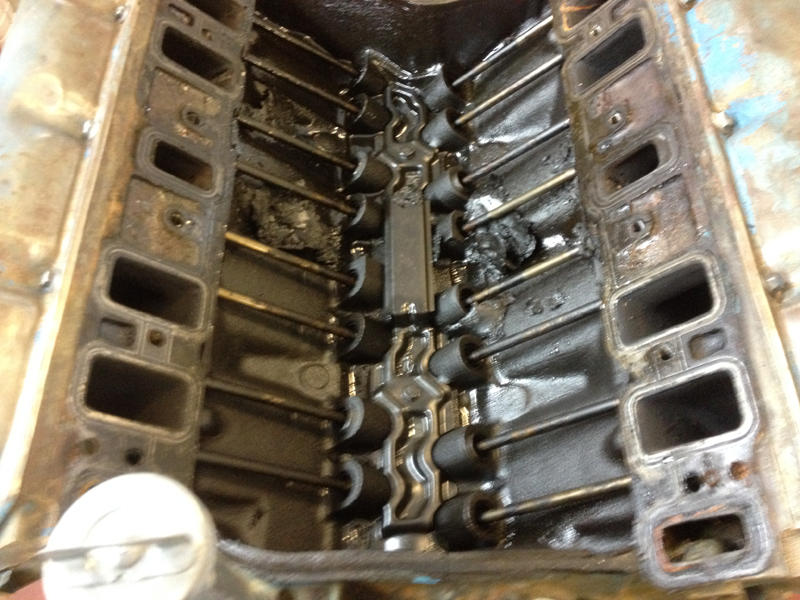
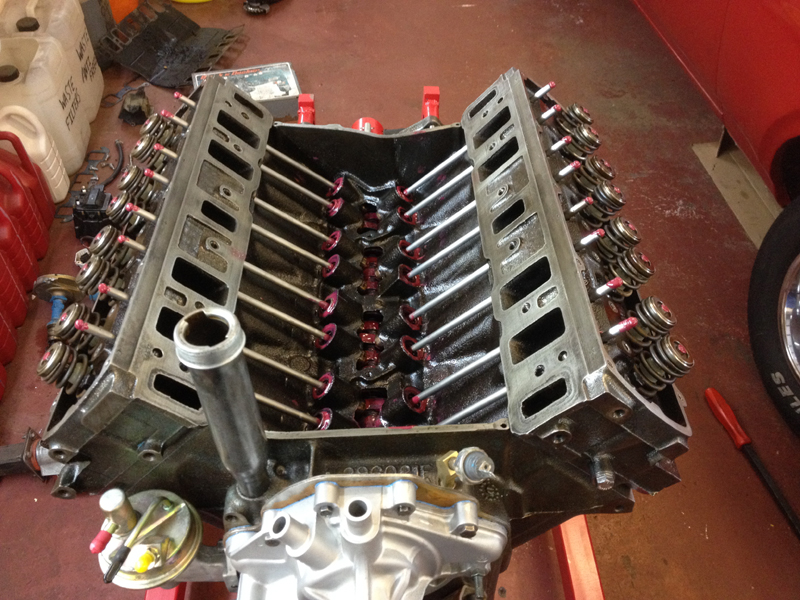
Now we can start the strip down on the engine and take a look at how the inside looks, first step is to remove the intake manifold, note the oil sludge build up in places that has been there for so long its dried into crusty lumps, all this will need to be cleaned out:
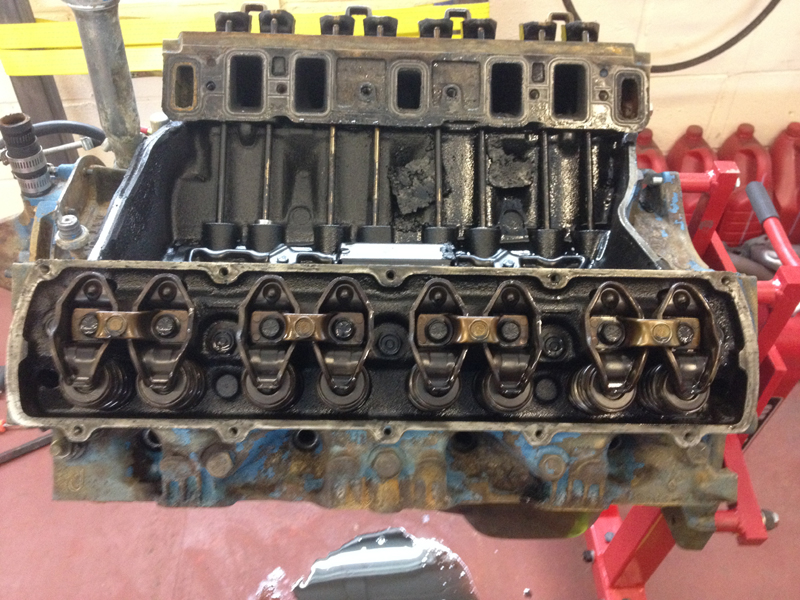
Under the drivers rocker cover, everything looks fine in here:
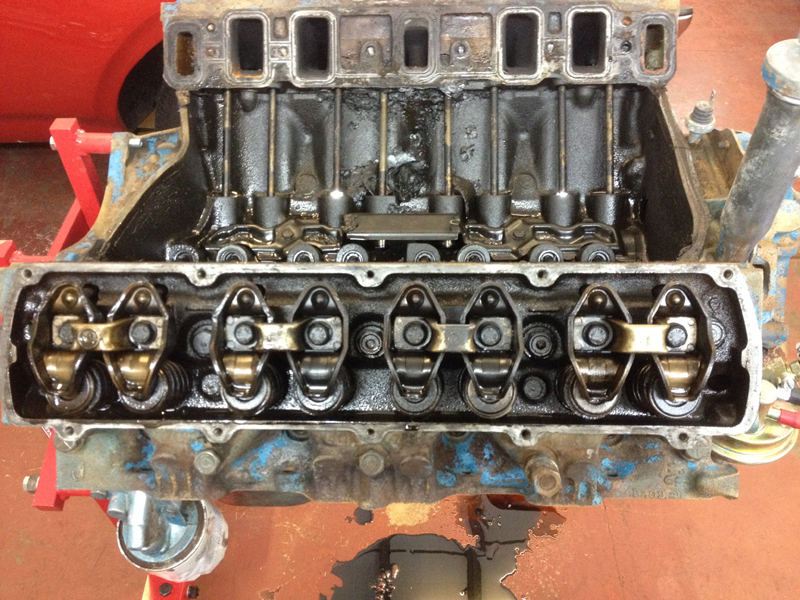
And the passenger one, again, no issues:
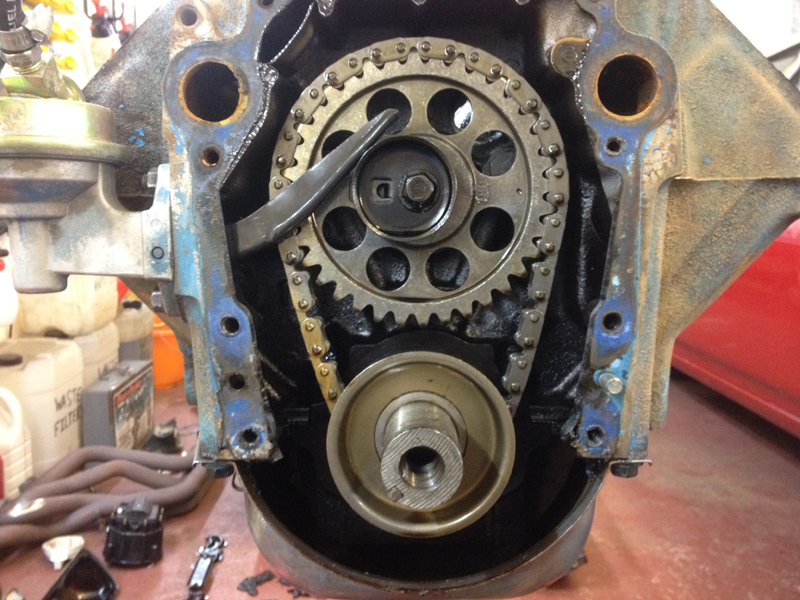
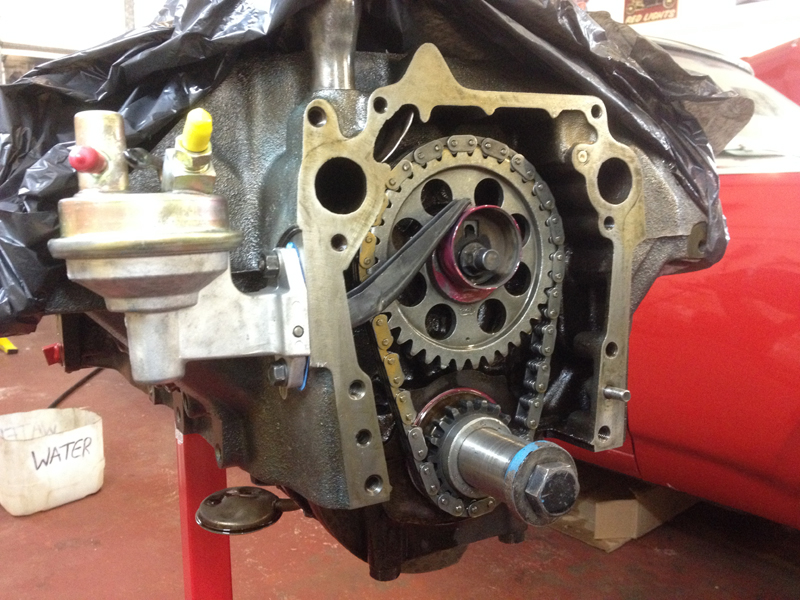
Behind the timing chain cover, no isses here, everything look ok and there is no excess play in the chain itself:
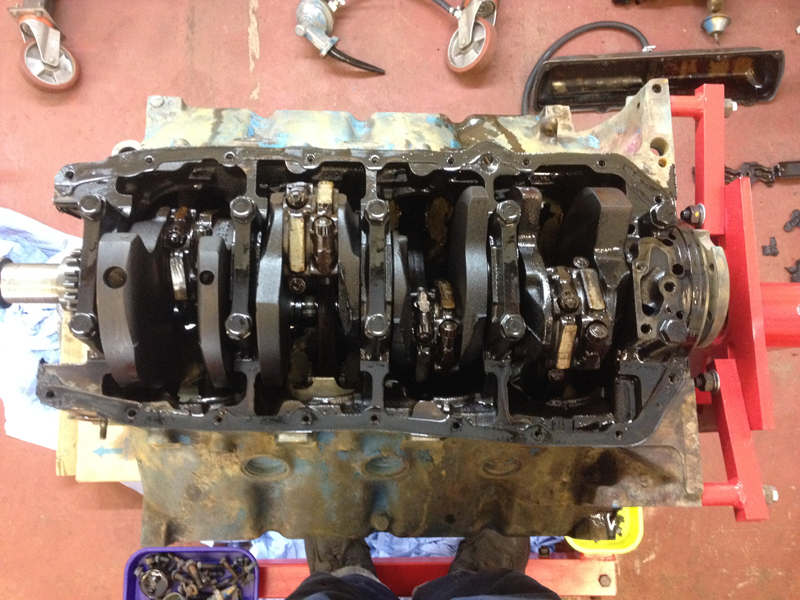
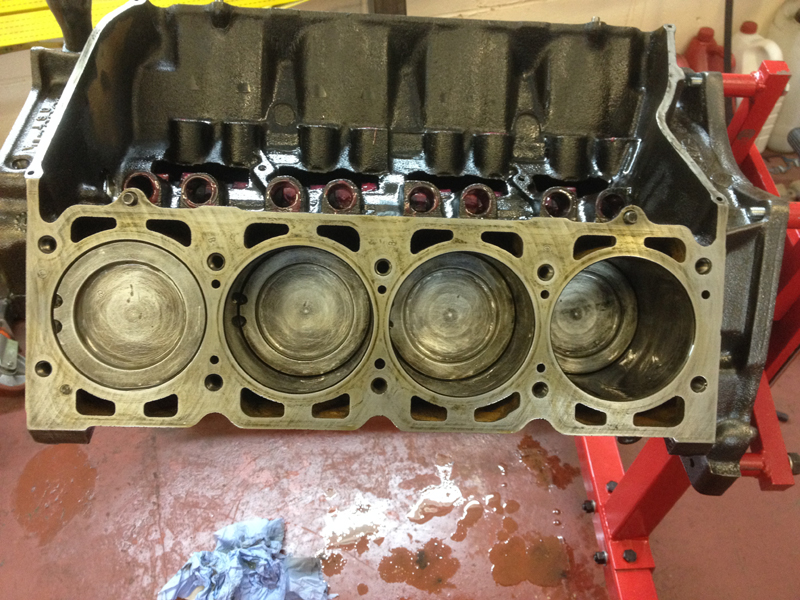
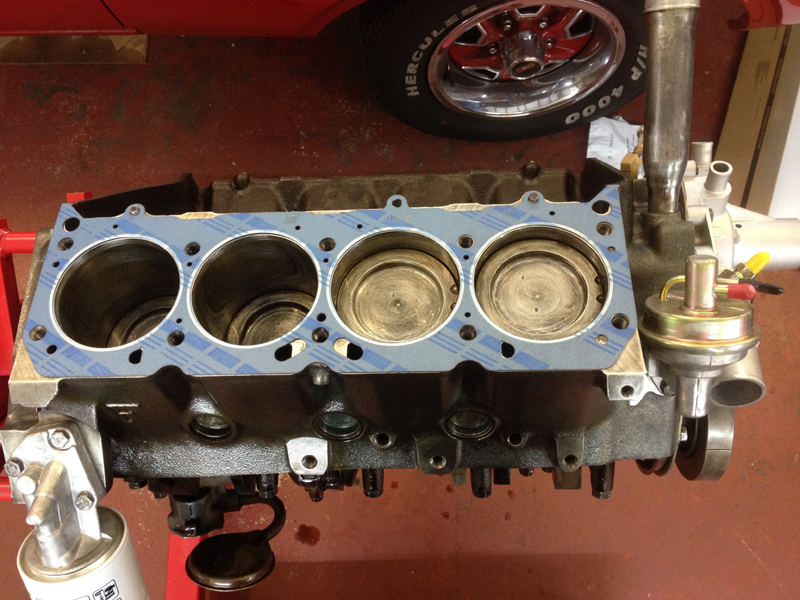
With the sump removed we can access the crankshaft and pistons, at a glance everything appears to be ok. Unfortunatly the crankshaft rear main oil seal is also leaking which means having to remove the crankshaft to replace it, so we will be removing the pistons and crankshaft anyway and can take a closer look at these important parts:
With the complete rotating assembly removed we can take a look at everything. Appart from alot of carbon build up on the pistons and rings everything looks great and will be re-used, there is no reason to replace and of the bearings or internal parts, everything just needs a real good clean up:
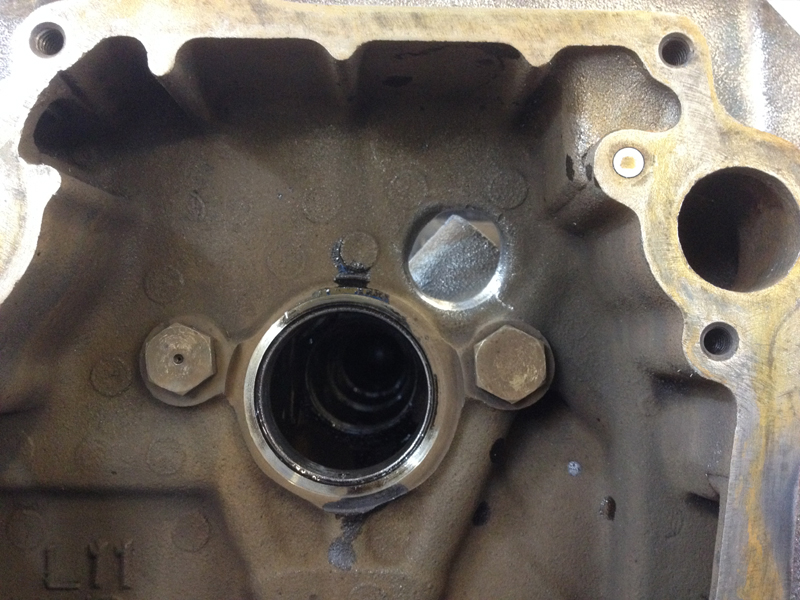
A downside of the 455 engine is poor oil return back into the sump. This is due to small oil passages in the cylinder heads and a poorly cast oil return hole in the timing cover at the front of the lifter valley. Not alot can be done about the cylinder heads without some machine work to the actualy block to restrict oil flow up to the top of the engine but there is a simple solution for the poorly cast hole in the lifter valley:
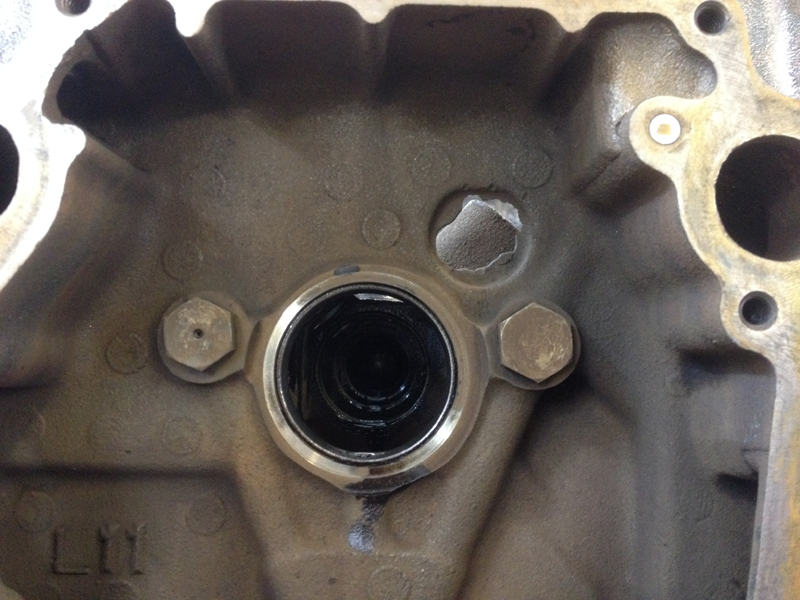
Using a die grinder we simply open the hole out into a actual round, smooth hole, thus allowing the oil to flow much better back out the lifter valley and into the sump. We wouldn't recomend doing this on anything other than a stripped down engine block as once the hole is made we pressure wash the engine to remove all the metal shavings, on an assembled engine you won't be able to do this:
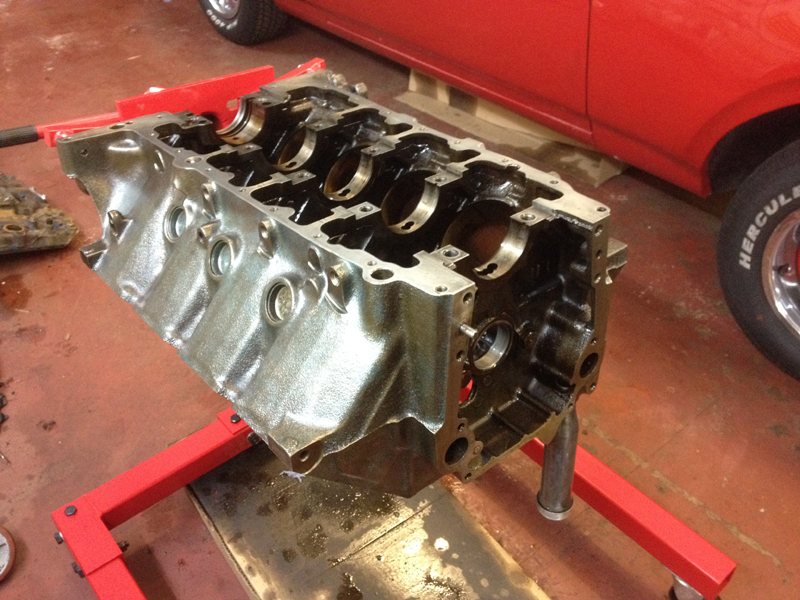
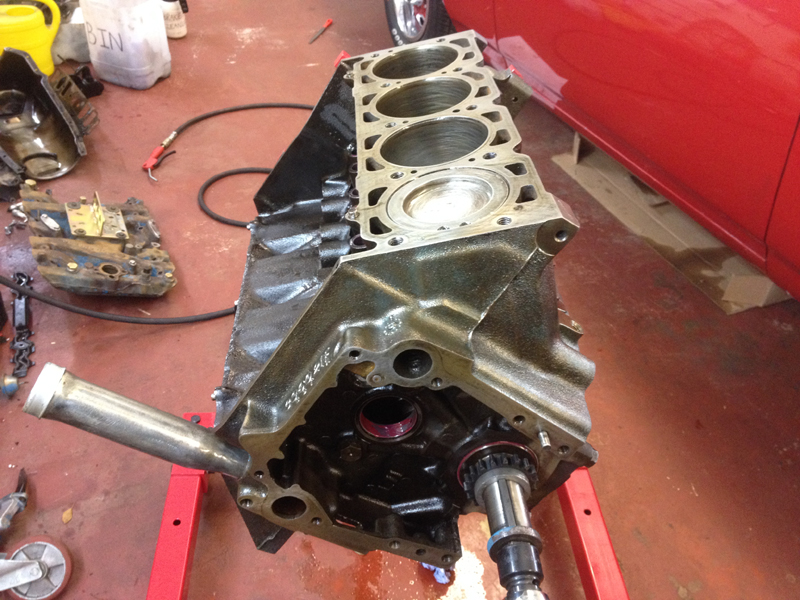
Using various different methods of paint removal and gasket scrapers we completly clean and de-grease and remove all traces of the old gaskets and seals. Once clean and dry we lightly coat the entire block in oil to stop is rusting until it can be painted:
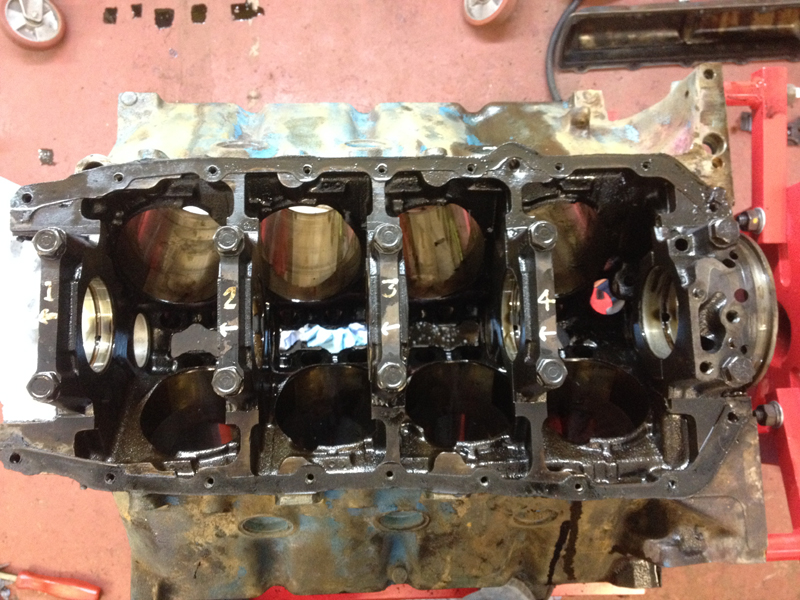
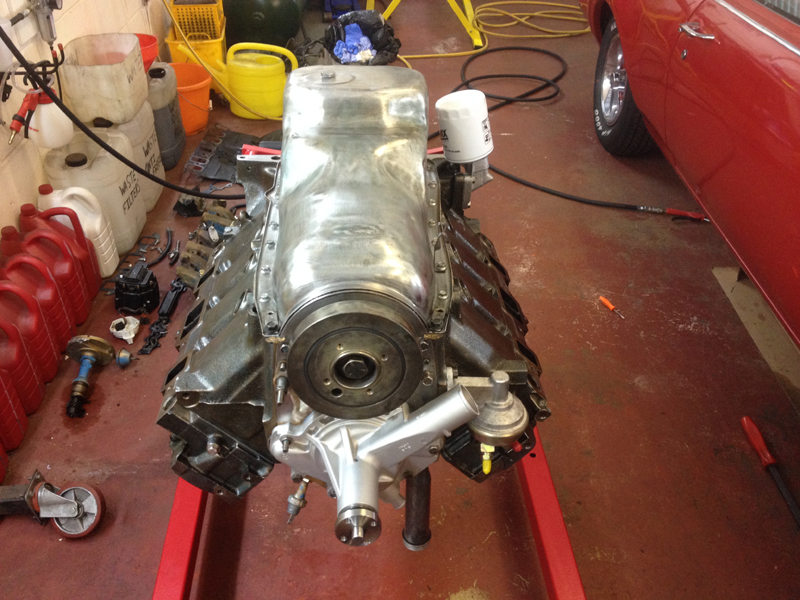
Just a shot from the bottom of the engine before the crankshaft goes back in:
First step before re-assembly can begin is to install the 2 piece rear main oil seal. Once thats installed we coat all the bearings and lifter bores with an assembly lube that won't run out of the important places whilst the engine is sitting on the stand like oil does:
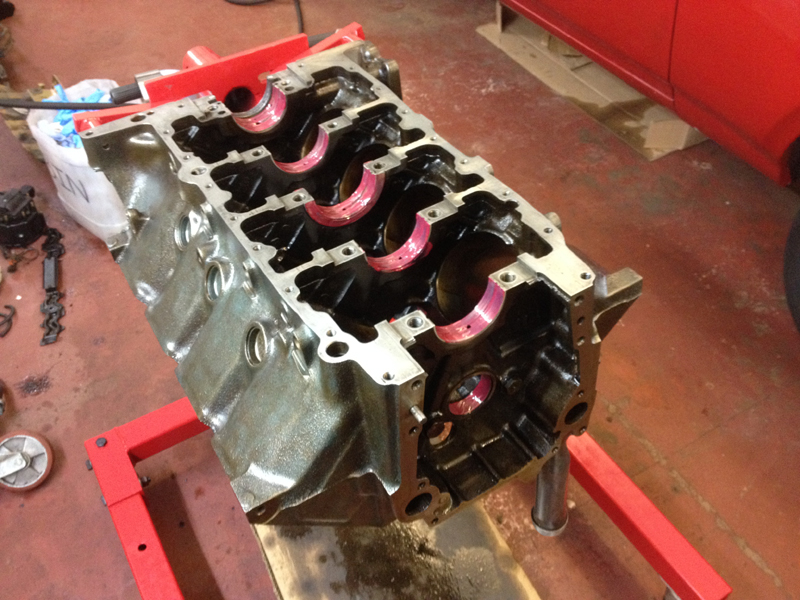
Next the crankshaft itself is thouroughly cleaned and inspected and then installed. More assembly lube is applied to the main bearing caps before they are installed and torqued into place:
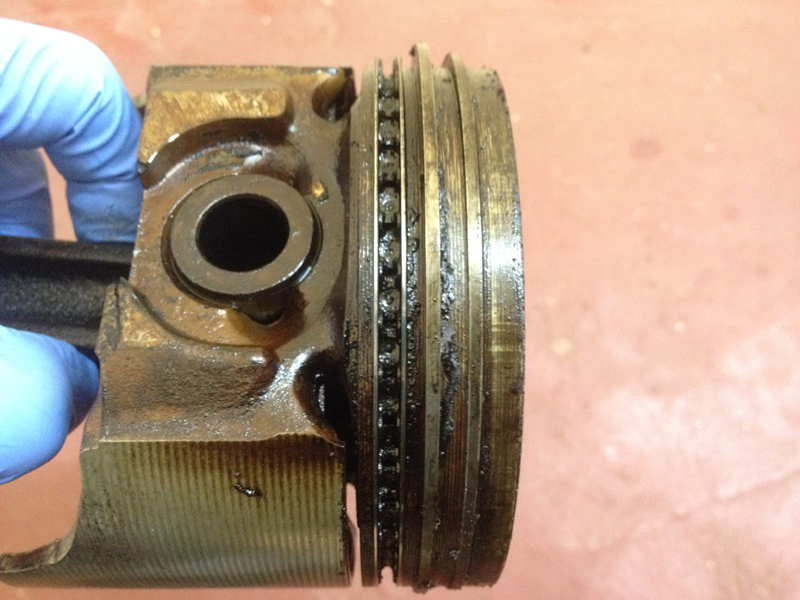
Next the pistons need to be installed. The pistons and rings were covered in carbon build up and oil sludge, this can happen due to a number of reasons, not changing the oil on a regualar basis, the EGR valve sticking and letting exhaust gases into the combustion chamber at the wrong times and an incorrectly set up carburettor. Before we can install the pistons we need to strip them all down and clean them up to ensure the rings make a nice tight seal and move up and down the bore with a smooth motion:
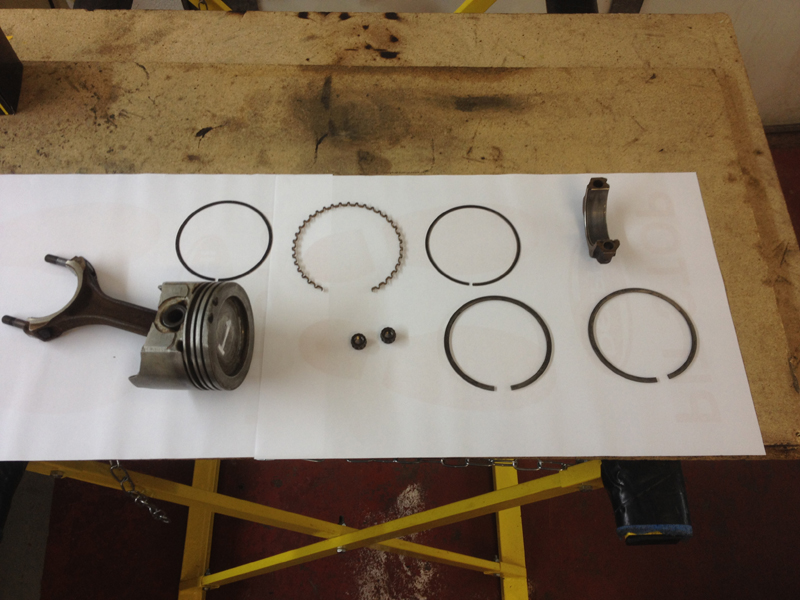
Piston number 1 is has been stripped, carefully cleaned and inspected and ready go be installed in the block:
Thats 1 down, 7 more to go:
With all the pistons installed we turn the engine over by hand to make sure it turns smoothly and freely and then set the crankshaft at TDC (top dead center) for the engine to be firing on cylinder 1 ready to install the camshaft and timing chain:
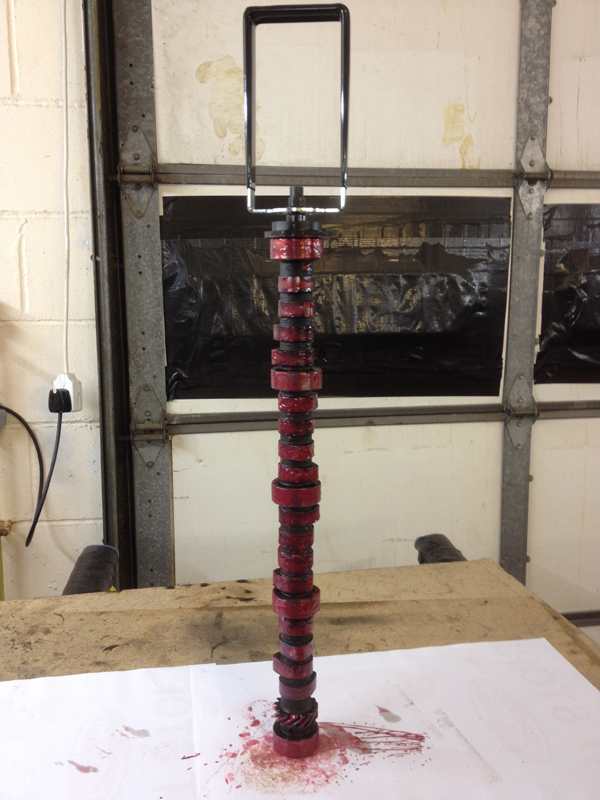
Before the camshaft can be installed, we give it a good clean and a nice coating of assembly lube. Lubrication is critical to an engine that been freshly put together, all the moving parts are dry and the assembly lube stops them from wearing out on the initial starting of the engine until the engine starts making its own oil pressure. Once this happens the assembly lube simply disolves into the engine oil and all the rotating parts are kept well oiled:
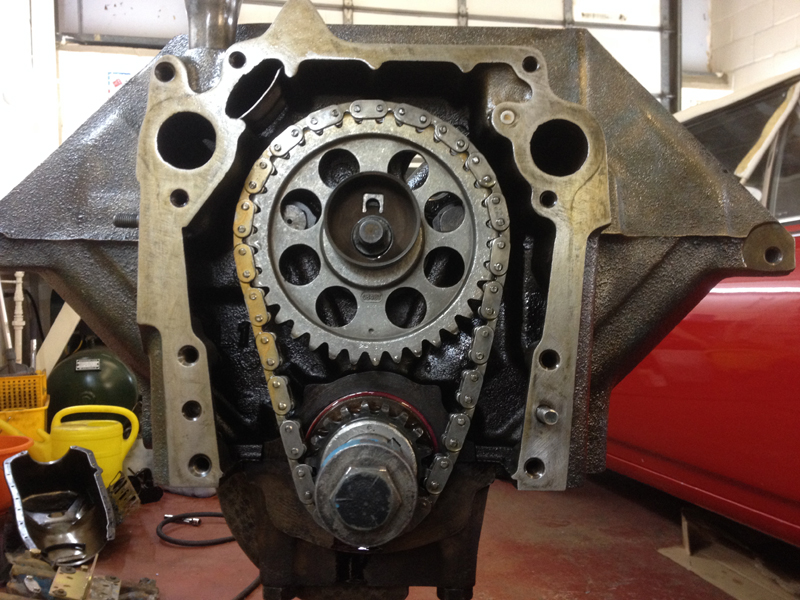
With the camshaft installed we can now install the timing chain and camshaft sproket:
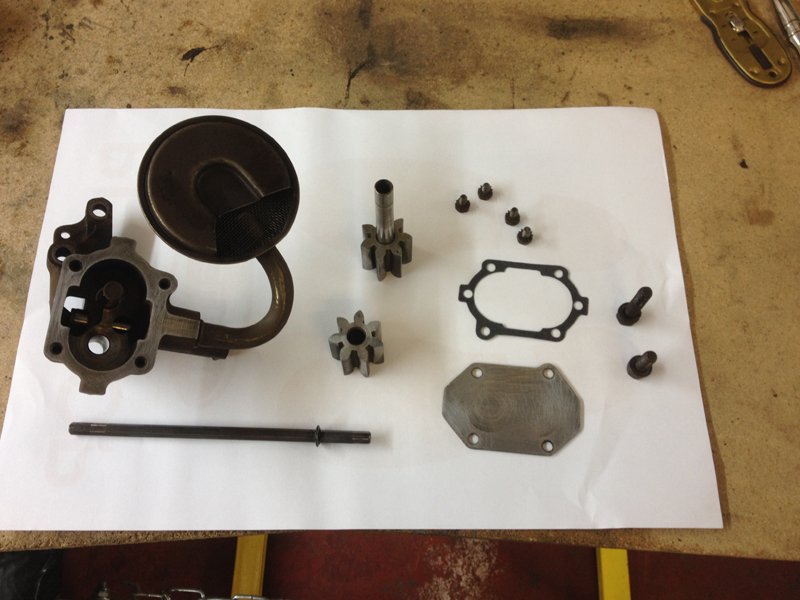
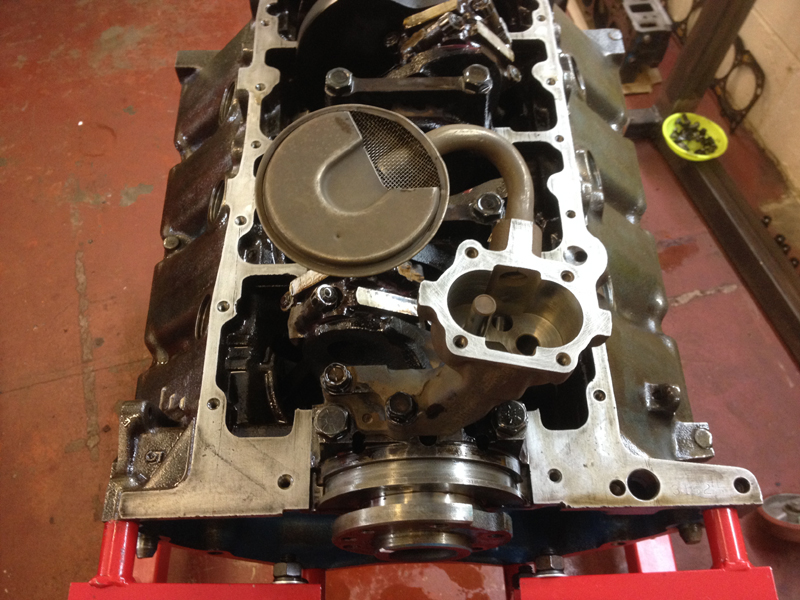
Next step is to install the oil pump. The engine gasket set came with a new oil pump drive gear gasket so we thought we may aswell take an extra 5 minutes to strip, clean and inspect the pump and install the new gasket. First step was the strip and clean:
Then install the main housing on the engine itself:
Then the oil pump drive gears. We use a small ammount of assembly lube on the gears to to stop them wearing until the pump can pick up its own oil:
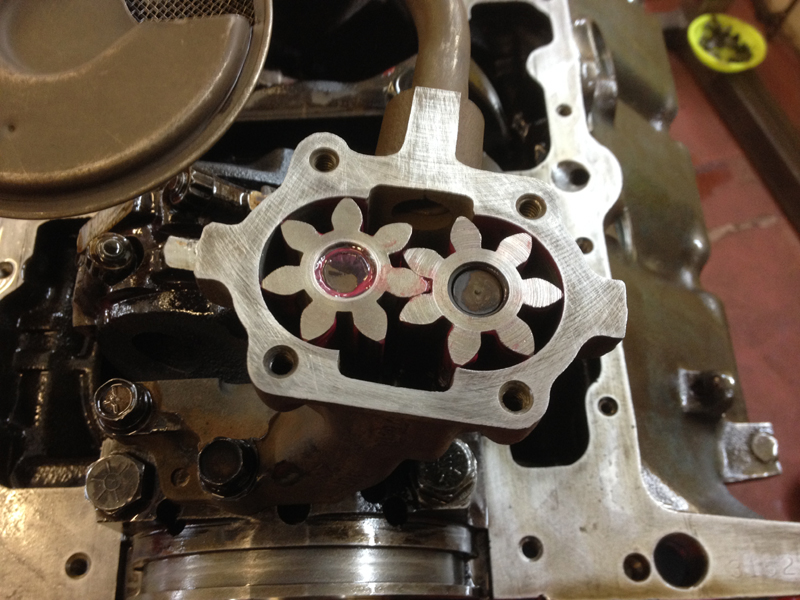
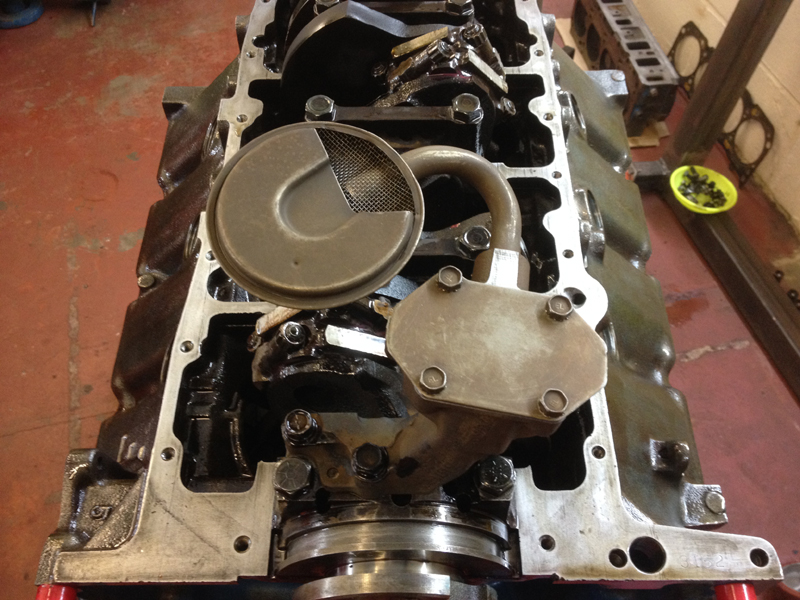
Then we install the new gasket and gear cover and the oil pump installation is complete:
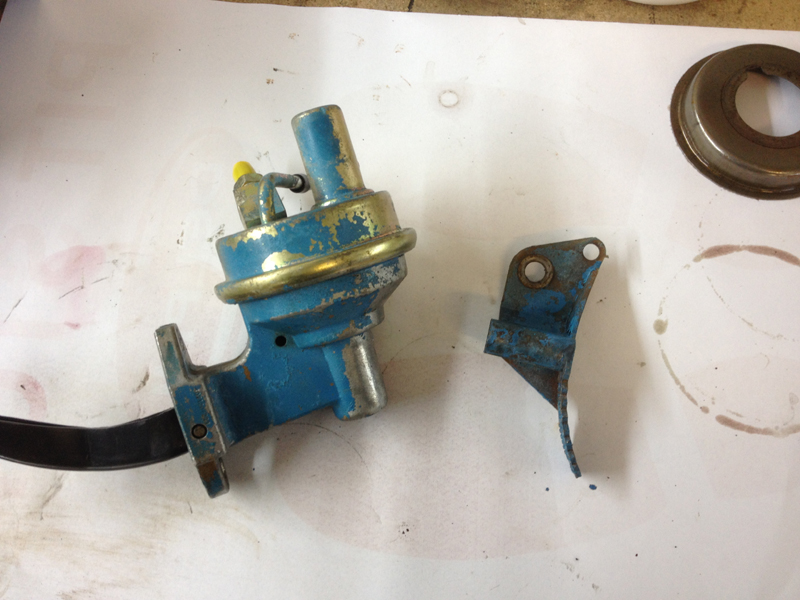
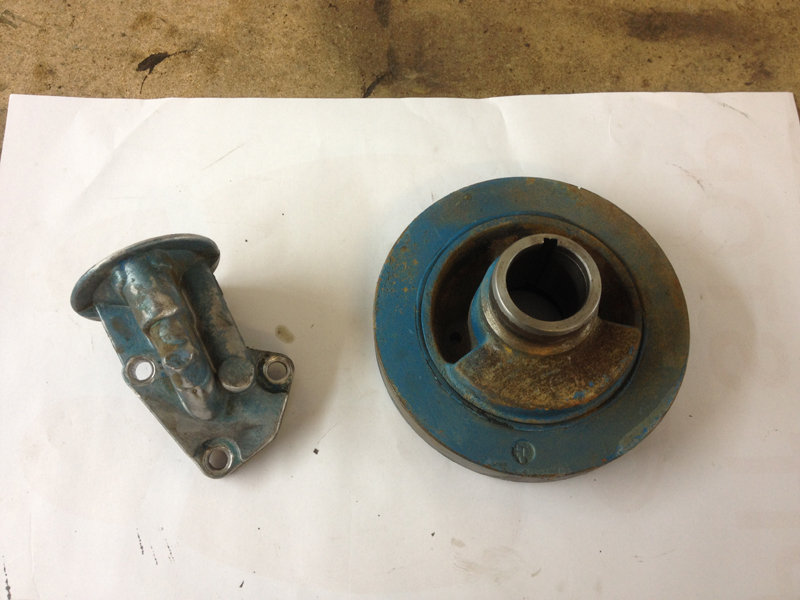
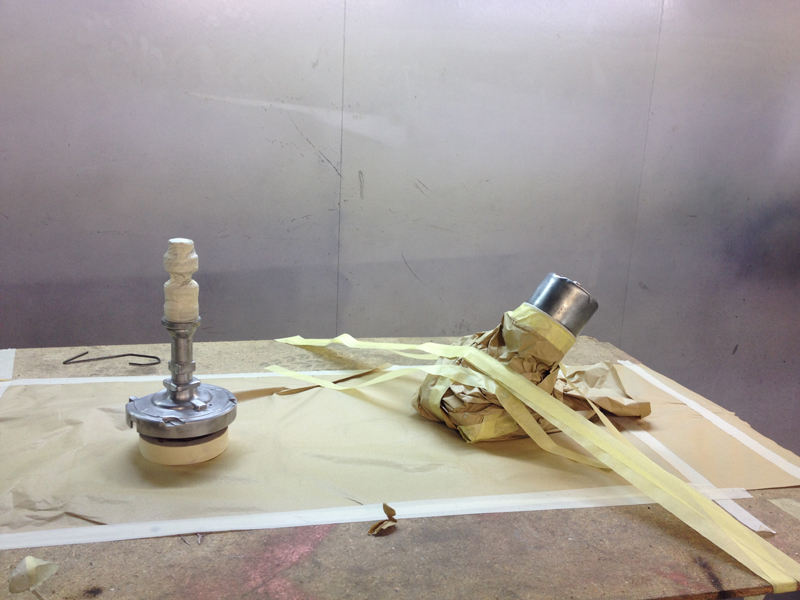
Next we wanted to install the fuel pump and timing chain cover but first needed to clean the old paint of them. The timing chain cover is just regular mild steel so we used a wire wheel to clean it up, but the pump is made of aluminium and the timing pointer made from plastic, so require a more delicate touch:
We used a hand held soda blaster to carefully remove all traces of the old paint, dirt and corrosion without damaging the actual compononents. When finished blasting the parts, they are carefully washed with hot water to remove any of the blasting soda and then cleaned with a de-greaser:
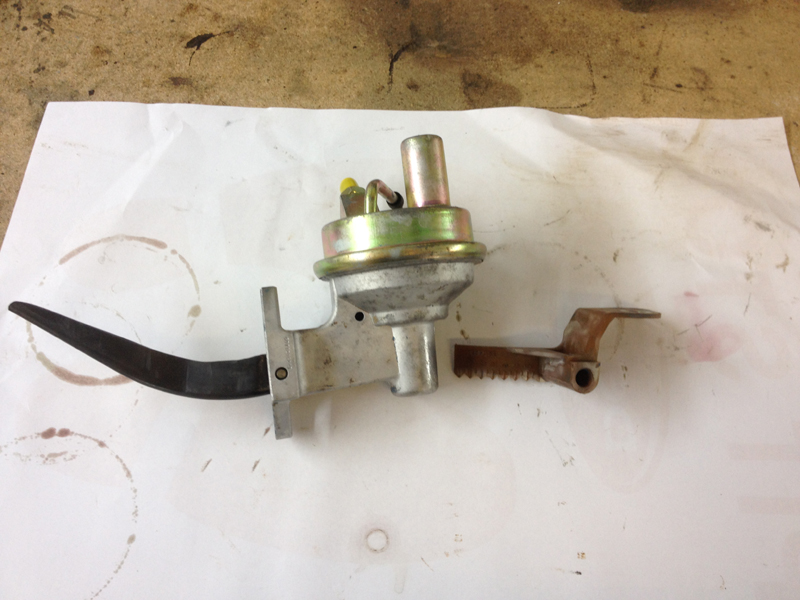
Now the fuel pump can be installed with a new gasket. Note the assembly lube on the fuel pump drive on the end of the camshaft:
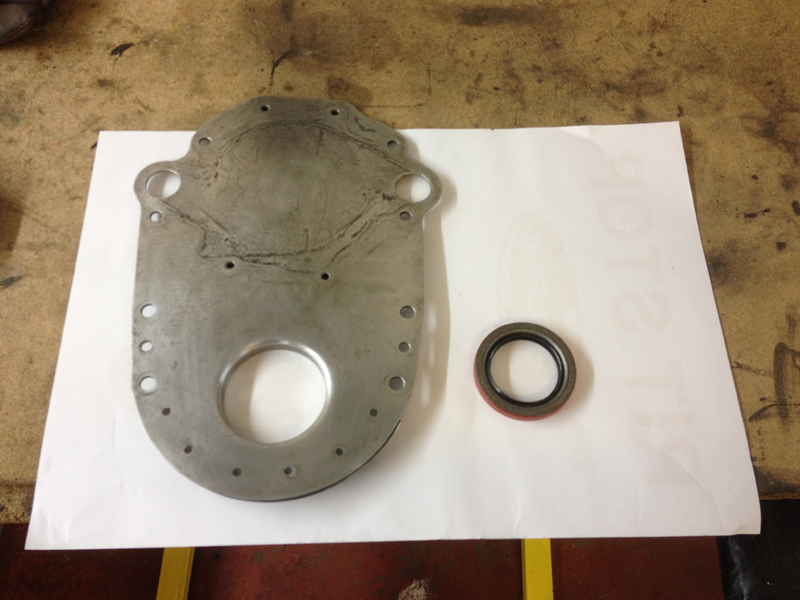
The timing cover is all cleaned up ready to have a new front oil seal installed:
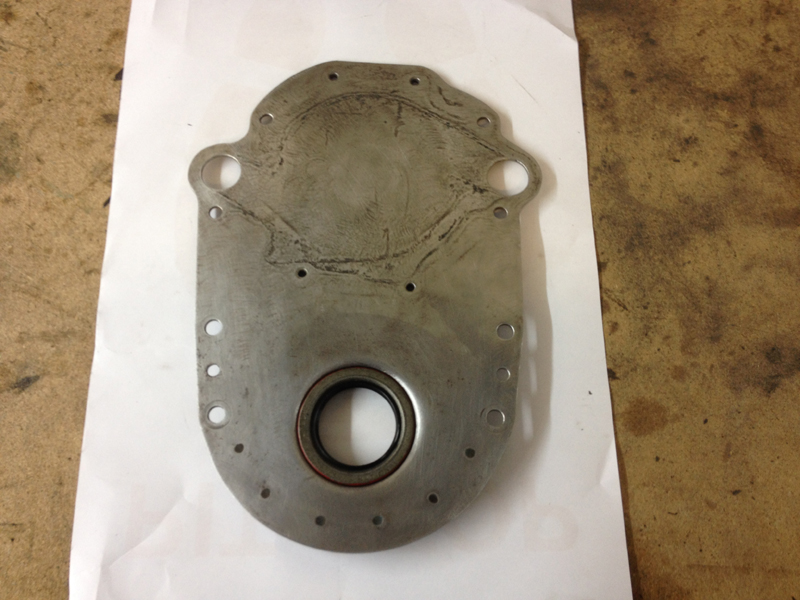
And with the oil seal installed its ready to be installed on the engine:
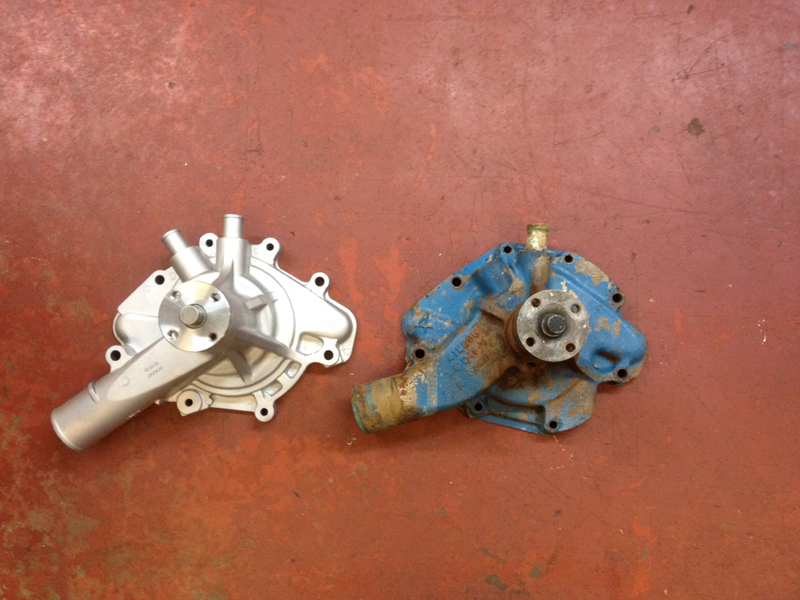
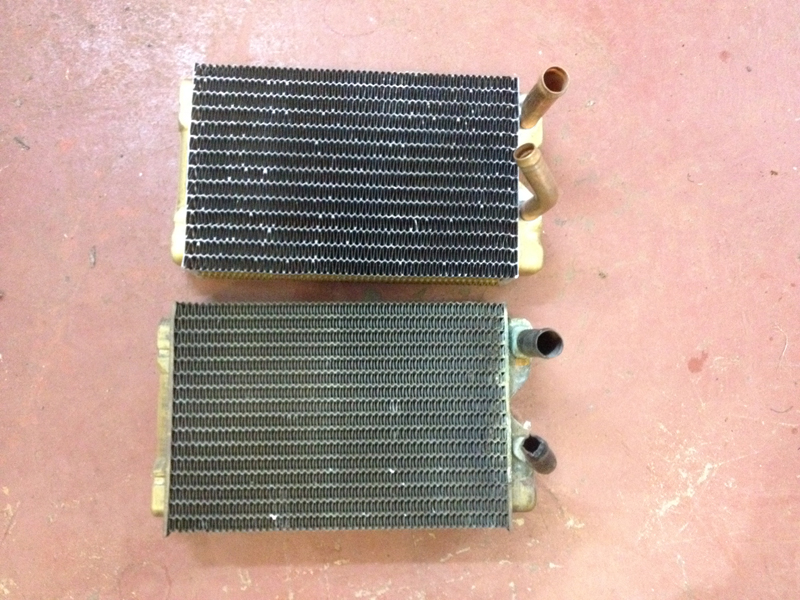
The original water pump is on the right. There is nothing actualy wrong with the pump but its the wrong pump for this engines application. On the top of the pump there is only 1 water outlet, there needs to be 2, the second one for the cars heating. We believe this pump to originaly have been a marine application pump where no heating is required. The customer wanted to have the cars heating re-connected back up to the car and its actualy cheaper to purchase a brand new aluminium pump for the correct application than have the old pump machined to accept a pipe fitting. The new pump is on the left and has 2 outlets on the top:
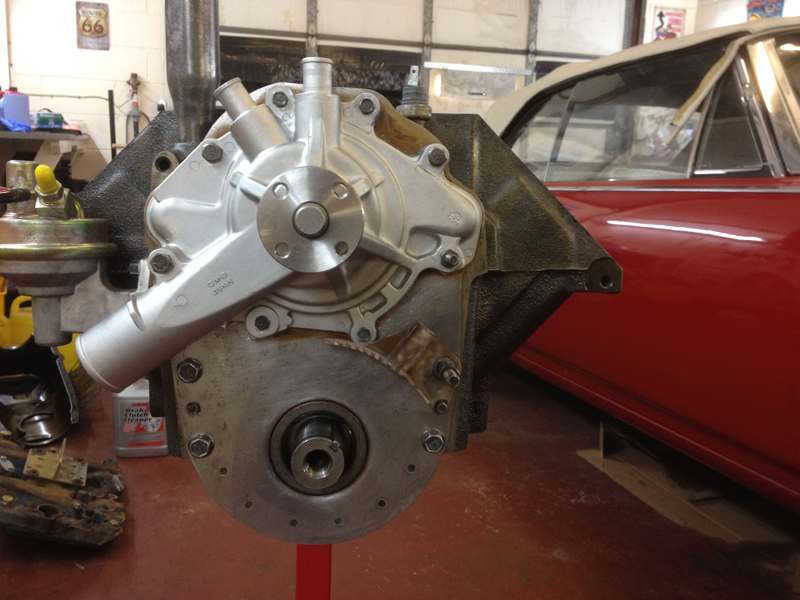
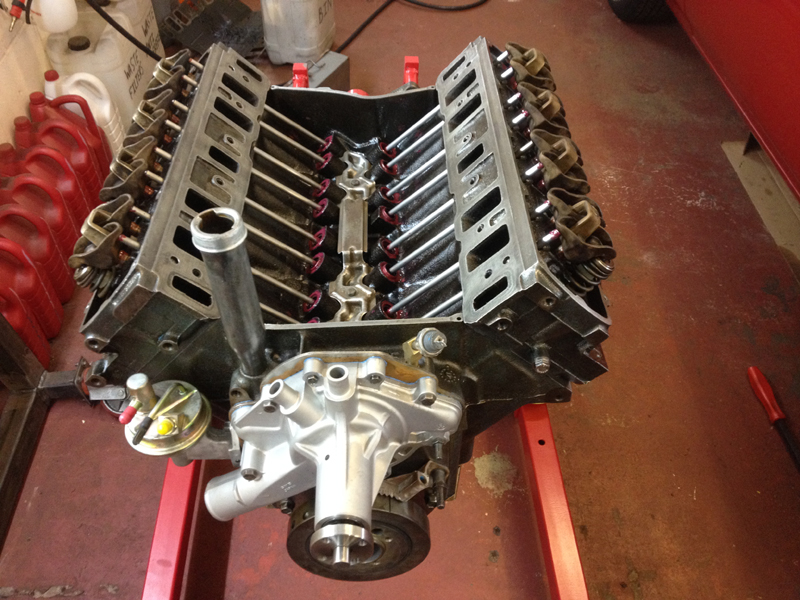
Now the timing chain cover, ignition timing pointer and water pump can all be installed:
Next up we want to install the crankshaft balancer and oil filter housing but these need the same soda blasting treatment as earlier. Even though the balancer is made from strong steel, it is rubber bonded so we have to use the blasting technique so it doesn't damage the rubber bonding:
All cleaned up and ready to go:
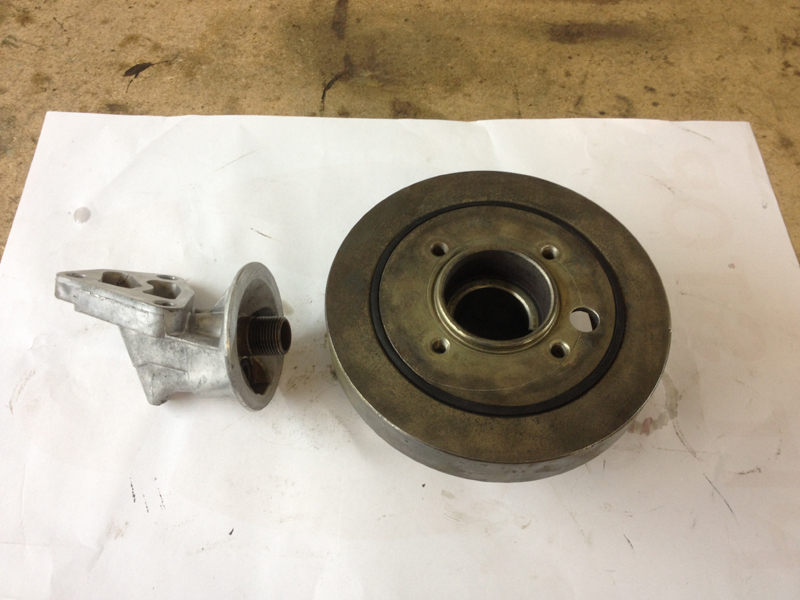
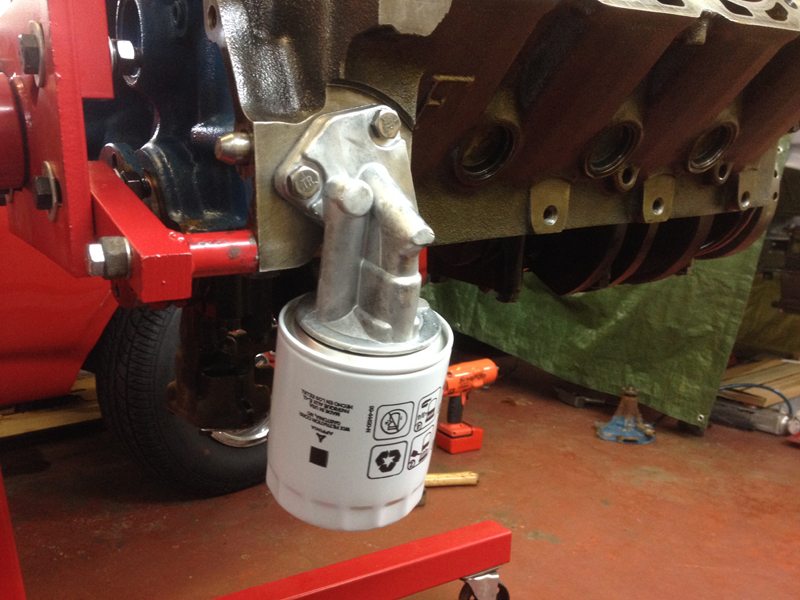
First we installed the oil filter housing with a new gasket and new oil filter:
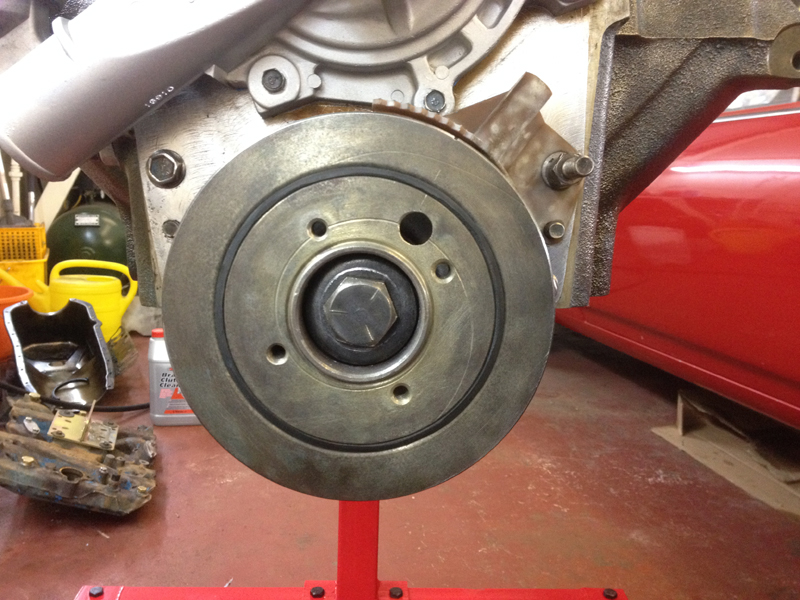
Then the balancer is also intalled:
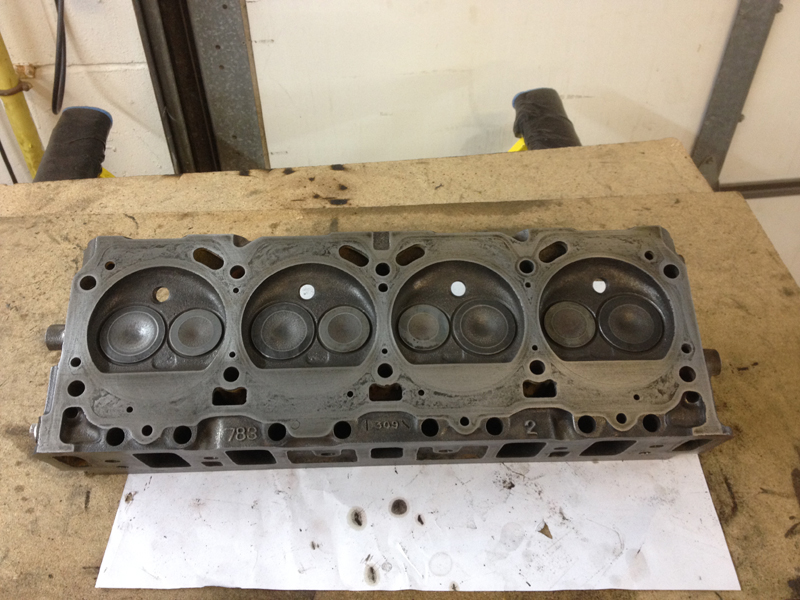
The next job is to rebuild and install the cylinder heads. First job we do is clean the cylinder heads removing all the old traces of gasket and carbon deposit. Then we check the heads are flat before continuing:
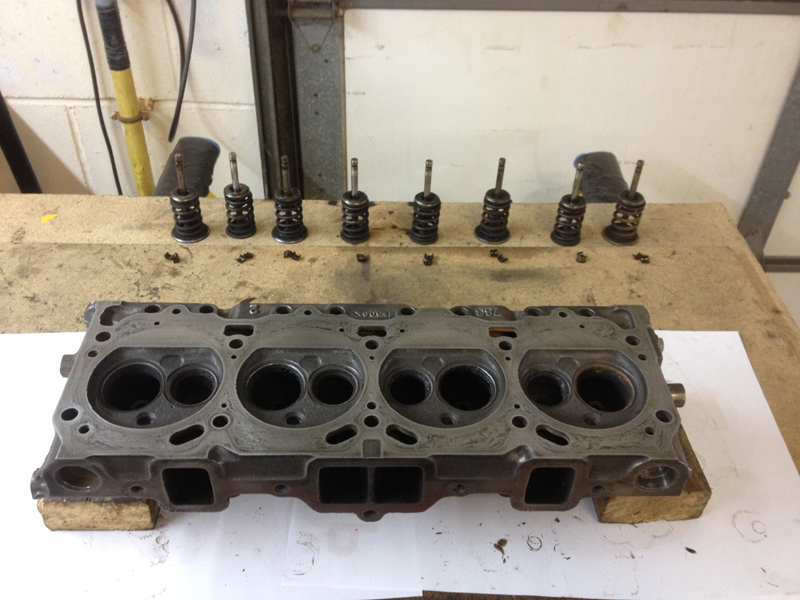
Next we remove all the valves:
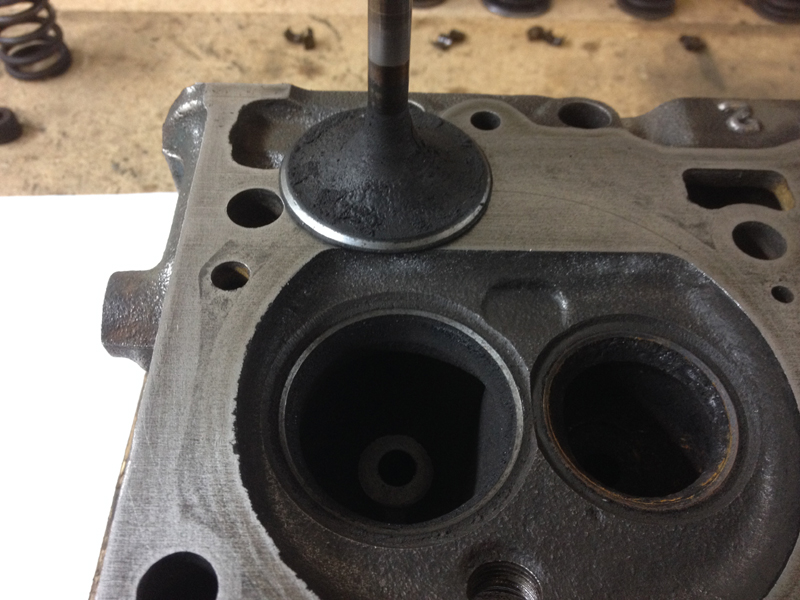
The valves and valve seats have alot of carbon deposit on them, this is before we clean it up:
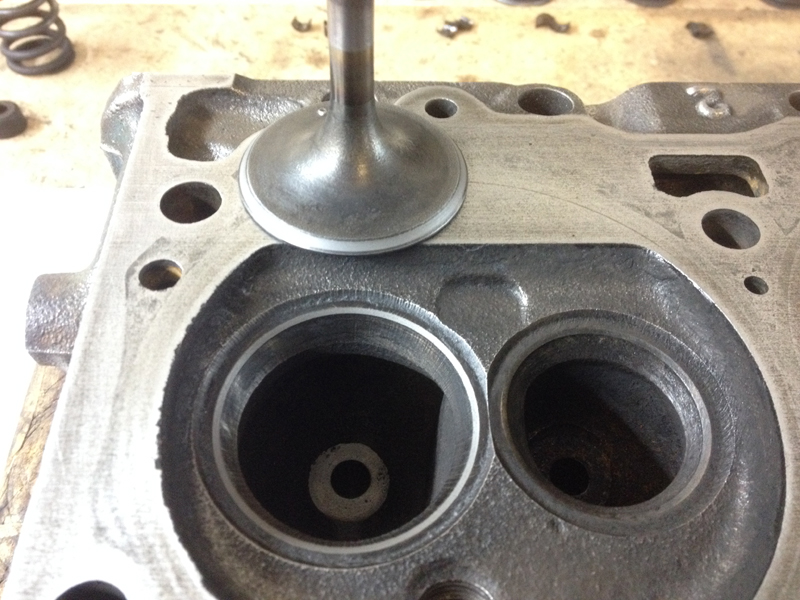
And after. We clean each valve and seat and relap each valve to make sure it has a perfect seal:
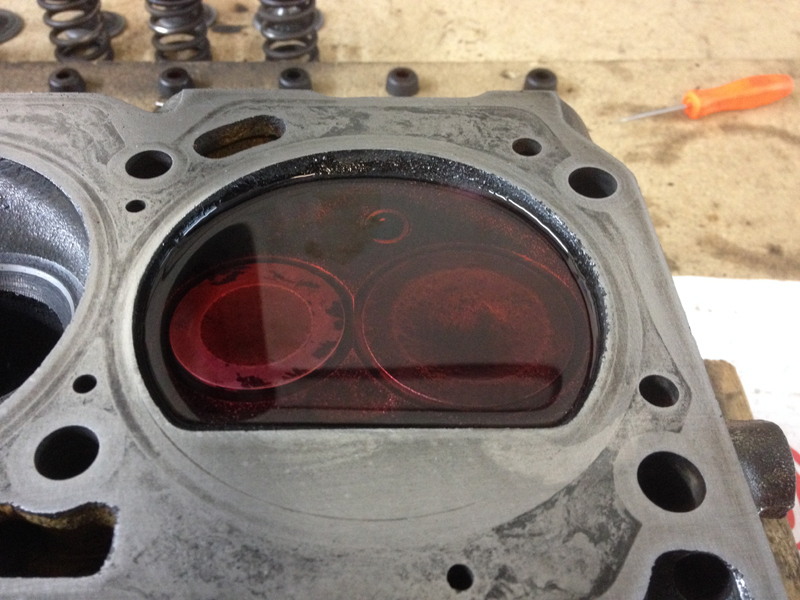
Once 2 valves for the same cylinder are done, we install those valves back in the head and carry out a fluid test to make sure the valves are sealing correctly. If the fluid leaks out in the intake and exhaust ports then the valves are not sealing:
Once that is done accross the entire cylinder head, new valve stem seals are installed:
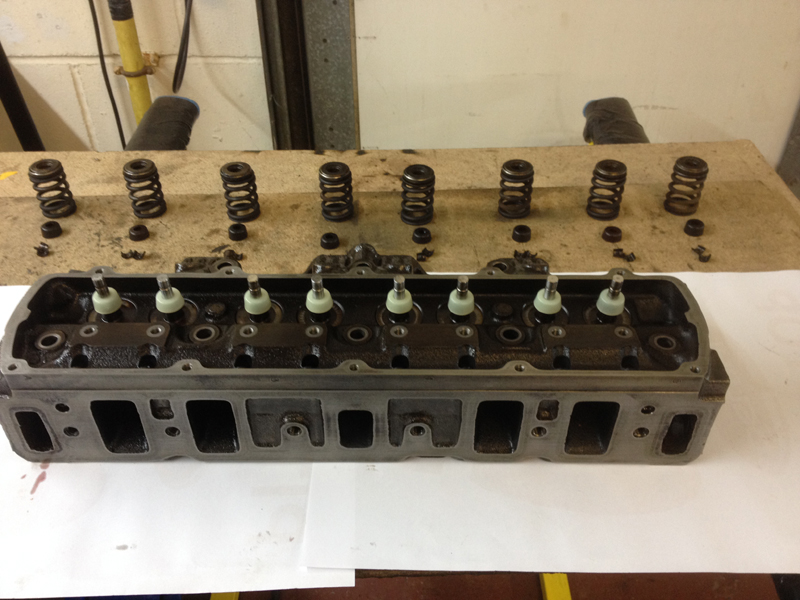
And then the valves fitted back in for the last time:
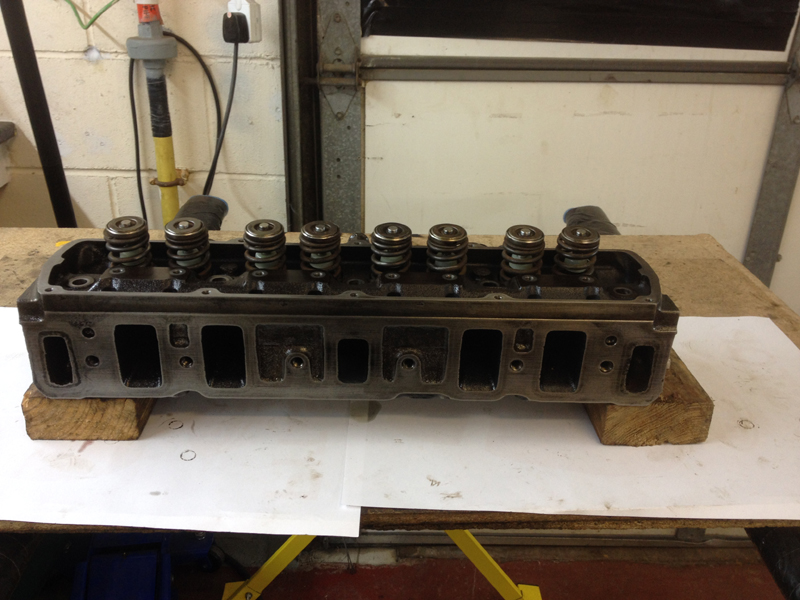
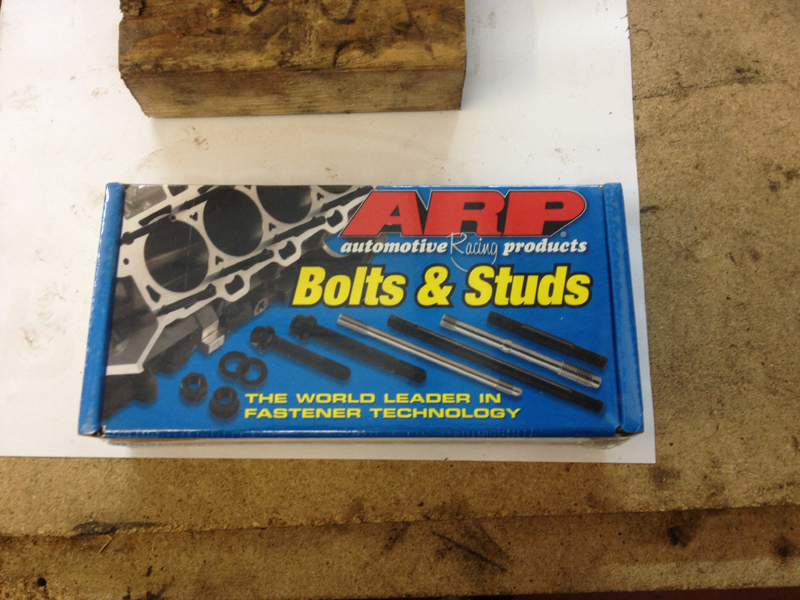
As with all our engine builds, we use ARP cylinder heads bolts. Simply put, there the best you can get and can be re-used again and again should the cylinder head ever need to be removed in the future:
Next the new head gasket is placed on the cylinder head:
And then the cylinder head is installed and torqued down:
The same prcedure is carried out on the other side:
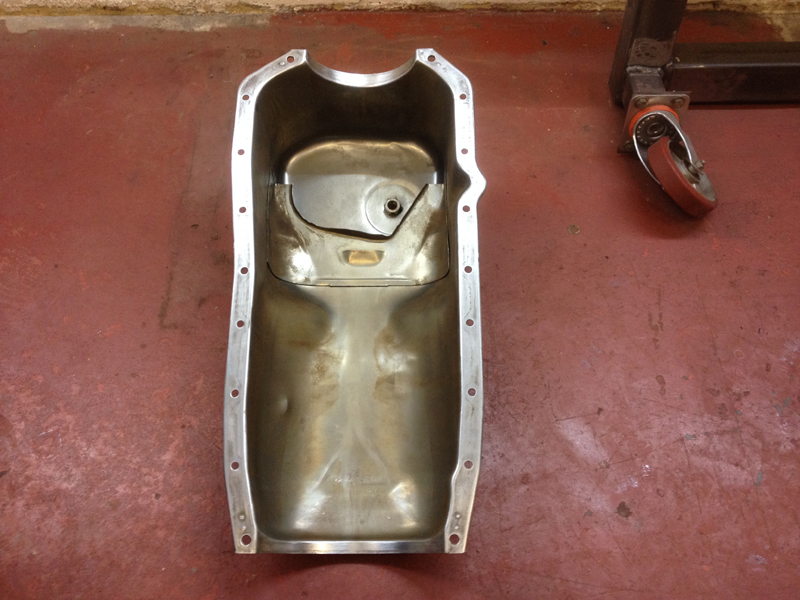
Next the sump is cleaned inside and out and any dents that can be removed are removed:
Then the sump is installed:
Next we install the camshaft followers, these are the old ones and are given a thorough clean. Beacuase they are flat tappet they must go back in the exaxt same hole they came out of, its the only way you can re-use them:
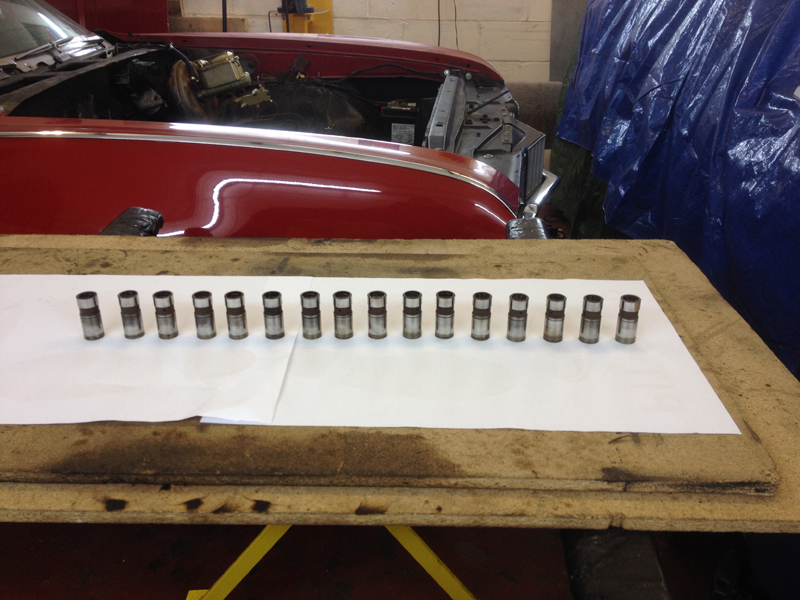
The pushrod on the left is how all 16 pushrods looked when they were removed, the one on the right is after we cleaned it up:

Once all 16 pushrods were cleaned we installed them. Again in the same hole they originaly came from:
Next the rockers are cleaned, fitted and set up, again, each one from its original position:
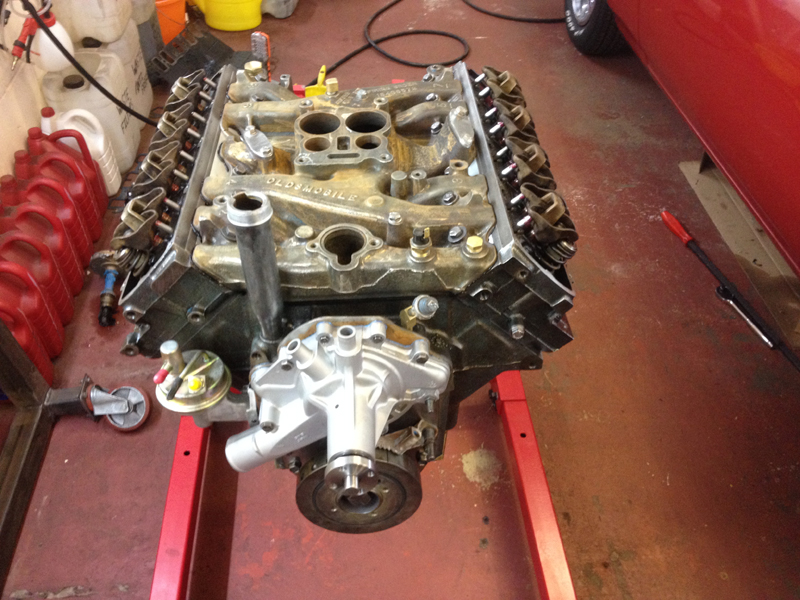
Next the intake manifold is cleaned and installed with all new gaskets:
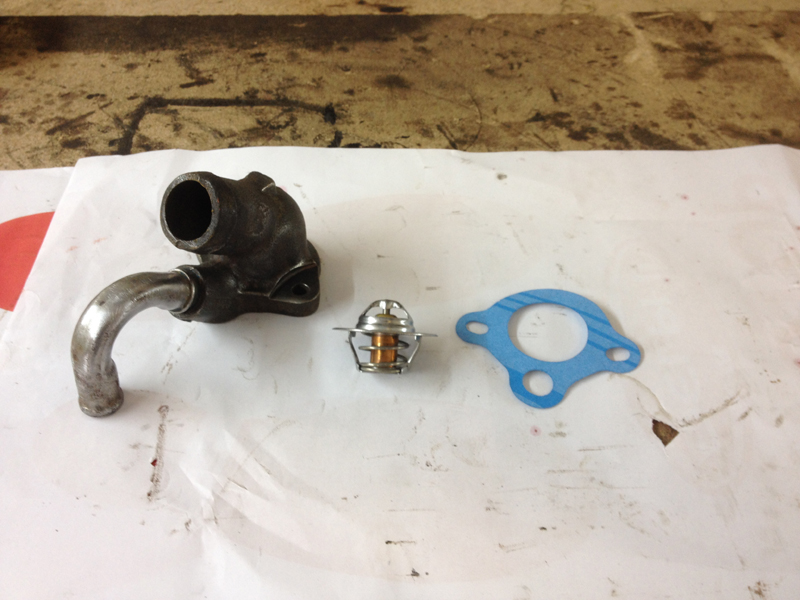
When we took the engine appart we found that the thermostat was actualy missing. So rather than say replace, we actualy installed one aswell as cleaning the housing and fitting a new gasket:
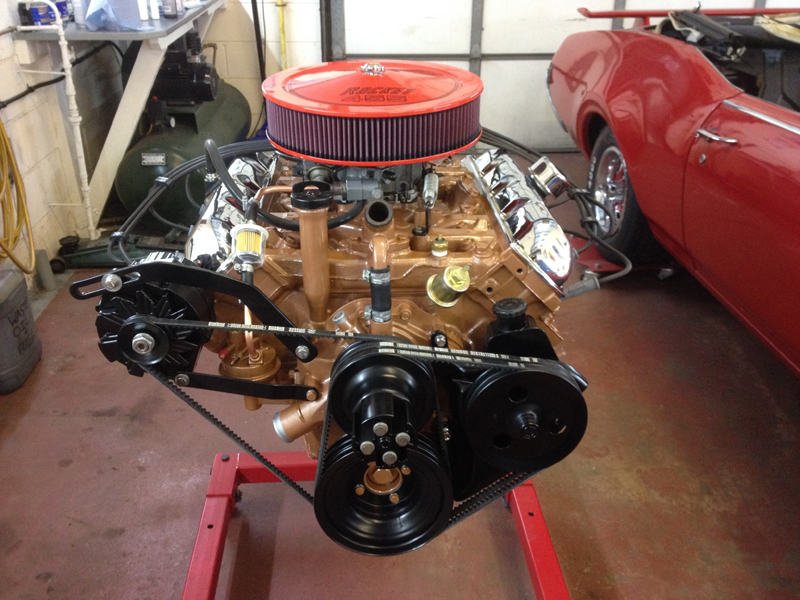
The next step for the engine is to paint it. The rocker covers are going to be chrome plated but for now are tempery installed along with the old oil pressure sender unit and coolant temperture gauge sender unit. The other holes on the engine are all covered with masking tape too:
To paint the engine we use KBS Coating's Motor Coater kit. The engine is going back to bronze which is what would have been the correct colour for a 1968 car:
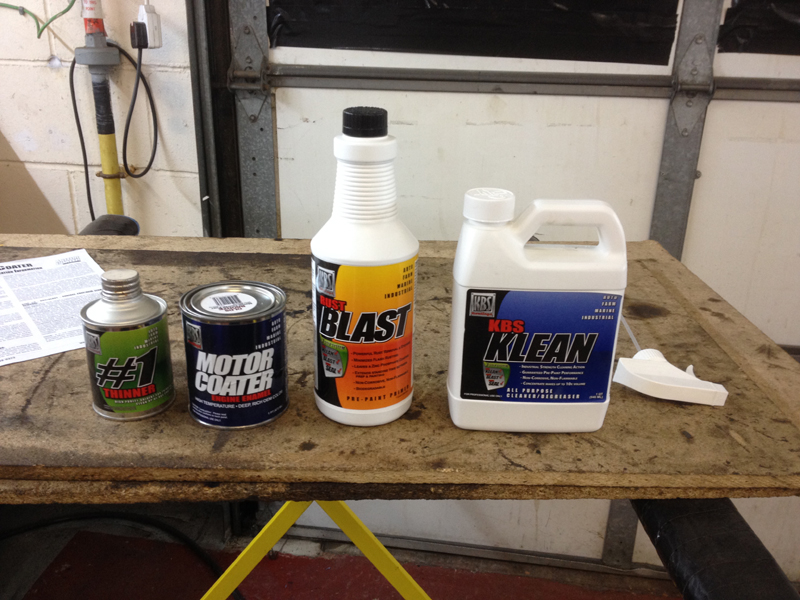
After applying the cleaning products supplied in the kit and then washing them off and drying the engine, the engine is left with a residue on it. This is to help seal the surfaces and help the paint stick:
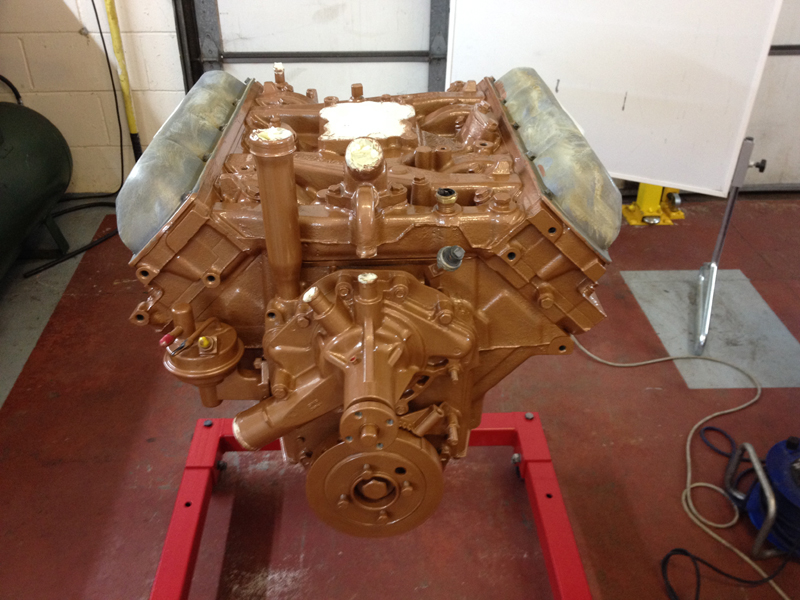
Next everything is masked up again and the paint is applied:
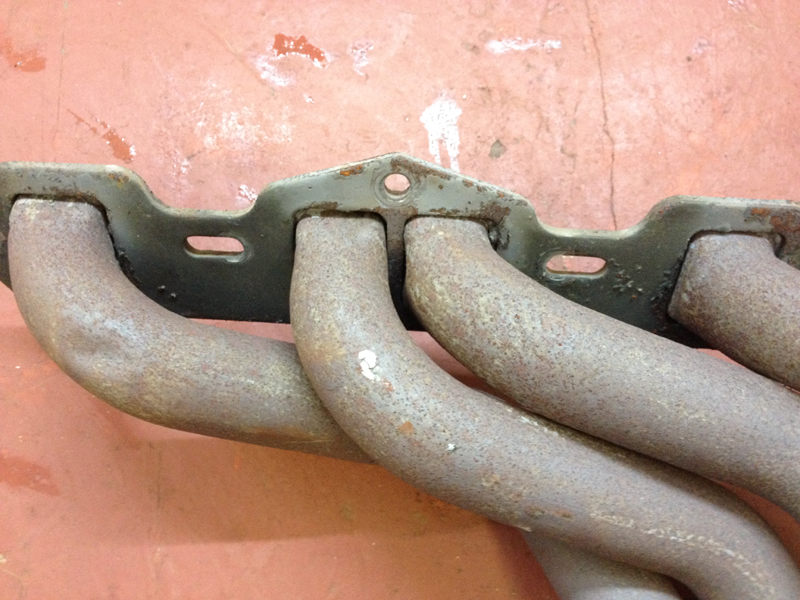
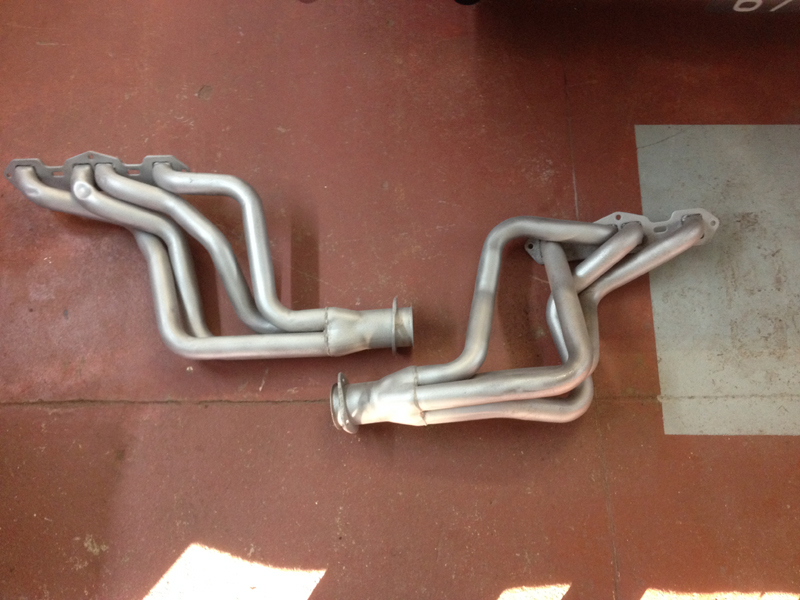
Both exhaust manifold were very rusty and we didn't want to fit them back on the car as they were:
So we had them sandblasted:
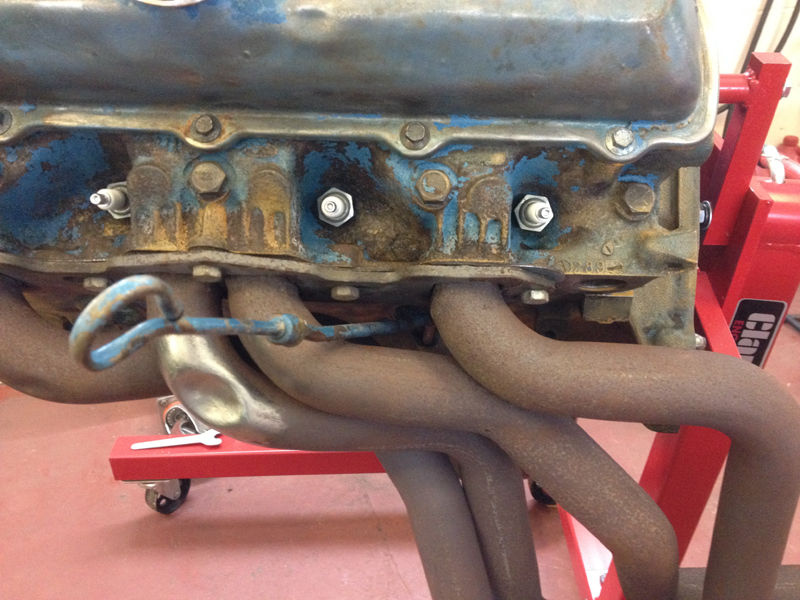
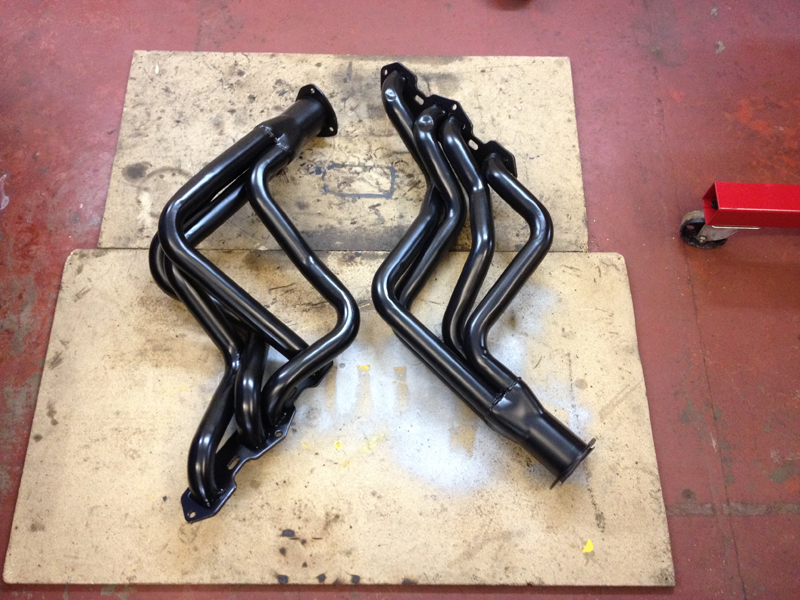
And then painted them in a very high temperature paint designed specifically for exhaust manifolds:
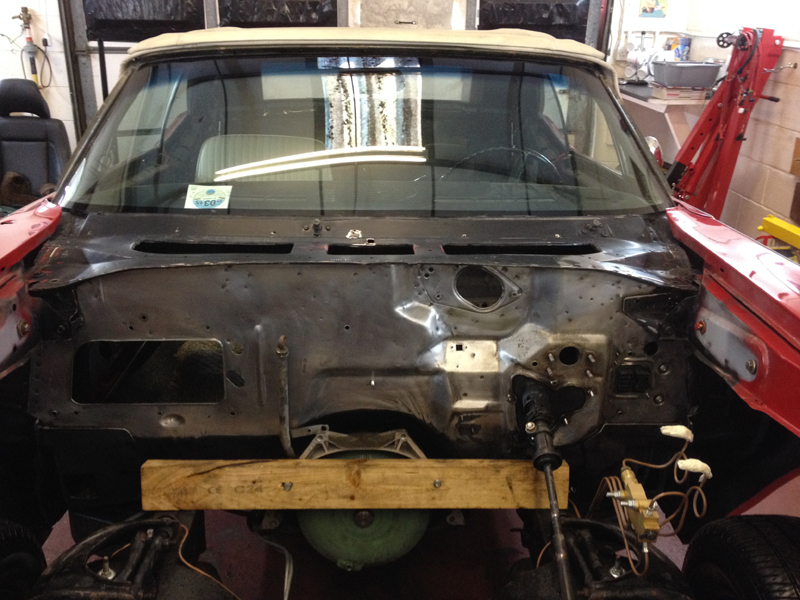
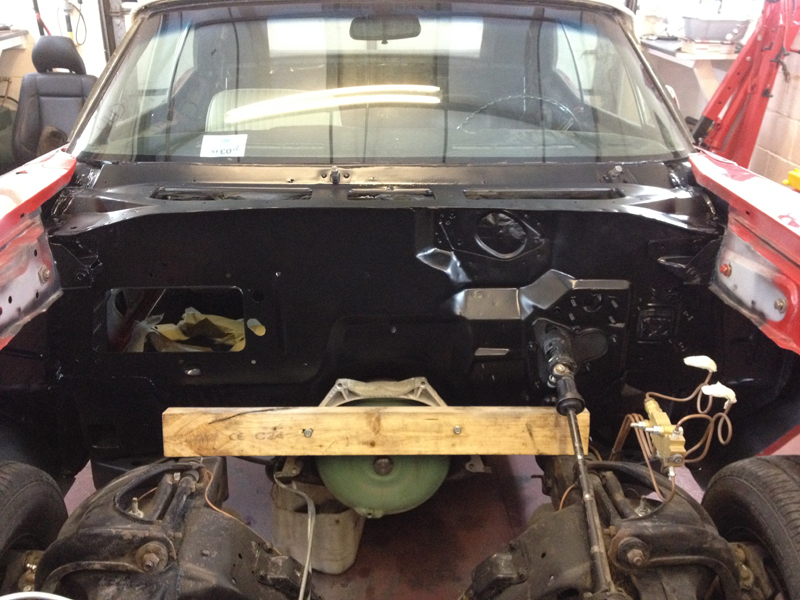
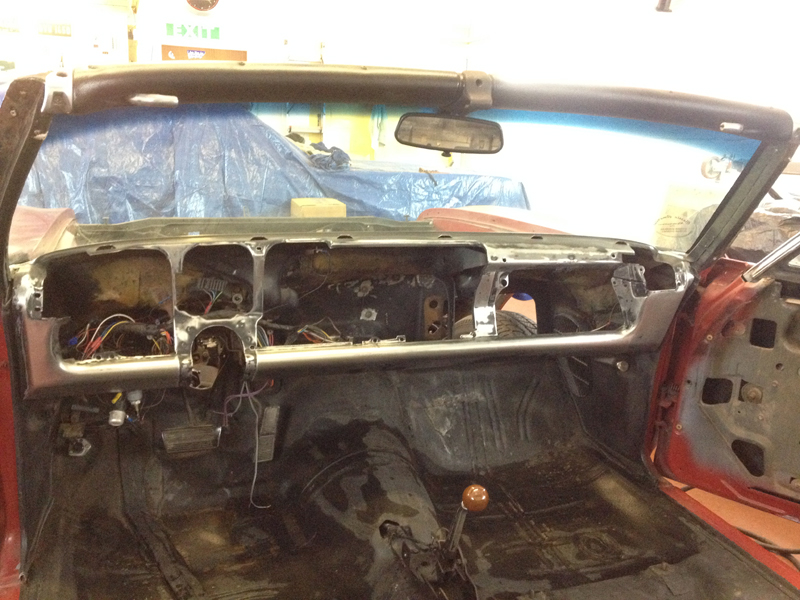
Before the engine could go back in the car we also wanted to tidy up the engine bay. First step was to remove everything attached to the bulkhead and scuttle panel and the wheel housings:
The holes surrounded by clean metal are no longer needed and need to be welded up:
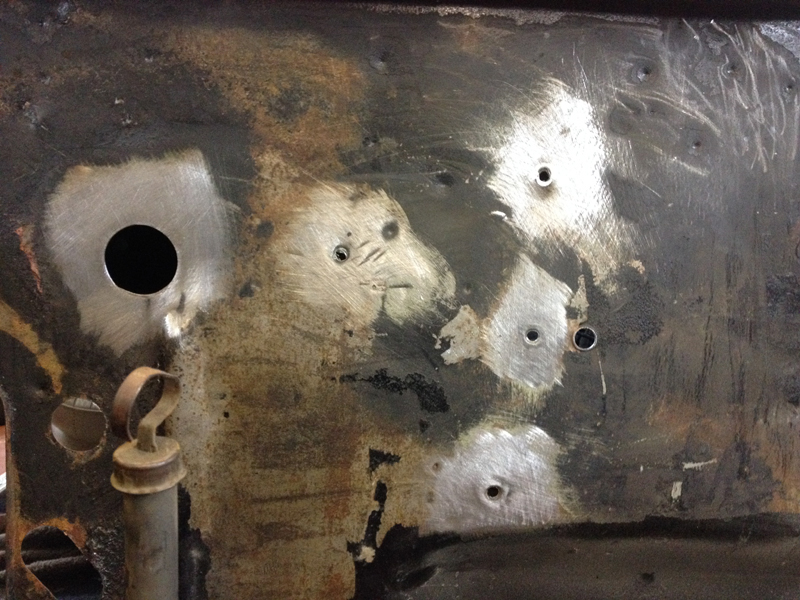
This is the same spot after the holes are welded up and the welds ground smooth:

Then the dirty old flakey paint is taken of the rest of the bulkhead:
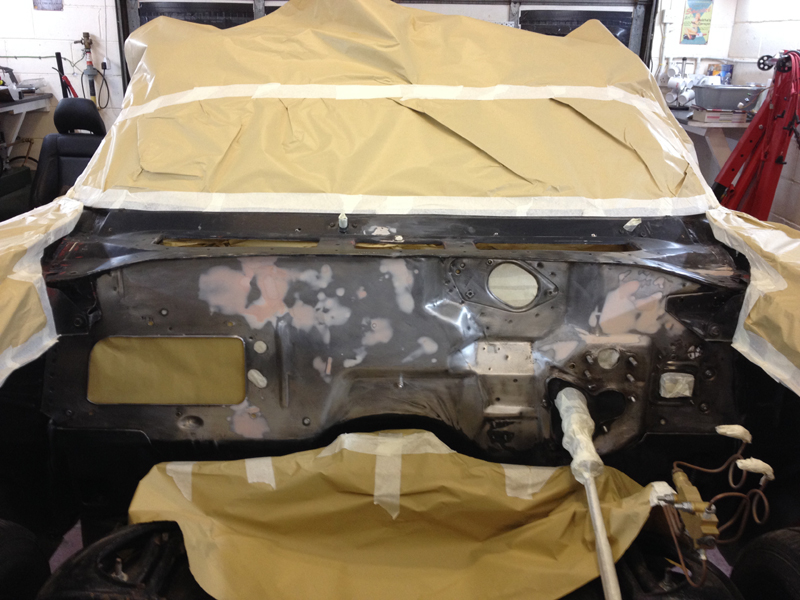
The car was then rolled outside, the entire engine bay de-greased and washed, then rolled back inside, completly dried, a small ammount of body filler was applied to areas of the bulkhead that needed it to make it smooth and flat, then after the filler was rubbed down, everything was cleaned and the car was masked up ready to start painting:
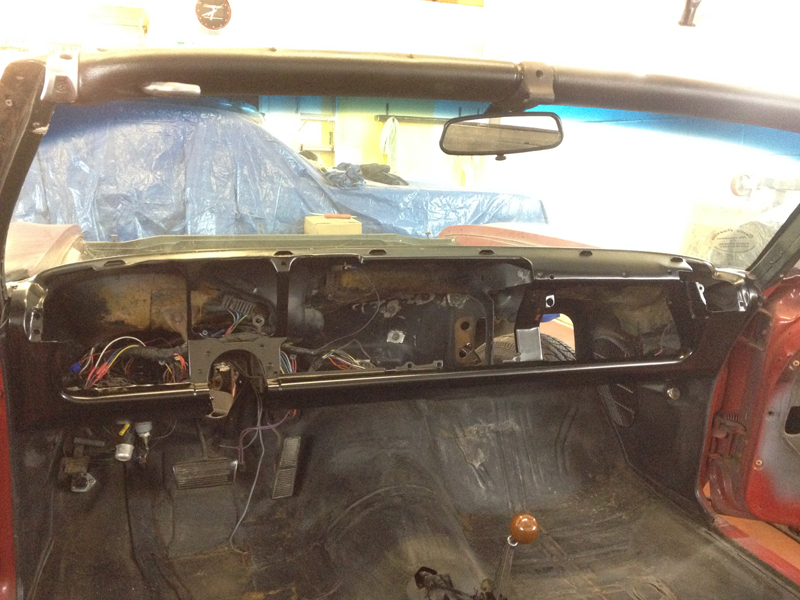
First it was painted with etch primer and then a coat of high build primer:
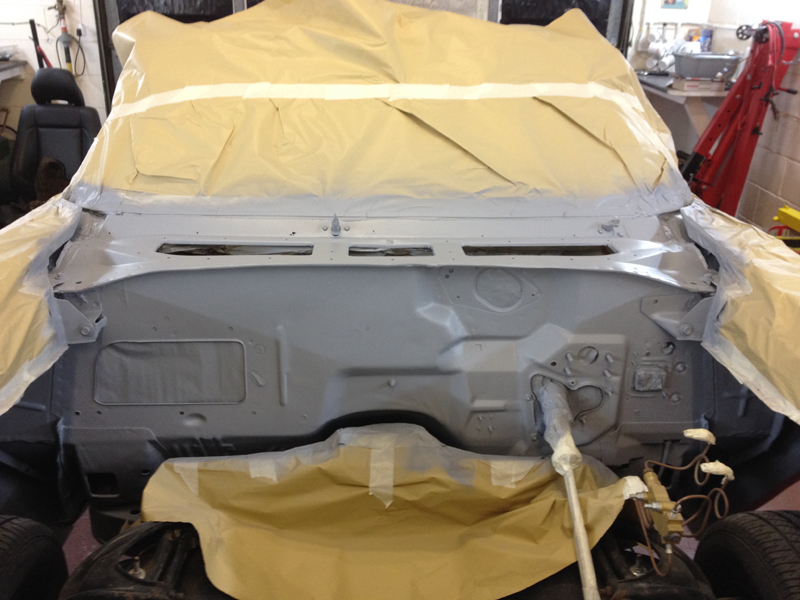
And then finished with satin black as per the original spec. The final result is a much tider and cleaner looking engine bay ready for the engine to sit back in:
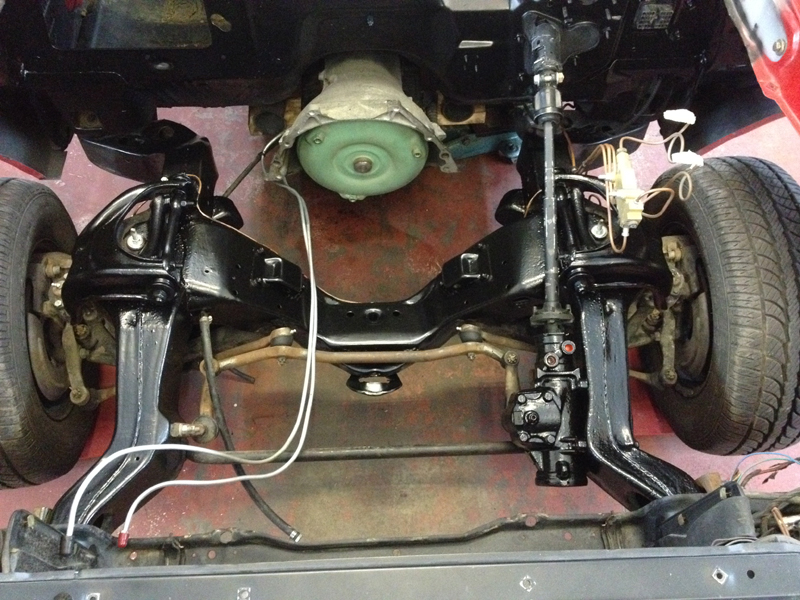
Next we decided to tidy up the chassis rails in the engine bay a little. This picture was taken after they were cleaned and de-greased:
And this is after a couple of coats of satin black paint:
Whilst waiting for some of the engine parts to arrive so that we can install the engine back in the car we decided to start on the interior. First the old interior was completly stripped from the car and sent of to an upholstry specialist to be completly retrimmed with the exception of the front seats. The owner of the car wanted seats with a little more comfort and saftey, so he picked up a pair of front seats from a Volvo C70, which looked just like this:
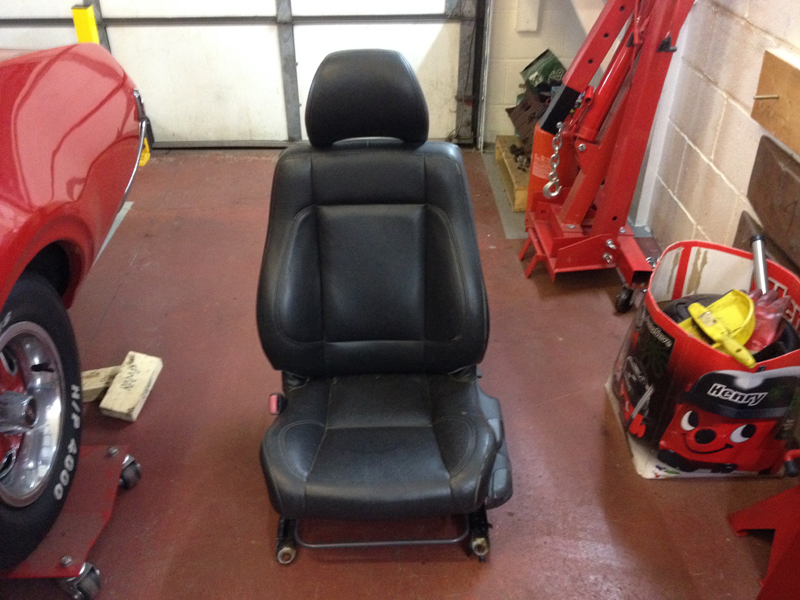
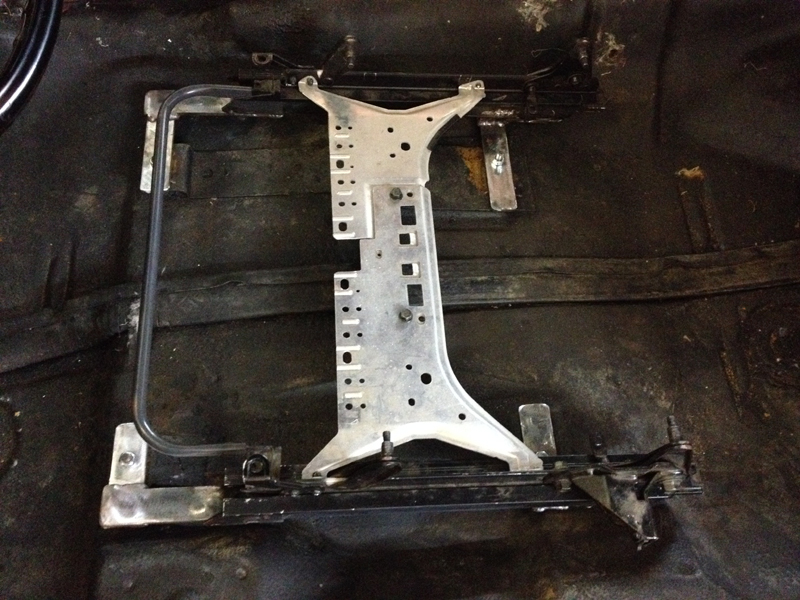
The problem was the mouting points on the seats were completly in the wrong place and angles for the cars floor pan. So we removed the seast frames from the seats, cut the original mounting brackets off them, fabricated new brackets and welded them to the frames so that the seats could be mounted in the car in onto the original seat mounting points:
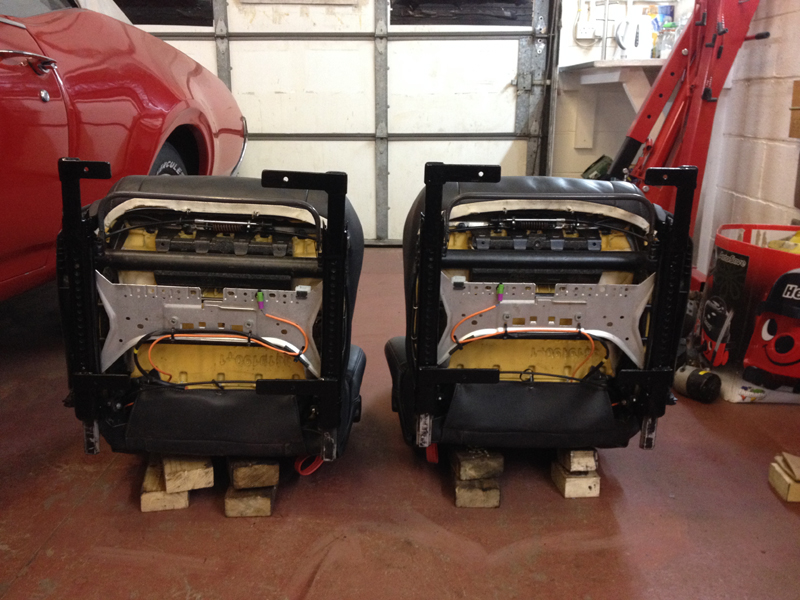
After both sides were complete, we attached the frames back onto the seats and then re-painted them:
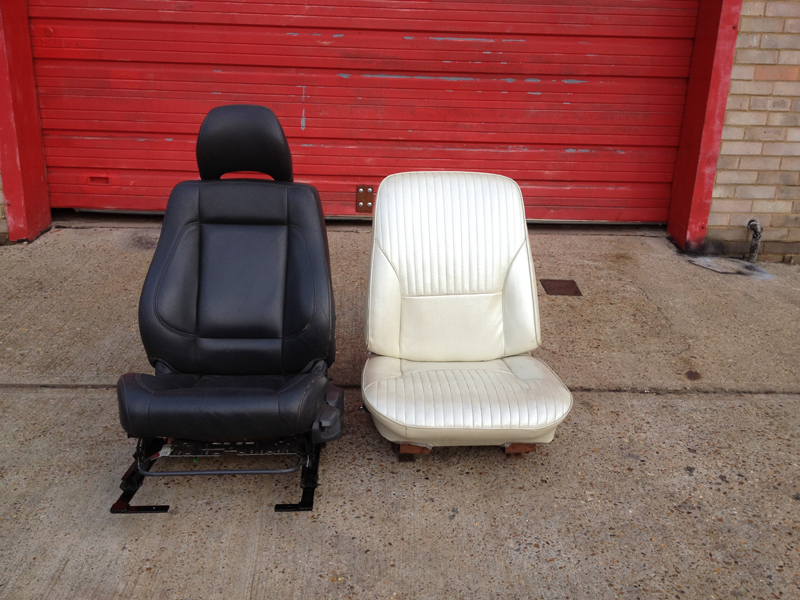
The new front seats then went off to the upholstry place to be retrimmed with the rest of the cars interior. Here is a shot of the old and new seats side by side:
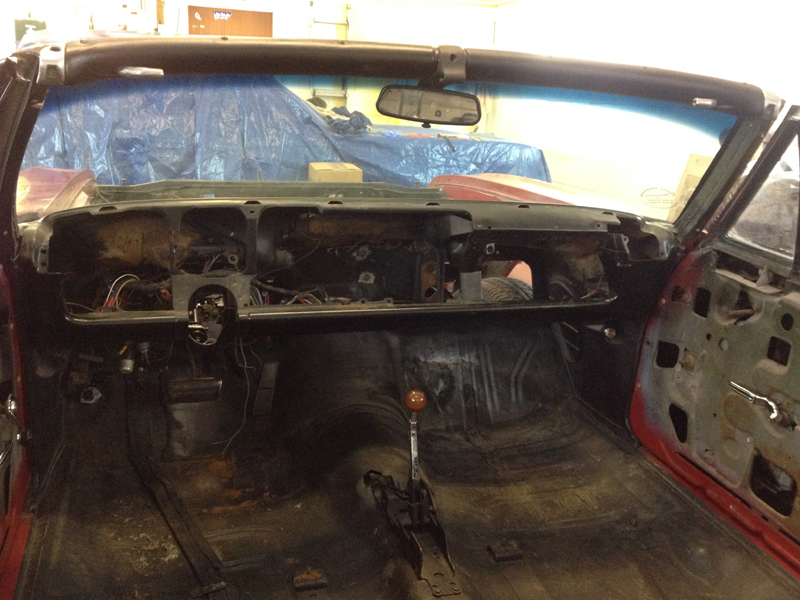
With the cars interior stripped and out the way we could re-paint the metal part of the dashboard. The paint wasn't to bad but there were some rusty spots and some areas had been brush painted in the past to cover up scratches:
After spending some time rubbing down the old paint it was ready to have fresh paint applied to it:
And here it is now with a fresh coat of paint in the original colour:
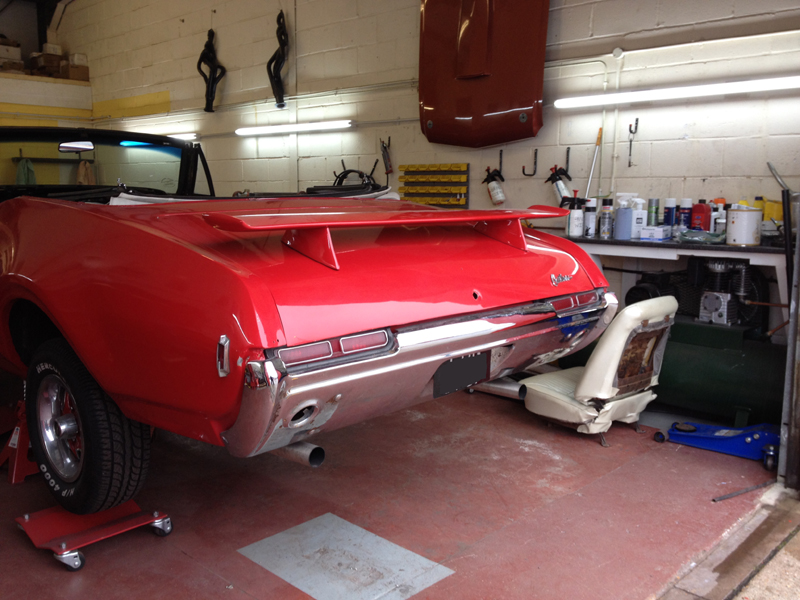
Whilst waiting for the engine brackets to come back from the powder coaters we decided to tackle a few other jobs on the car. The owner of the car wanted us to fit a rear spoiler from an Oldsmobile 442. The Cutlass was never optioned with a factory spoiler, and even though the 2 cars are similar in style, the boot lid of the Cutlass has different contours to the 442 boot lid. Never the less, we decided to make the new spoiler fit the car without having to re-shape the spoiler or the boot lid itself. The first job was the measuring of the boot lid, we mounted the spoiler square to the boot lid itself taking measurements from only the boot lid. We placed masking tape on the boot lid to protect the paintwork and allow us to make notes on the tape itself:
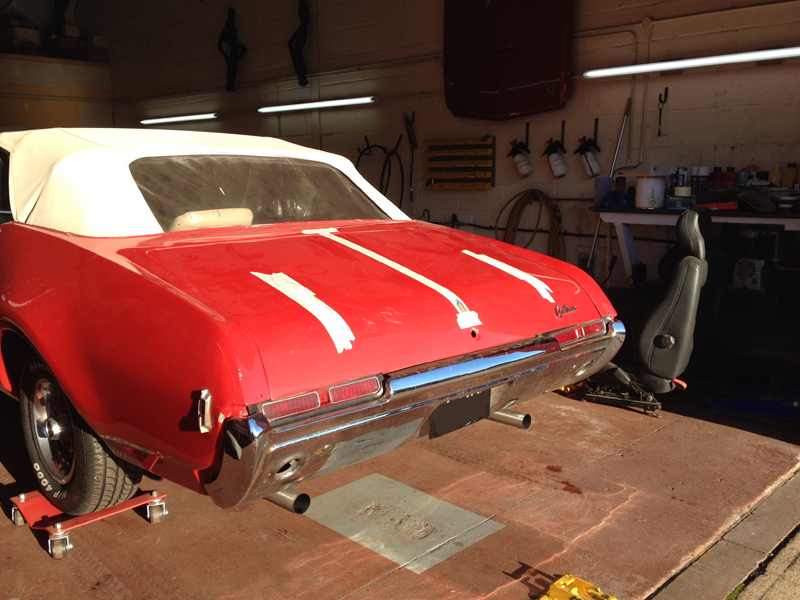
Once we had marked out were the spoiler was going to sit, we carefully drilled holes into the bootlid for the spoiler to mount throgh and test fitted it onto the car to see how it looked:
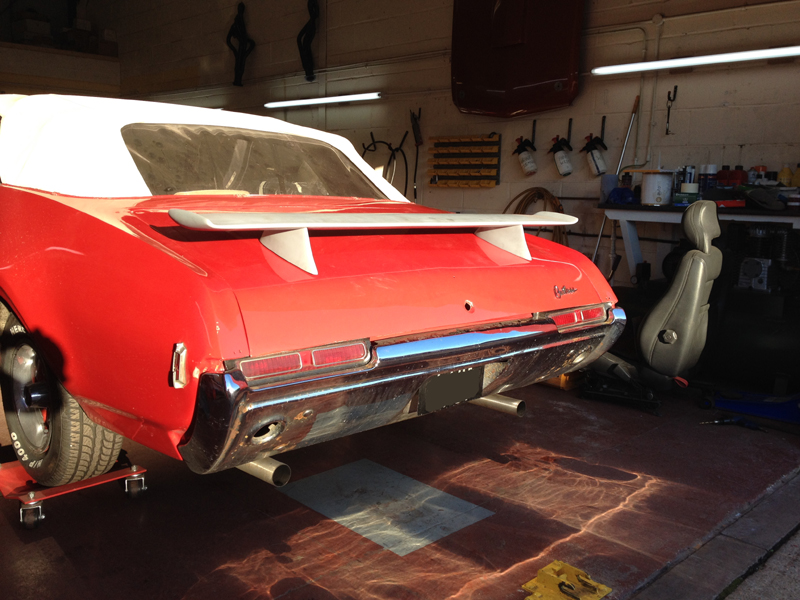
Happy with the result, the spoiler was ready for paint. Being an aftermarket fibreglass item, it needed quite a bit of work before it could be painted, we found serveral small cracks in the fibreglass under the jel coat that needed to be repaired. Once repaired it was prepped and painted:
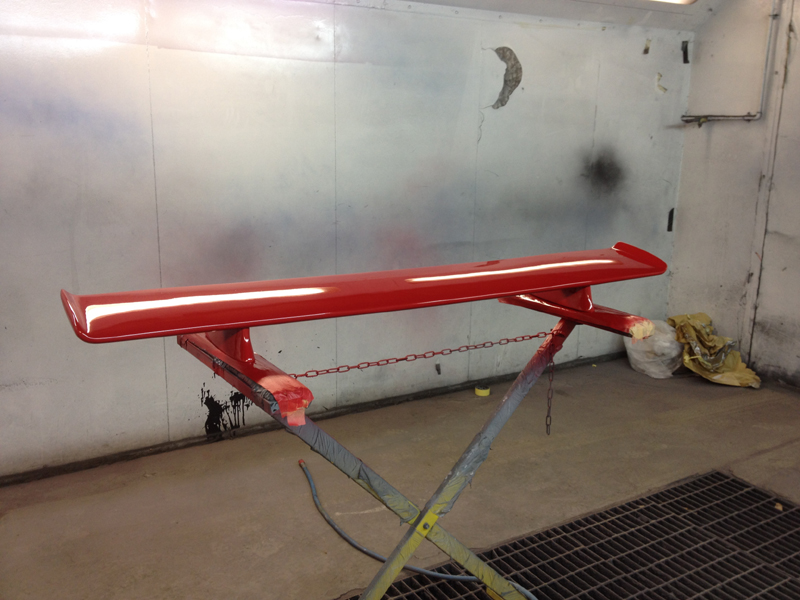
And once painted it was ready to put back onto the car for the final time:
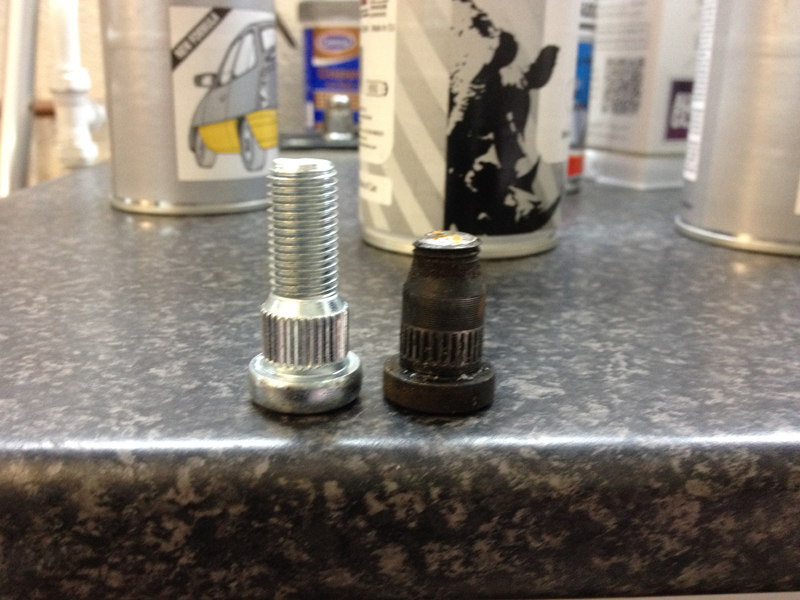
When the car came into our workshop, the front of the car was sitting so low it was actualy a struggle to make it through the door. One of the things the car's owner also mentioned was that it was so low that he couldn't actualy get it on his own driveway, so he asked us to investigate the problem. We found that the car was still sitting on its original front coil springs, which over time had sagged and weakend, also the springs were not up to the job of holding up the extra weight that was in the car with the larger, heavier engine and transmission. A previous owner had even tried to help the problem by using rubber spacers between the coils to stop the springs compressing as much but this was still no use. We ordered a set of custom made springs from an Oldsmobile parts specialist in the USA to this cars exact specs and installed them. The car sits noticablly higher now but not too high and still maintains a nice mean stance. We also installed new coil spring insulators which were actualy missing when the car came in. The original spring is on the left with the rubber spacers between the coils, the new on the right, the new spring is shorter in length but the spring material is of larger diameter and designed for this car with this engine set up:

When the car came in 1 of the front wheel nut studs was snapped so whilst working on the suspension we replaced the broken stud with a new one:
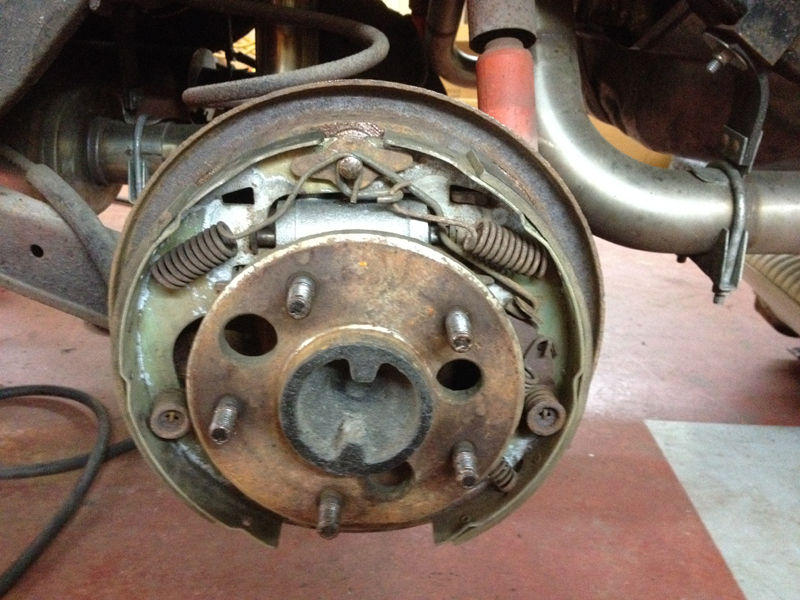
Whilst carrying out some inspection work on the car we discovered that both rear wheel cylinders were leaking brake fluid into the dust boots. The brakes also needed a good overhaul, here is the driver's side rear brake before:
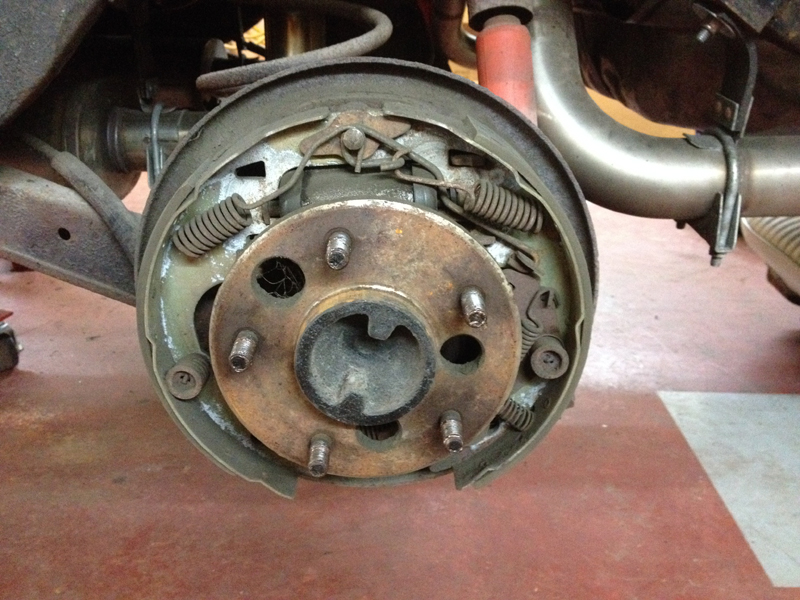
And after, we stripped the brake assembly completly down, cleaned everything up, re-greased all the componenets that need greasing, replaced the leaking wheel cylinder and re-adjusted the brakes:
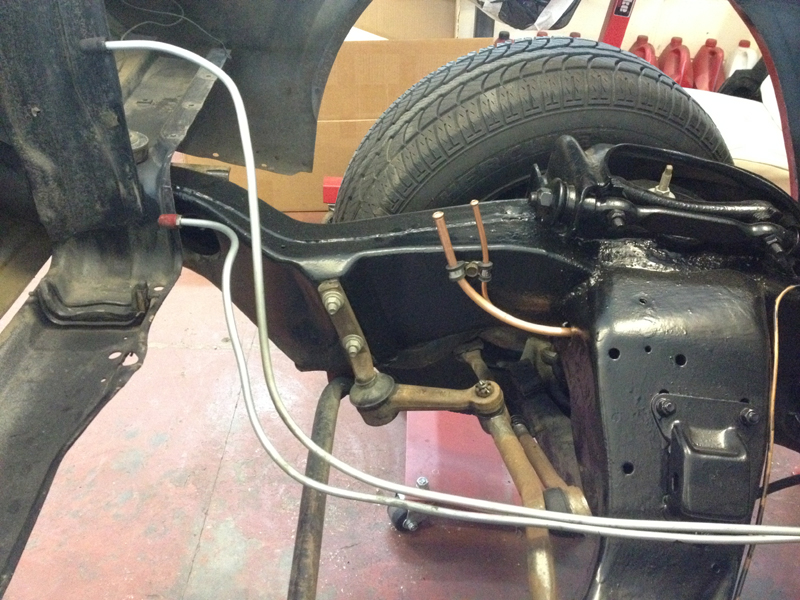
The fuel system on the car needed some work too. The fuel return line was completly missing from the car and blocked off on the fuel tank, the rubber line from the tank to the metal hardline was routed incorrectly and rubbing on the exhaust, the tank breather was missing and the rubber line at the front of the car was perished and had been made wrong. Here is how the fuel line in the engine bay looked before:

And here it is after. We made a complete new return line for the system, replaced the front section of the main line, replaced all the rubber fuel hoses, installed a breather back into the tank, re-routed the fuel lines at the rear of the car to clear the exhaust and replaced all the hose clips on the system:
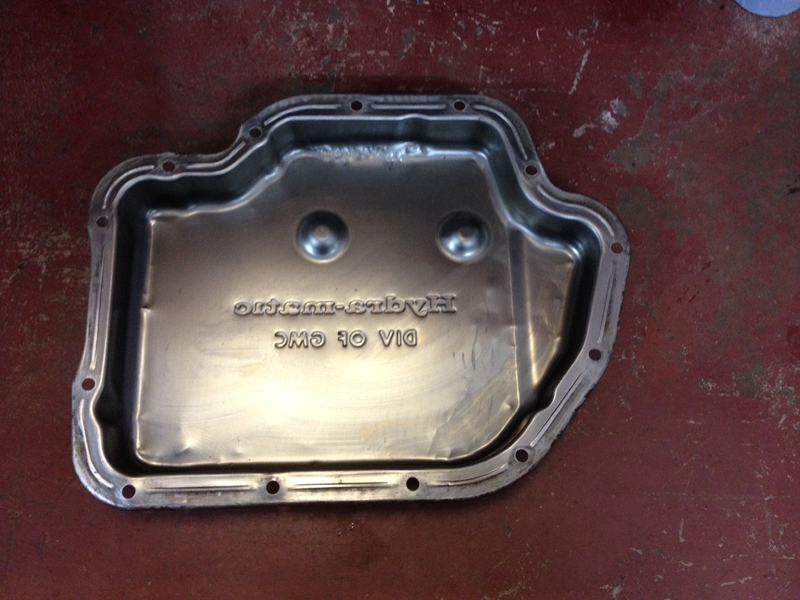
The car's transmission was leaking fluid from its sump gasket. We decided to removed the sump and replace the gasket, clean the inside of the sump out and replace the filter whilst the sump was off. Here is the inside of the transmission sump after we cleaned it up:
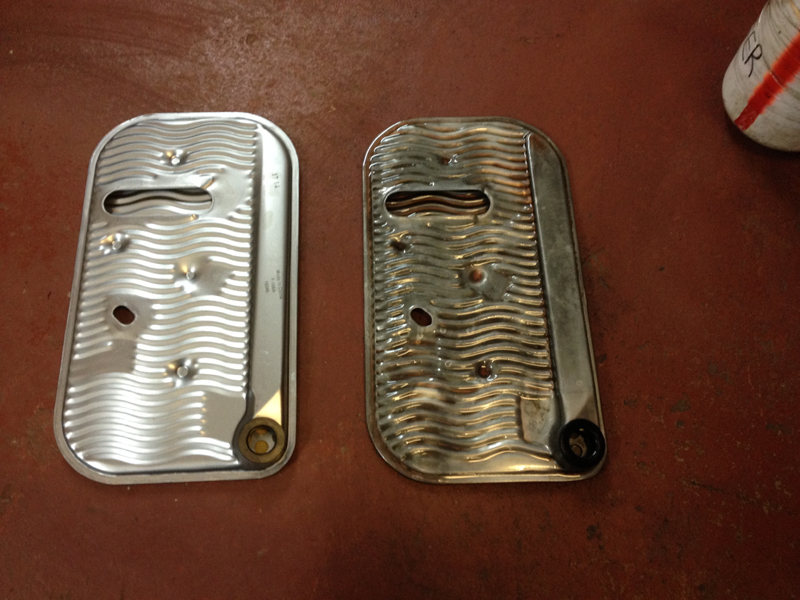
The new transmission filter is on the left and the old on the right:
The internals of the transmission itself looked to be in good order and very clean which is a good sign:
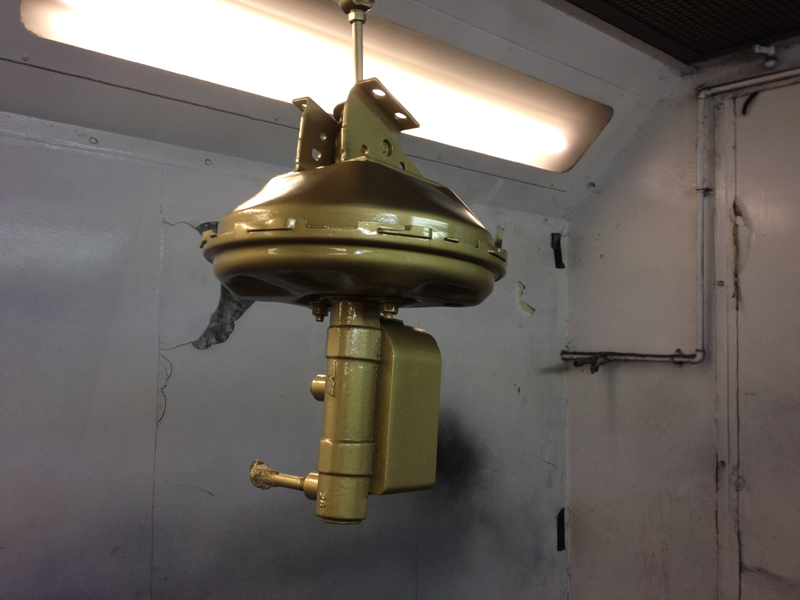
With the engine being detailed to a high standard and repainting the engine bay itself it was only right to detail some of the other parts that mount in the engine bay and to the engine. We started with the brake master assembly. The master cylinder was fairly new but the servo was looking quite sorry for itself, we gave it all a good clean and got it ready to be painted:

And then once ready painted it. Not only does it look good but it will also increase the service life of the parts by protecting them from the elements:
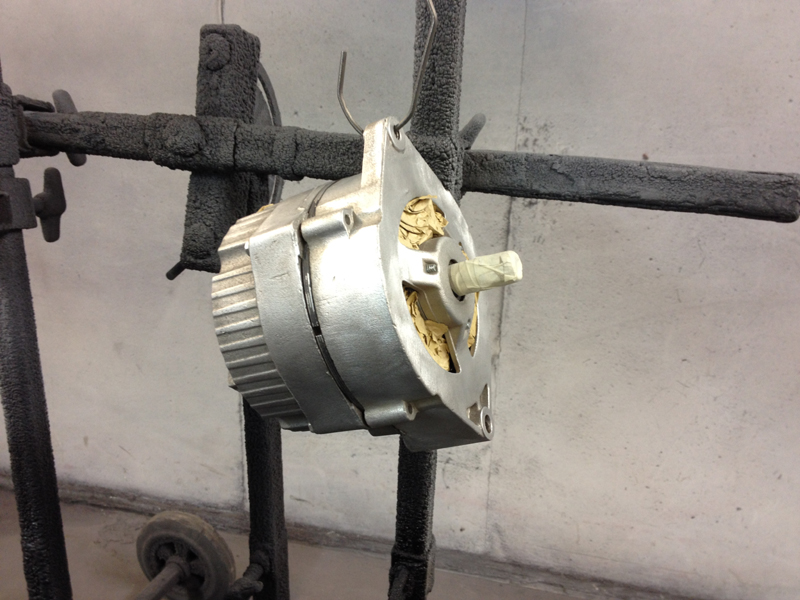
The distributor, windscreen wiper motor, alternator and power steering pump all received the same treatment:
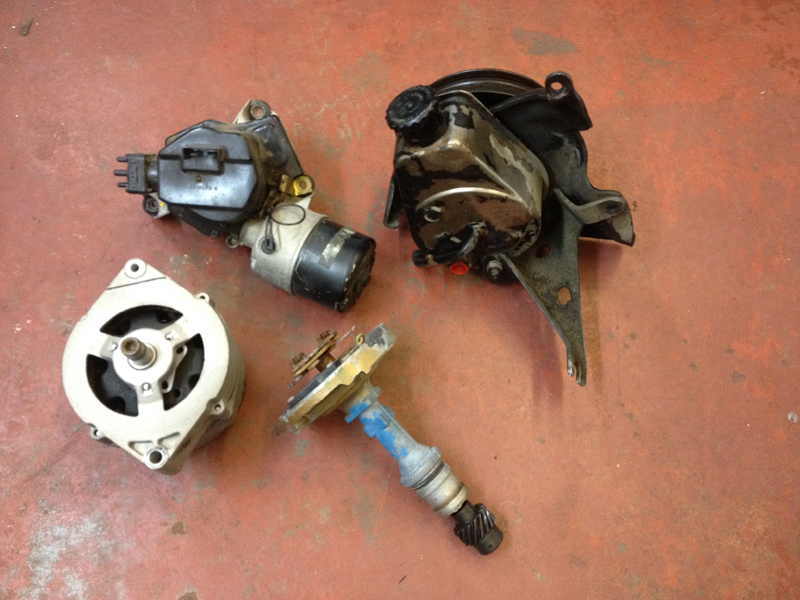
Here is the distributor and wiper motor after being cleaned and prepped:
And then painted:

The alternator before:
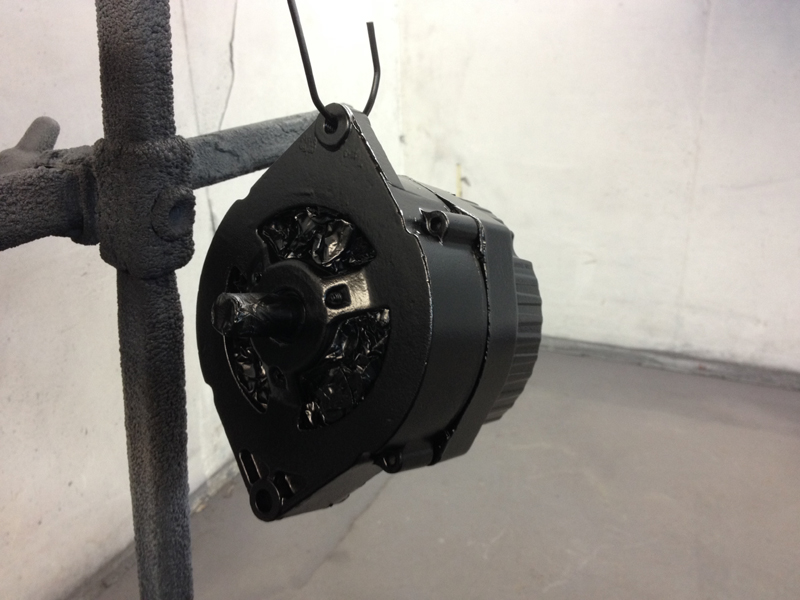
And after:
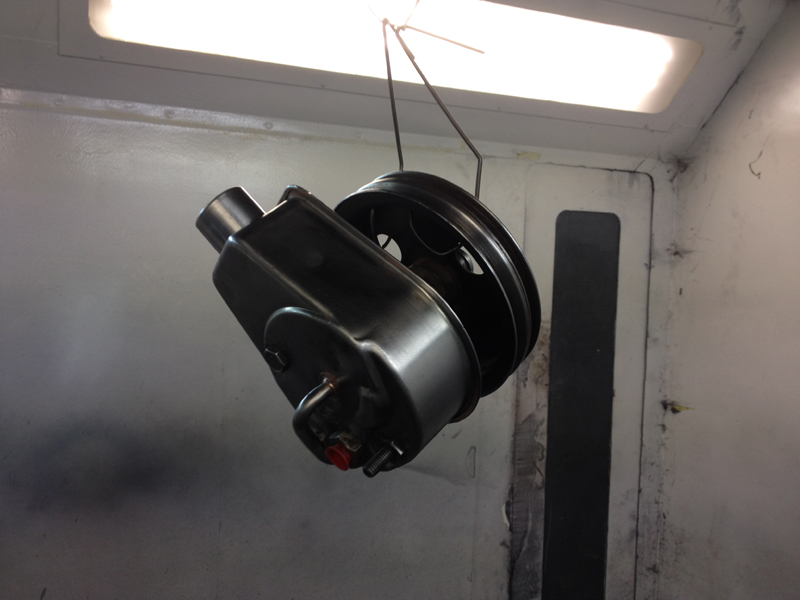
The power steering pump before:
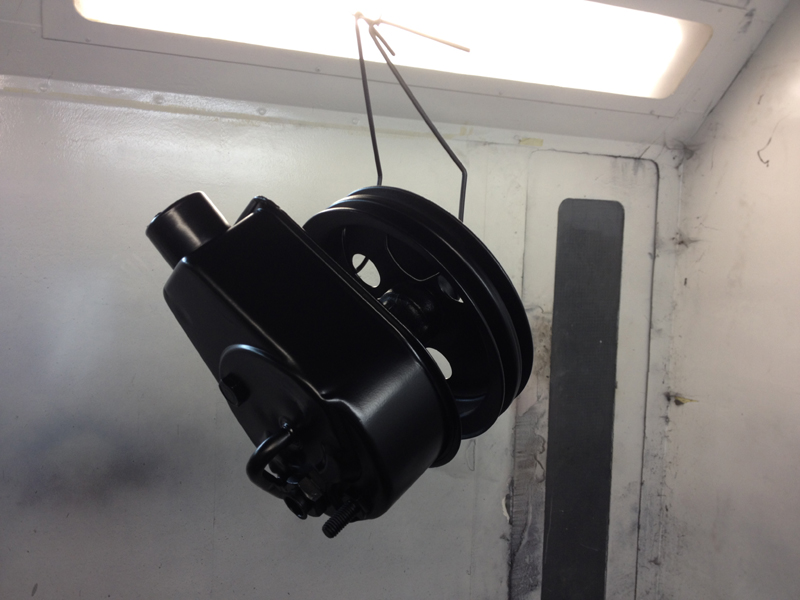
And after:
We had all the brackets, pulleys, the cooling fan and various other mountings for engine sent away to be powder coasted satin black, the air filter was powder coated in gloss red. We chose to have these items powder coated as the finish is much stronger and will last alot longer than a painted item and since these parts have no moving components or fragile gaskets in them its the best route to go down with them. We also had the rocker covers chrome plates, re-build the HEI distributor with a performance upgrade kit that replaces and upgrades all its interanals, replaced the spark plugs and HT leads, new drive belts, new sender units for the new gauges, all new hoses and clips. We removed the internal fuel filter from the carburettor and made new fuel lines from the pump to the carb as the original one was unsafe and also installed an inline fuel filter in the fuel line so that if the car has a fuel issue in the future it can easily be determined if the problem is before or after the fuel pump and the carburettor was also cleaned and de-greased before going back on the engine:
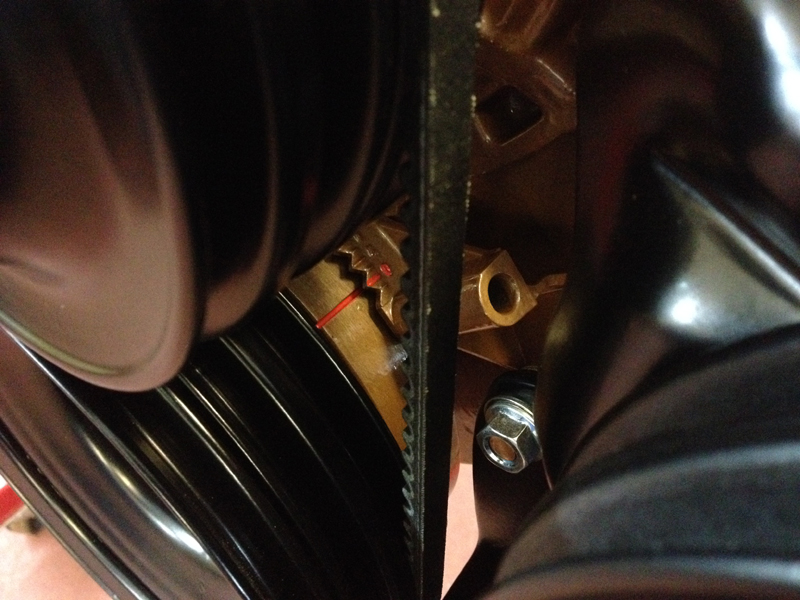
We detailed the timing mark on the crankshaft balancer and timing pointer to make setting the ignition timing and finding the engines TDC a bit easier:
Next we carefully installed the engine back in the car, re-fitted the cooling fan, power steering pump hoses, some of the new coolant hoses, made new rubber fuel hoses from the fuel pump to the fuel hard lines, installed the exhaust manifolds and re-connected them back up to the rest of the exhaust system. We also had the outer half of the heater box that sticks through into the engine bay sand blasted and powder coated, replaced all the gaskets on it and replaced the blower motor and fan with new items aswell to ensure even on the coldest of days this car can still be driven in comfort:
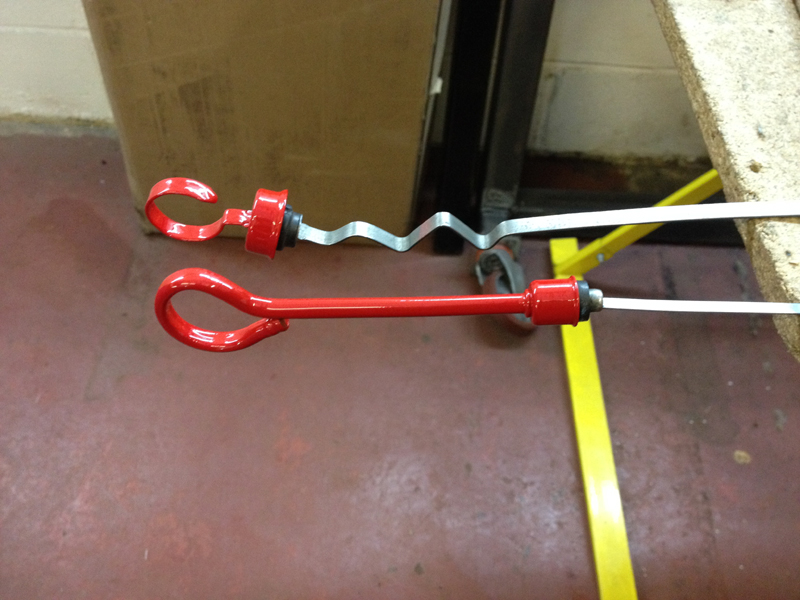
The engine oil and transmission oil dipsticks looked a little worse for wear so we cleaned them up, straightend them out and gave them a fresh coat of paint to tidy things up a bit:
When the car came in the heater pipes were not connected to the engine, well, they were missing completly as were the fittings on the engine for them. We had removed the heater box to repair the control cables and paint the inside of the bulkhead, the plan all along was to get the heating working again and when we looked inside the heater box there was obvious signs of the heater matrix leaking and in a bad way, so we replaced this with a new unit, cleaned the heater box out of all the dirt and dust and replaced the gaskets that seal against the bulkhead and then re-fitted the inner half of the heater box:
Another item that needed replacing was the choke coil, it was broken and not working at all and the electrical connector was actualy missing, the choke was actualy jammed open aswell causing the car to have trouble starting when cold, so we installed a new choke coil and correctly set up the choke mechanism:
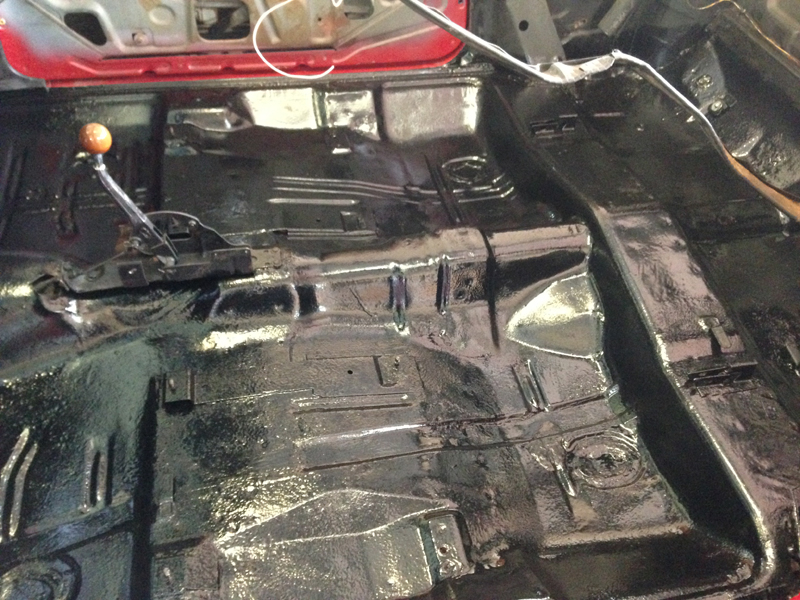
Whilst all the carpet was out the car it was a good idea to give the floor a fresh coat of paint to help protect it, the floor is in pretty good shape for a car of this age with only a couple of small previous welding repairs having been done, all we had to do was clean it up and paint it:
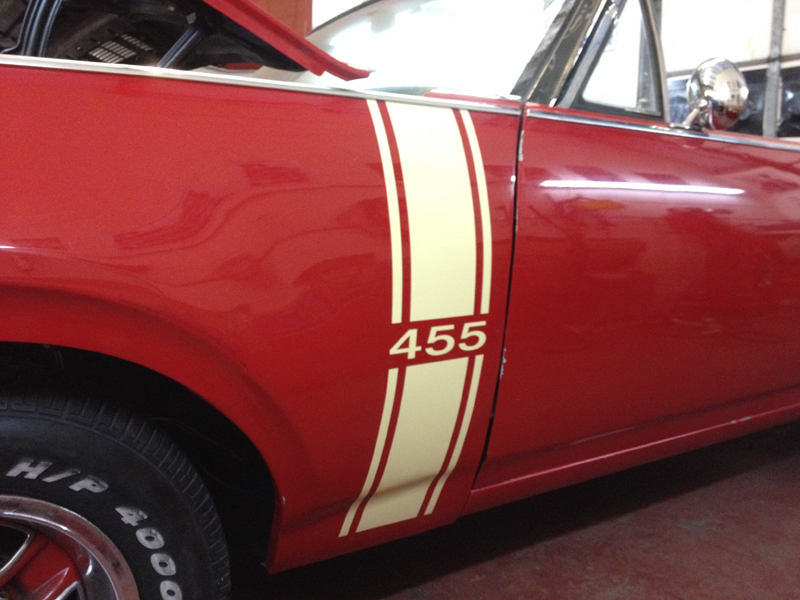
The customer liked the look of the racing stripes on the front wings of the Oldsmobile 442, so with that in mind he came up with the idea of something similar to go on his car, we had a car vinyl specialist make and install the stripes to give the car a slightly different look:
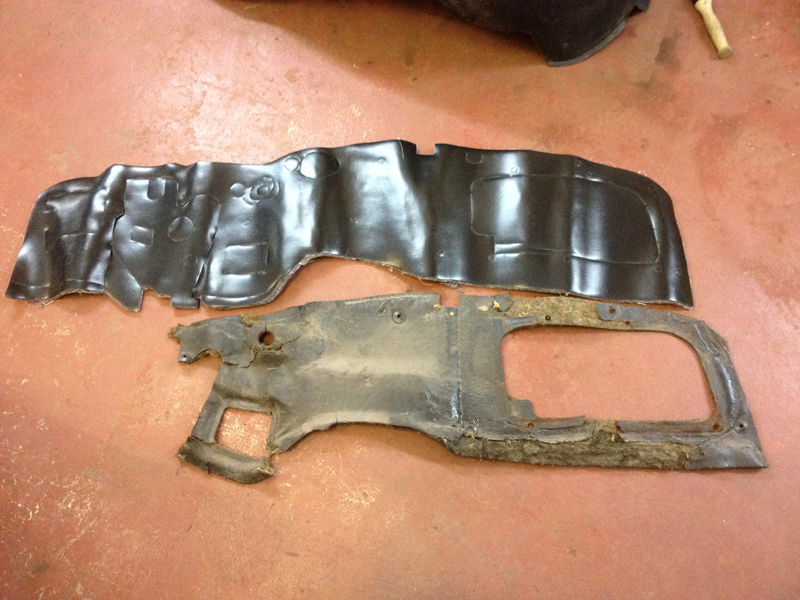
Once the paint on the floor had dried it was time to start fitting the interior back in the car, we started with a new insulation for the bulkhead, as you can see in this picture, the old one had seen better days!:
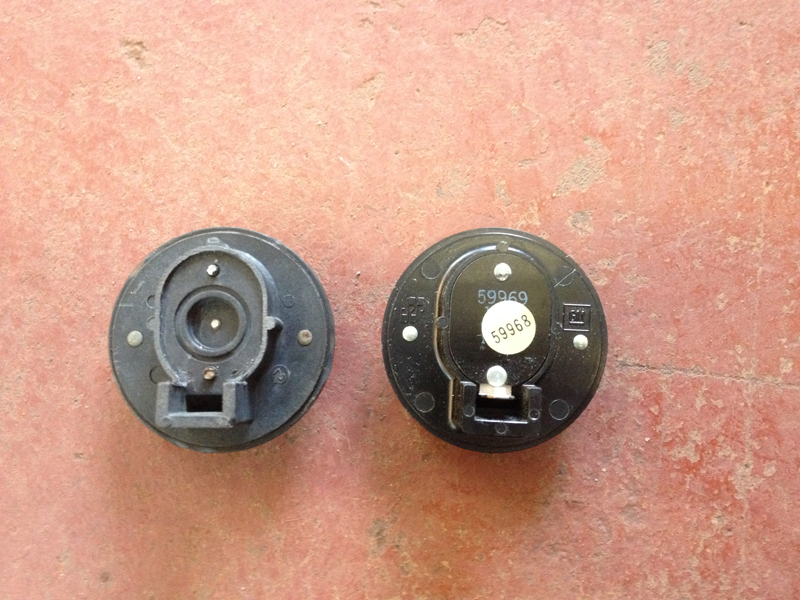
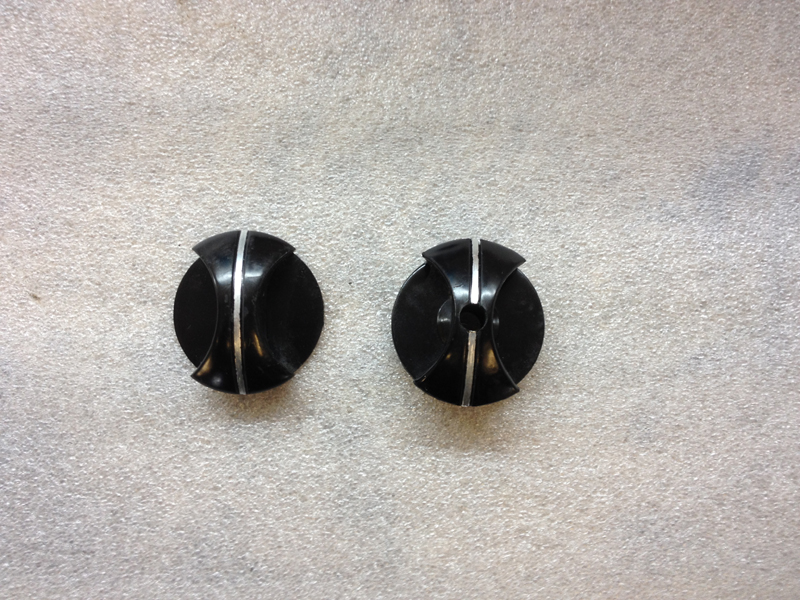
The headlamp and wiper switch knobs need to be re-detailed as they had faded over the years:
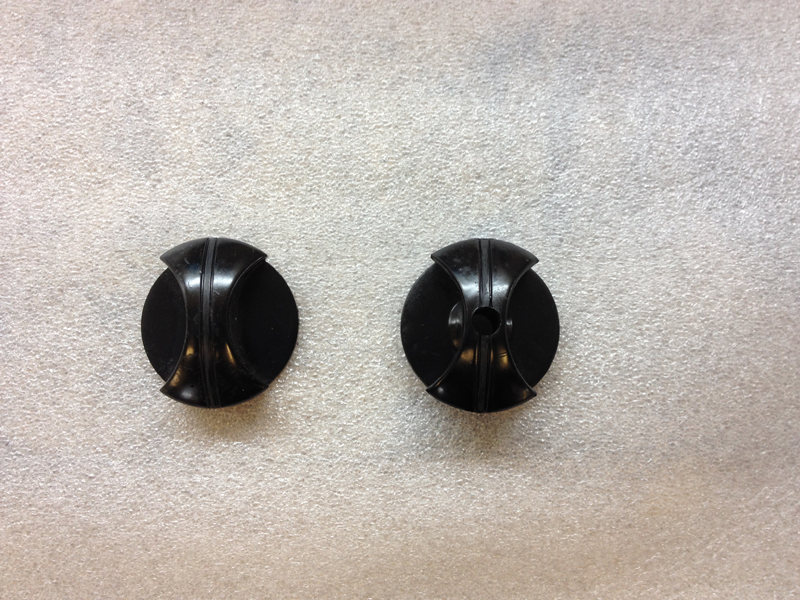
So we re-painted them. We also gave the same treatment to the parking brake release handle and the heater control knobs:
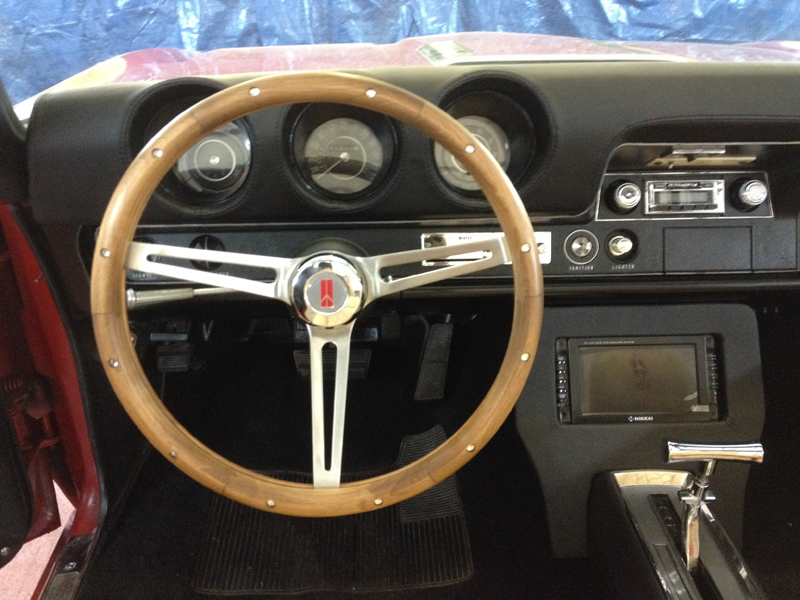
After repairing most of the wiring behind the dash, we could start re-installing the dash assembly. We upgraded the gauges to the rally pac set up and replaced the steering wheel with a custom item. The steering column itself was also stripped back to bare metal and re-painted to match the dash. The dash pad was custom re-trimmed in black leather along with the centre console. The customer also wanted a TV installed infront of the centre console so had the TV support made and and trimmed by the upholstry shop who trimmed the rest of the interior. We also sourced and installed the missing pieces of the dash such as the ash tray assembly and the upper steering column cover. We also replaced the gear shift knob and replaced the radio with a modern set up that allows extra inputs and outputs:
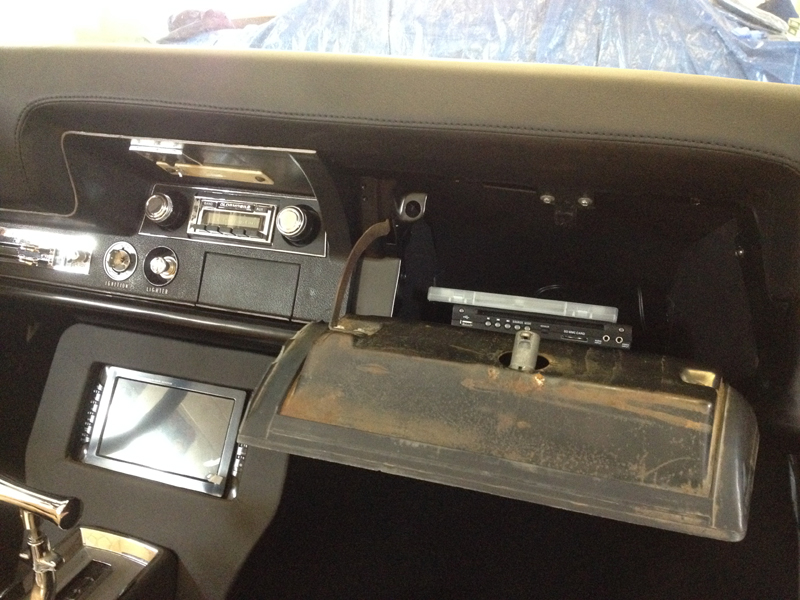
To go with the TV install the customer wanted a DVD player installed in the glove box. So we made some simple brackets that allowed the DVD player to mount to the glove box liner:
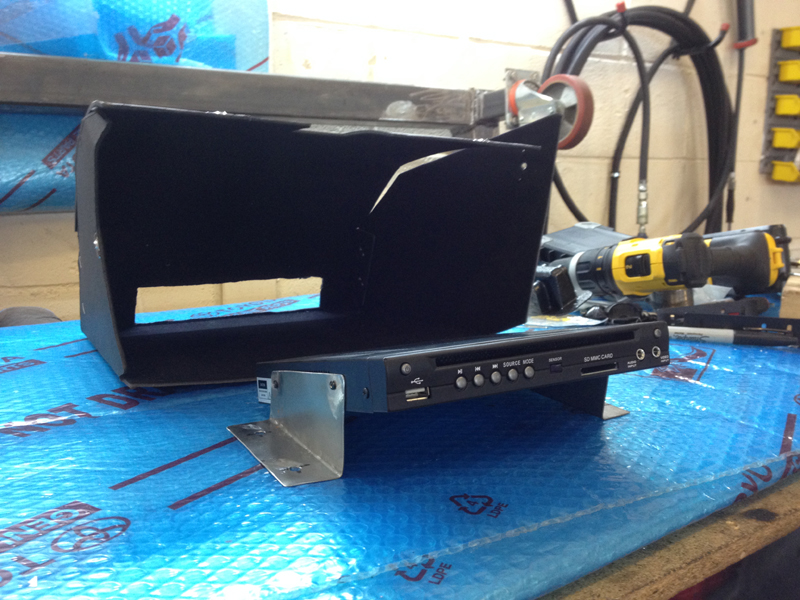
Then we instaled the glove box liner and DVD player. There is also an MP3 jack lead in the glove box to alow music to be played from and MP3 device through the cars speakers:
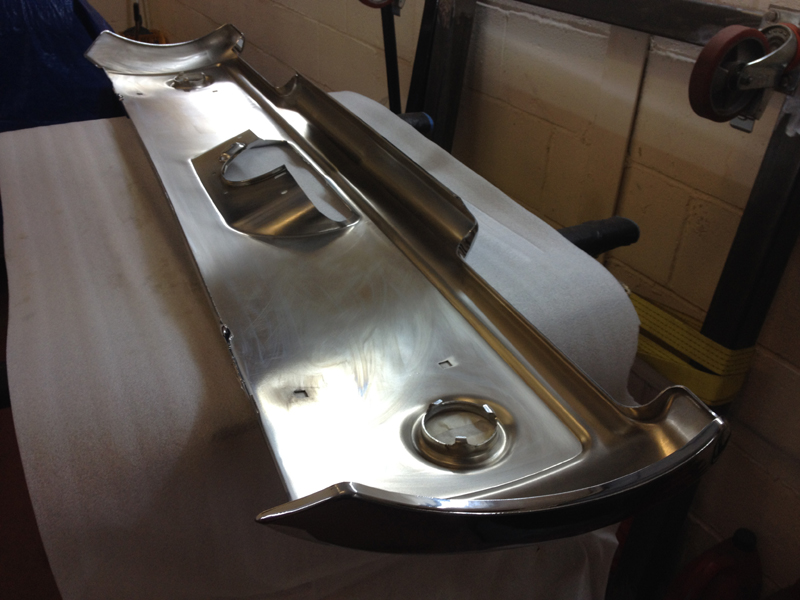
The rear bumper needed to be re-chromed and had some dents in it. It worked out actualy cheaper to replace the rear bumper with a brand new item then repair the original one. Before we install any new bumper we protect the insides of them to stop them rusting. This is how the inside looks straight out the box, no protection at all:
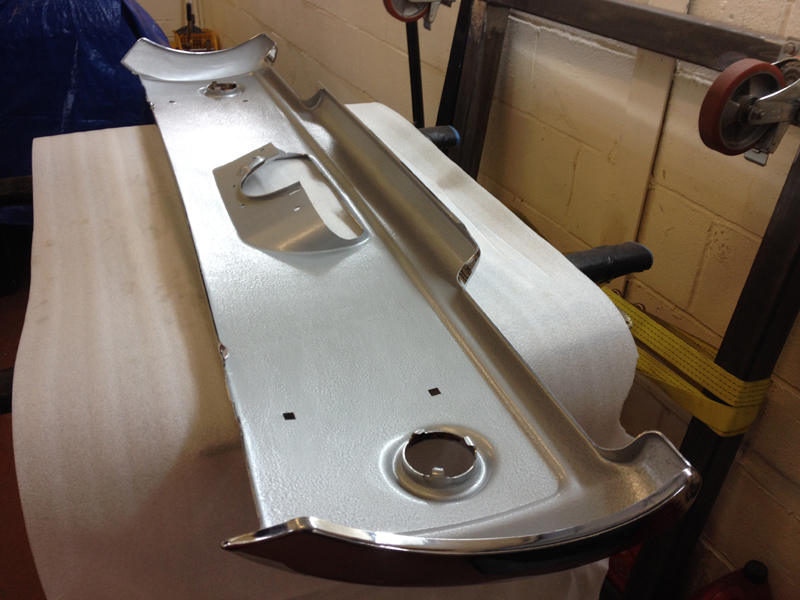
We gave the inside a clean and key up and give it 2 coats of hammerite silver hammer finish paint by brush. This protects the inside for many years to come:
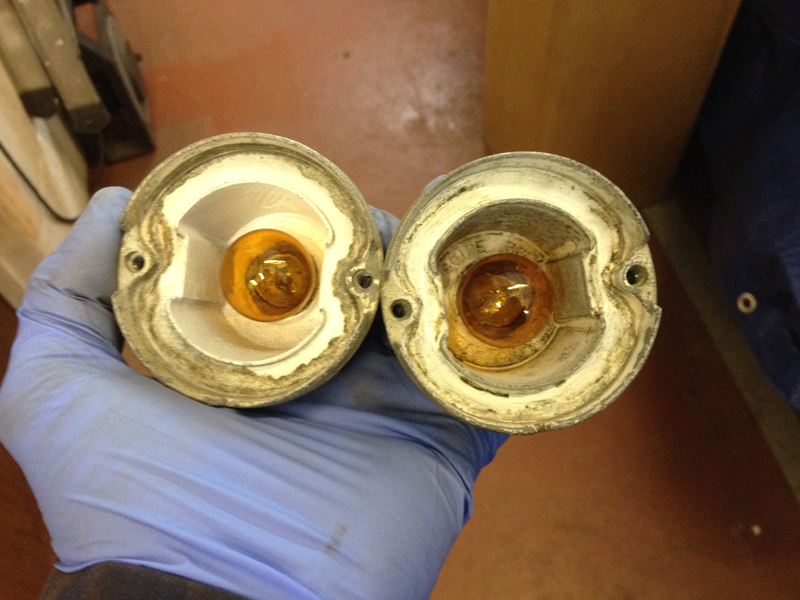
The rear indicators were still wired into the brake lamps. This is illegal in the UK for cars built after 1965. The simplist was around this is to convert the reverse lamps into indicators using amber bulbs and re-wiring the rear lights on the car:
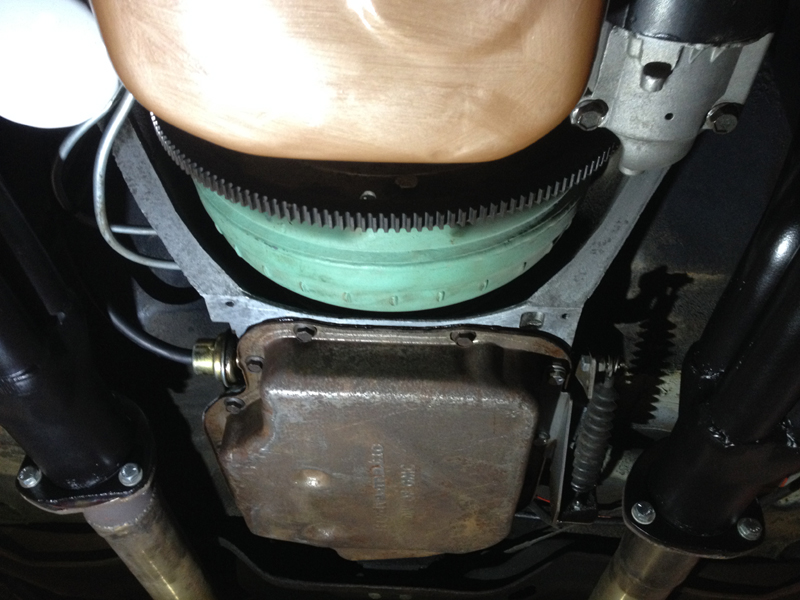
When the car came in we noticed the flywheel inspection cover was missing:
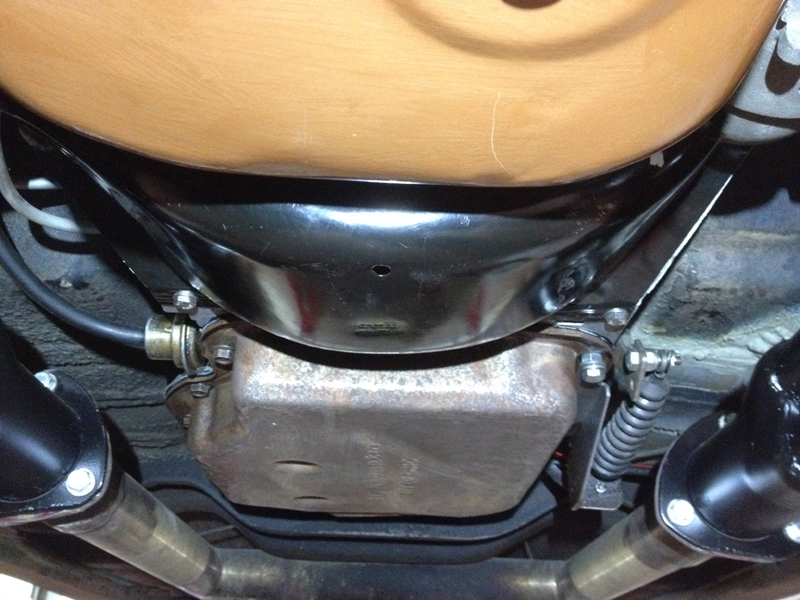
So we sourced and installed on to protect the flywheel and torque convertor:
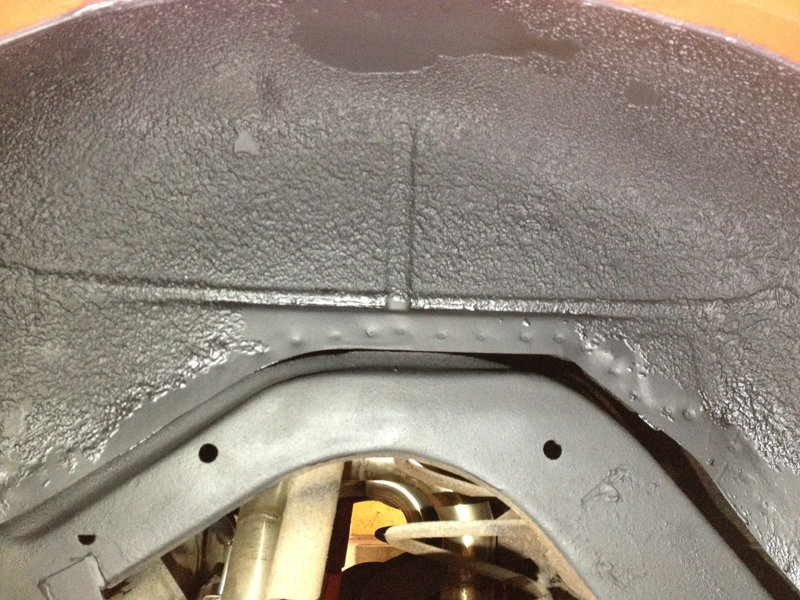
The rear wheel arches had previous welding repairs carried out but not finished properly and the rust protection was looking a little worse for wear:
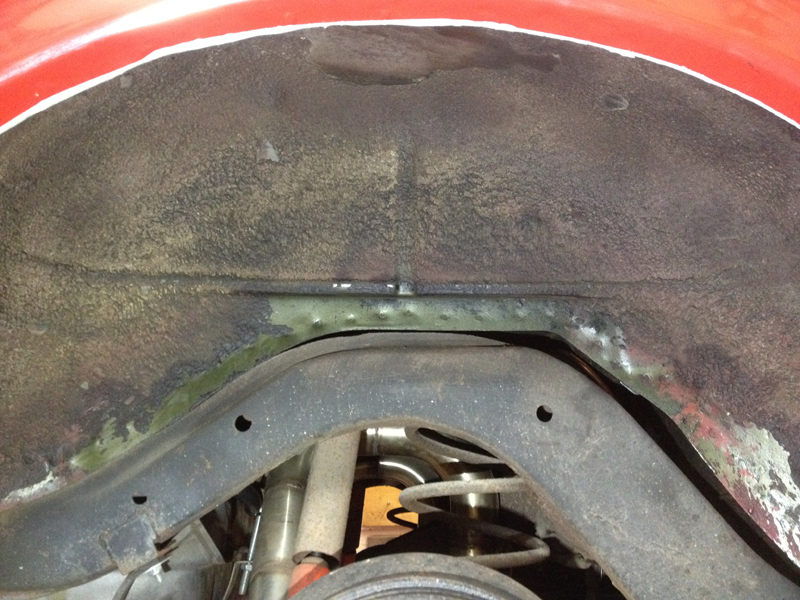
We cleaned everything up, seam sealed over all the welding repairs to protect them and applied fresh stonechip to the entire area on both sides:
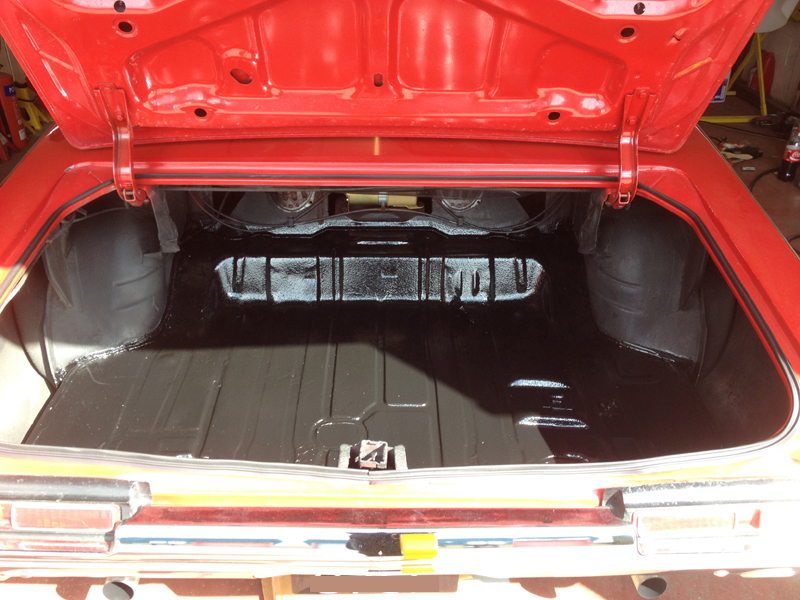
We also gave the boot floor a clean up and 2 fresh coats of brush on hammerite to protect it:
When tuning the engine we were having issues with the carburettor, we removed and stripped the carb down and it was a mess inside. We decided it best to upgrade to something a little more modern with more tuneabilty and reliabilty:
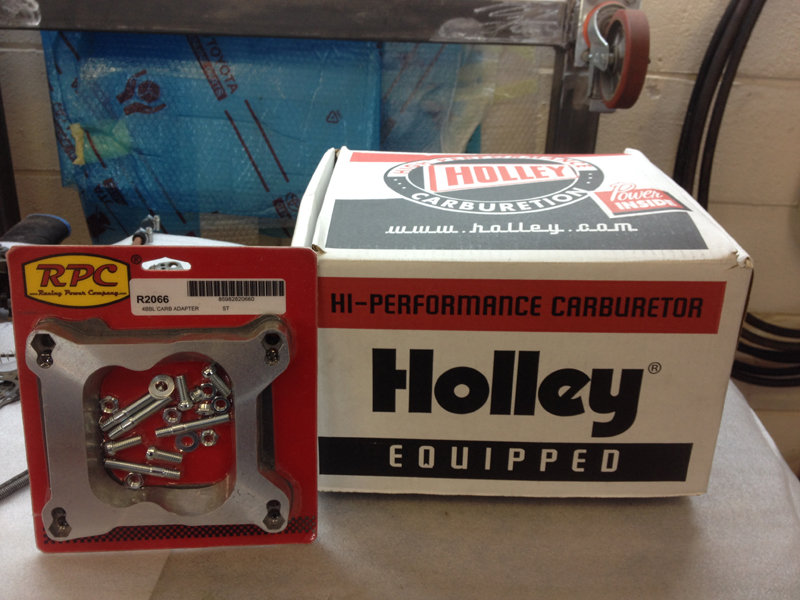
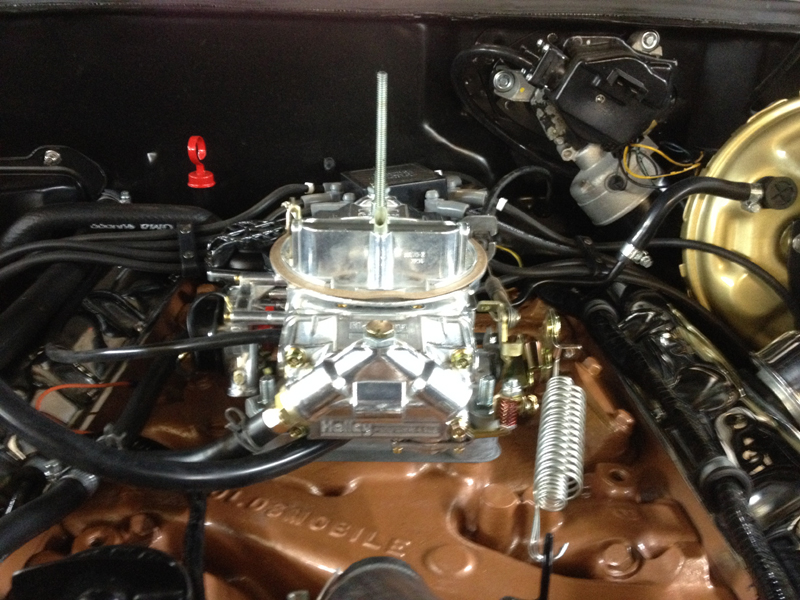
Installed is the new Holley Ultra Street Avenger 770 and base adaptor. After tuning the engine with this carb the difference was unreal and the engine performs alot better than with the original carb:
We installed the new rear bumper and re-built reverse lamps with new lenses, gaskets and bulbs, installed a new boot lock assembly and rocket emblem along with new end mouldings and sourced and installed a good used centre moulding on the boot lid:
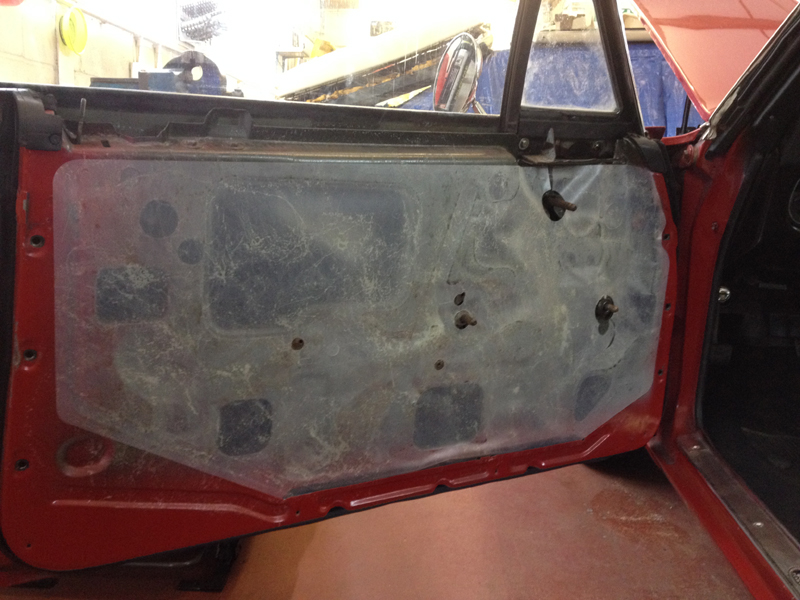
Before installing the rest of the interior we installed new front and rear water shields:
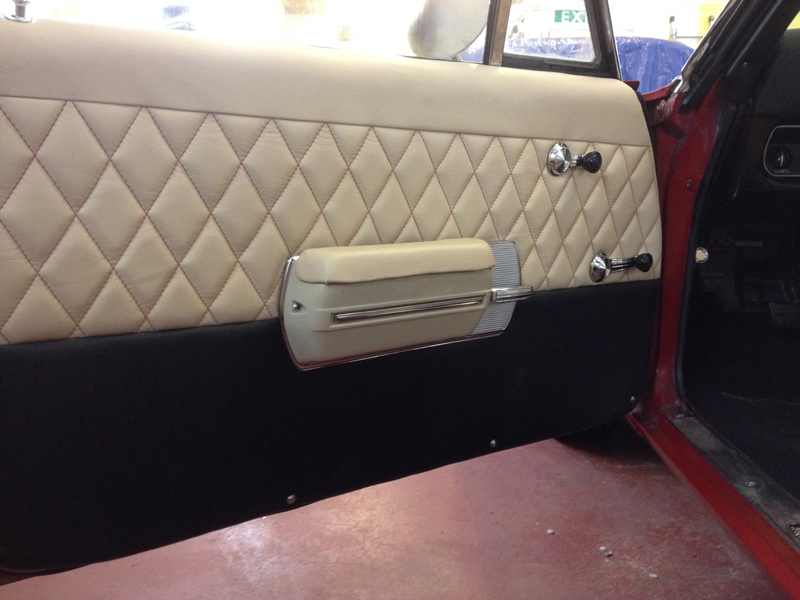
And then installed the custom trimmed door panels and rear side panels:
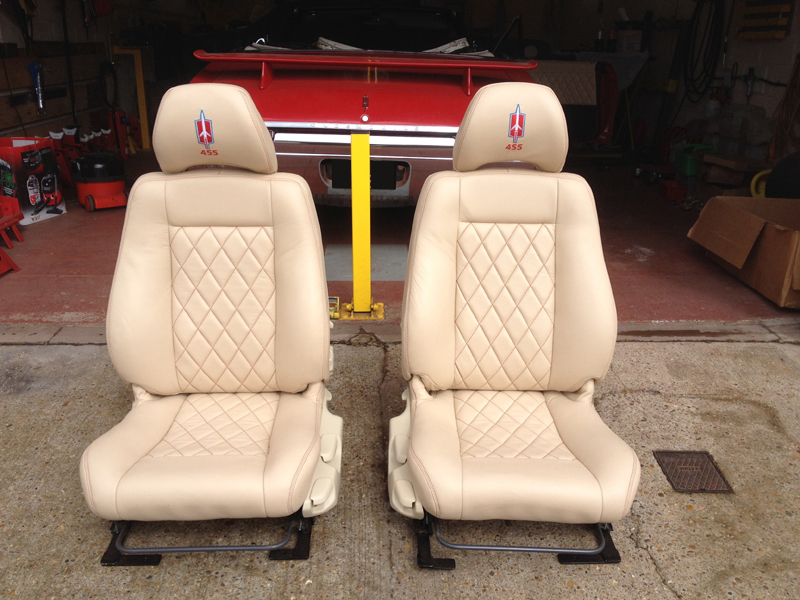
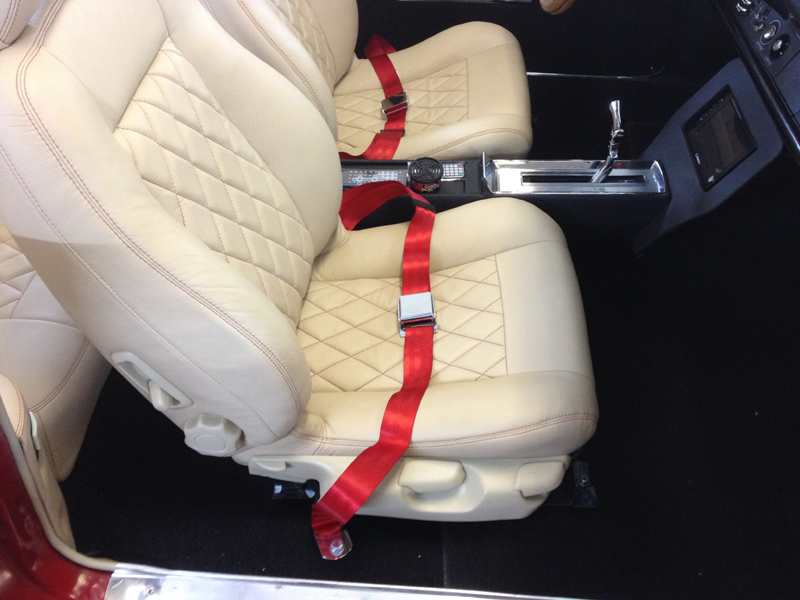
The new front seats back from the trimmers complete with custom stiched "455" and rocket emblem in the headrests:
Installed in the car with new red lap belts to match the red stiching and red paintwork:
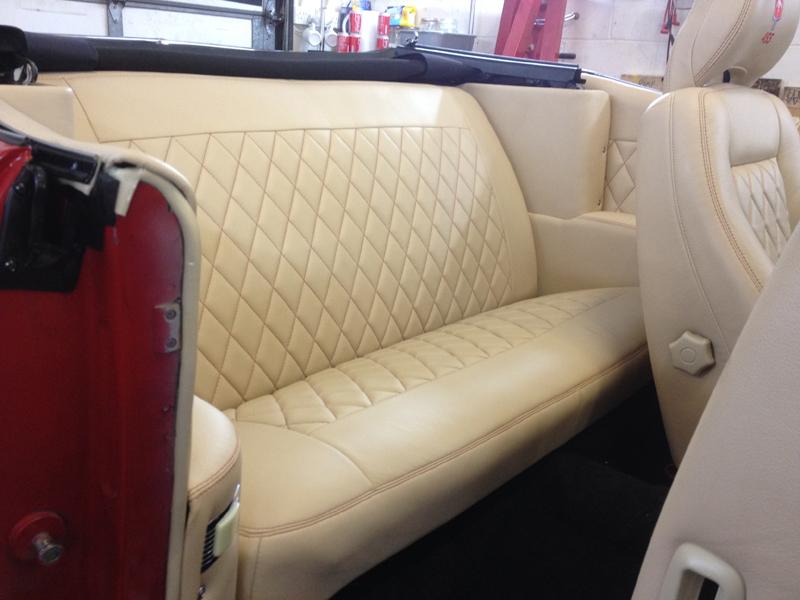
The rear seat installed, we also installed the lights for the rear of the car in either side trim and repaired the wiring for these:
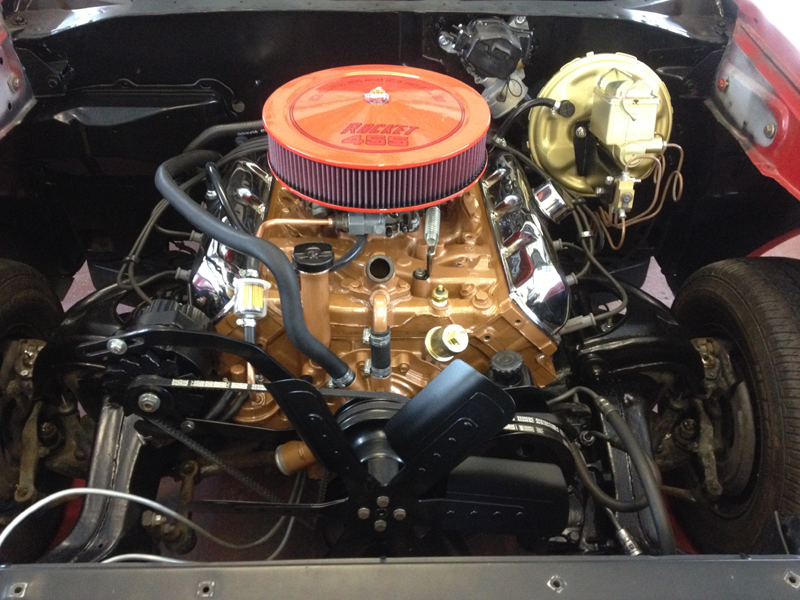
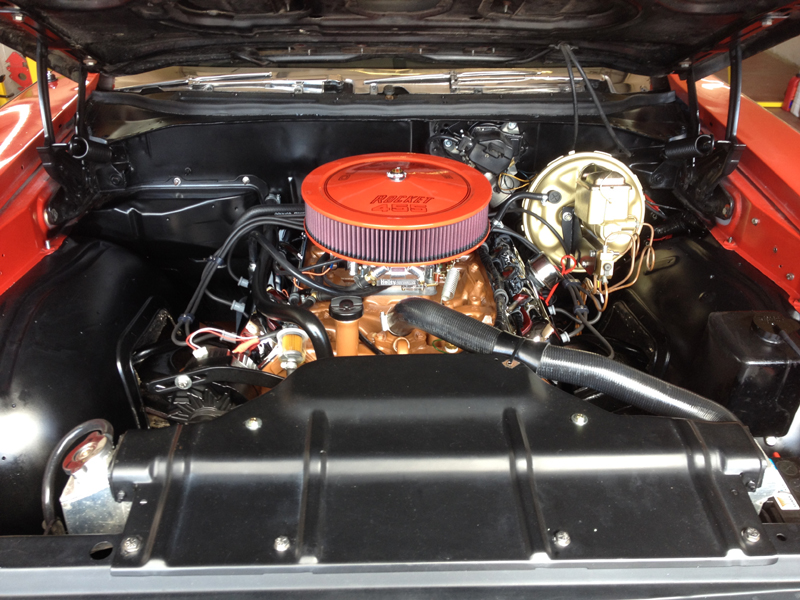
The car was now complete and just needed a final clean before being returned to its owner. The finished engine bay:
Front:
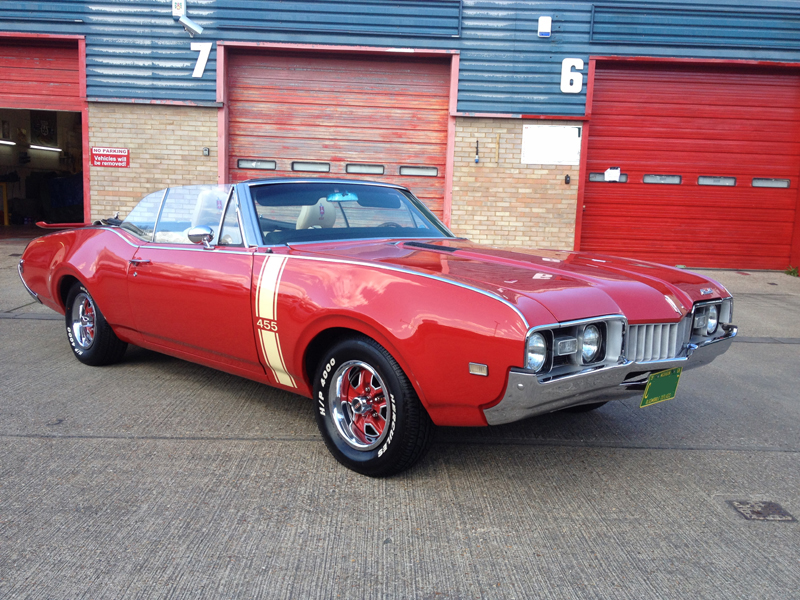
And rear view: