


1966 Ford Mustang Coupe
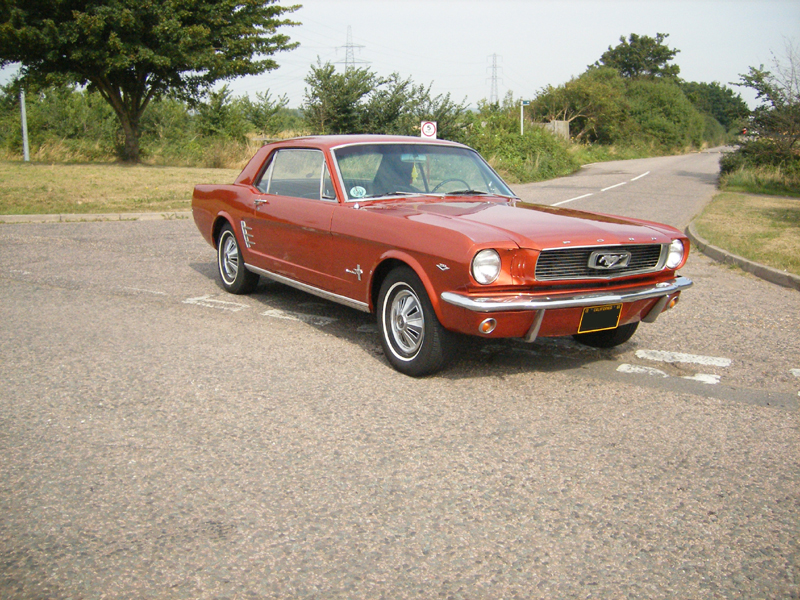
Even though this particular car belongs to the owner of Back to Life Cars, we just wanted to show people some of the more involved work that we can do. The car was purchased as a completly original car back in 2008, the only thing that had been changed was the paint colour by its previous owners in the USA, the car was originaly Silver Frost, but had been resprayed in a colour close to the Emberglo colour offerd by Ford for the 1966 year only. Progress on this car will be alot slower than the usual progress as customers cars must come first and this car is only worked on in our spare time.This photo was taken the day the car was deliverd back in 2008:
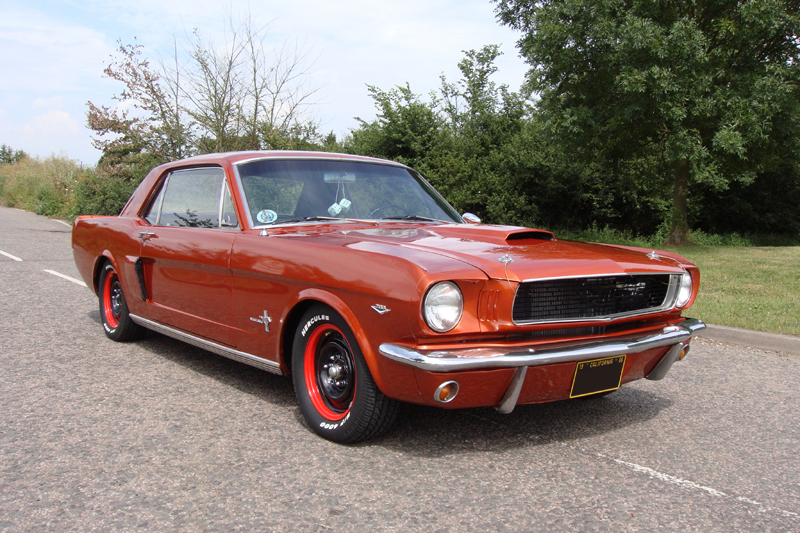
After driving the car for a year as it was, he decided he wanted to make a few changes to it, these mainly inluded the Shelby GT350 bonnet and side scoops, the later 1968 California Special boot lid and quater panel extensions, lower the car and re-paint the factory wheels ditching the hub caps, slightly wider tyres with a lower profile, front disc brake conversion, custom instrument cluster, long tube headers with a custom exhaust system and alot of general restoration work including re-wiring the car, going through the engine and upgrading some of the parts, replacing all the brake and fuel lines, cleaning the fuel tank and a whole lot more. This was the result and this photo was taken in 2009:
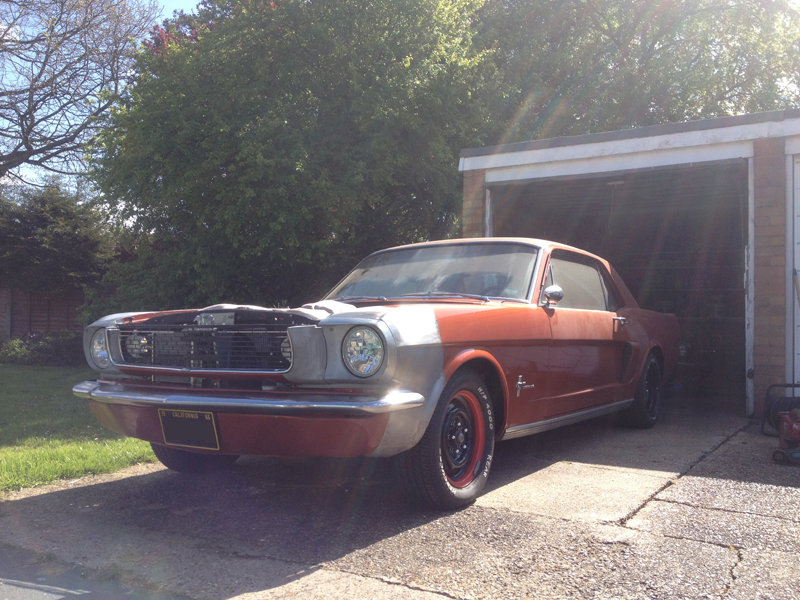
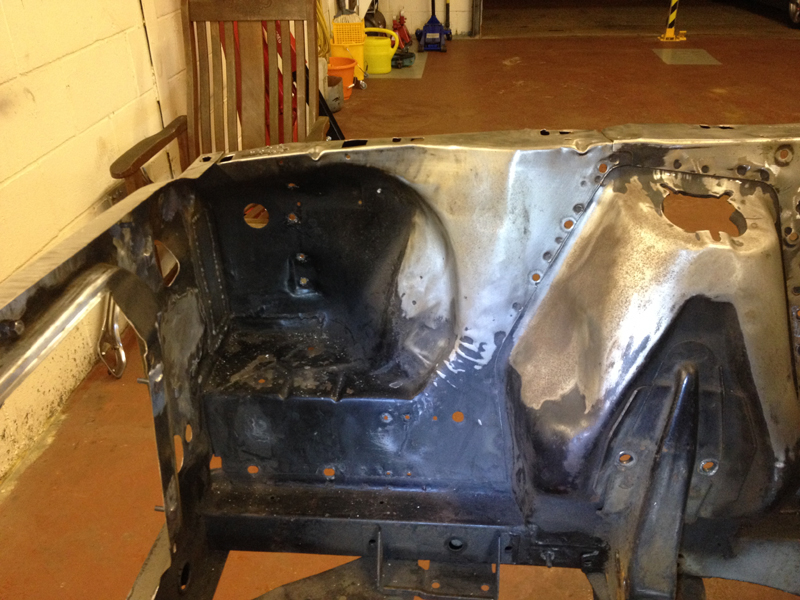
Skip forward a few years and a decision was taken to give the car a full restoration but still keeping with the custom theme. The car looked great from a distance but it was clear that under the paint there was some damage to the front panels and other areas of the car looked like there was rust issues under the paint, we wanted to correct all these issues aswell as modify the car alot further. The first thing that was done was make some more modifications to the front end and fix the damage that was hiding under the paint. New headlamp door assemblies were sourced as the originals were cracked and broken up and the headlamps replaced with modern headlamps converted to use HID bulbs, since the originals didn't light up the road much. Then the front valance was smoothed and small lights used behind the grille for the indicator and side lamps, the front bumper was smoothed and the over-riders where ditched, the horn was re-located to behind the front valance so it can't be seen, an oil cooler was installed behind the grille along with an electric fan conversion for the engines radiator, the screen wash bottle and oil filter were also relocated behind the front valance to tidy up the engine bay. We want the focus when people look under the bonnet to be on the engine itself and not whats around it. This is how the car looked after the front end had been changed about:
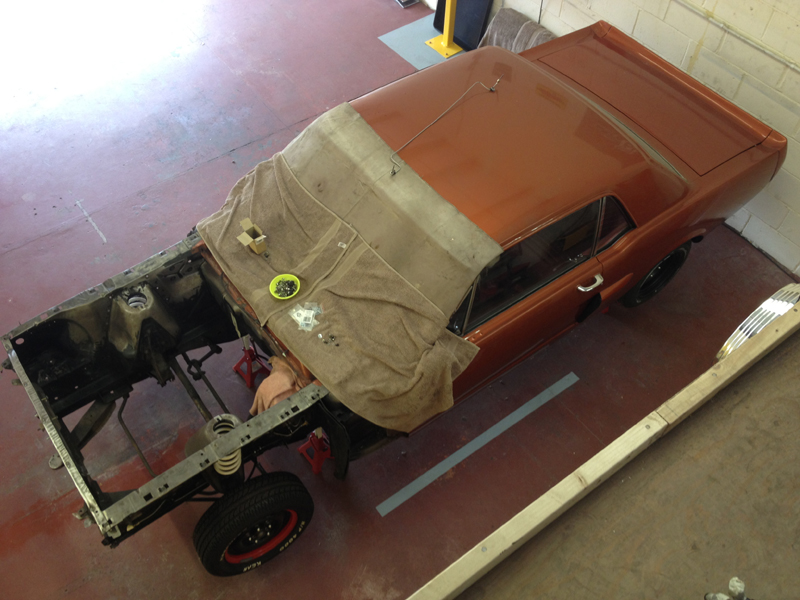
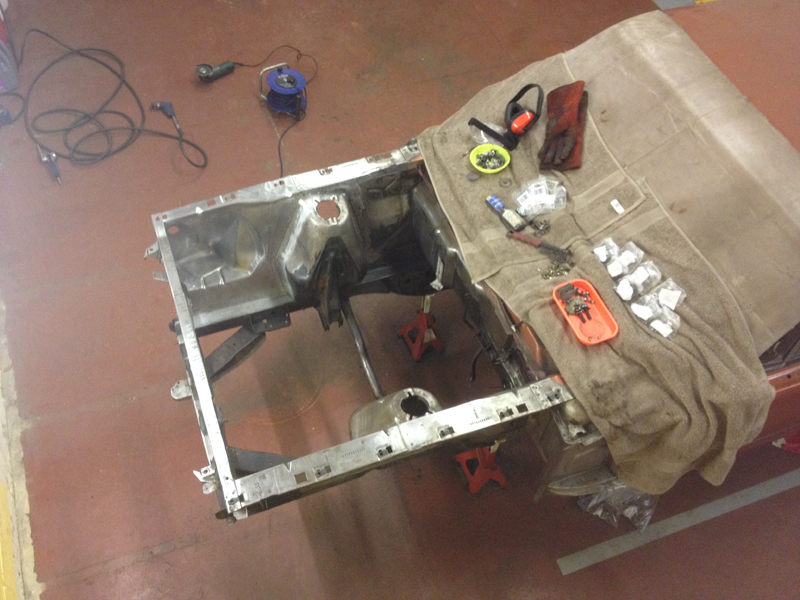
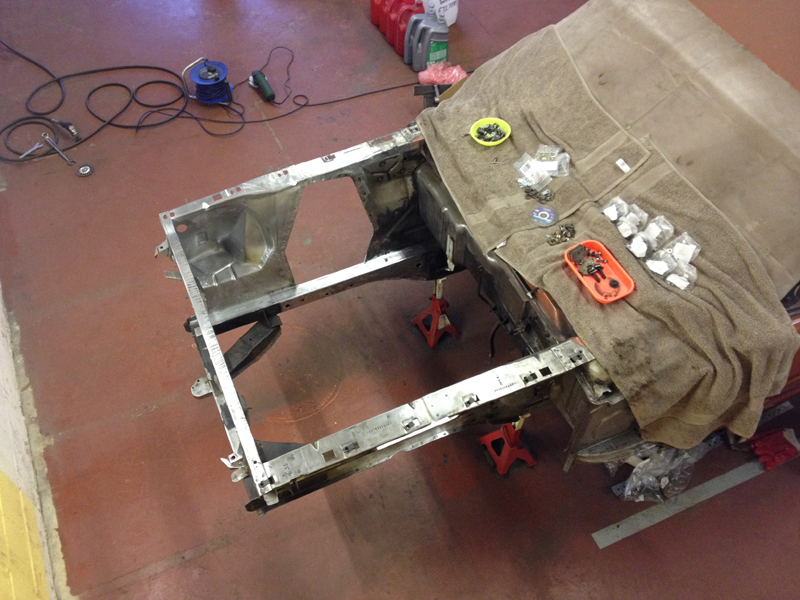
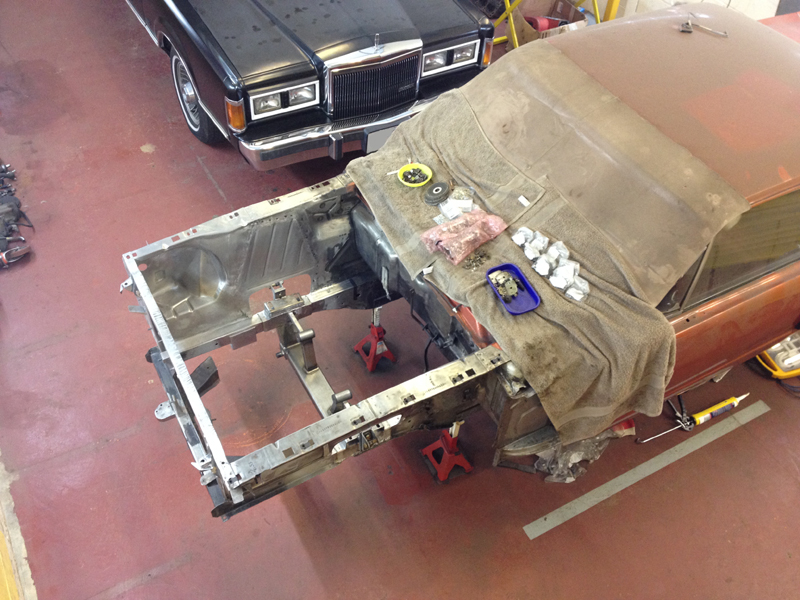
With that sorted out it was time to get the car stripped down further and get real stuck into the car, so the car was moved to our workshop, all the front panels were removed, the engine and gearbox pulled out, all the pipework and wiring from the front was removed too:
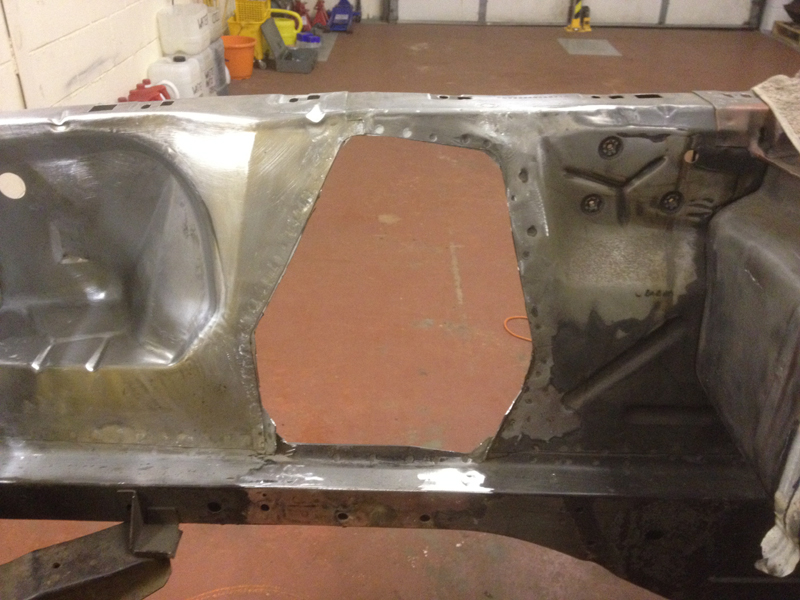
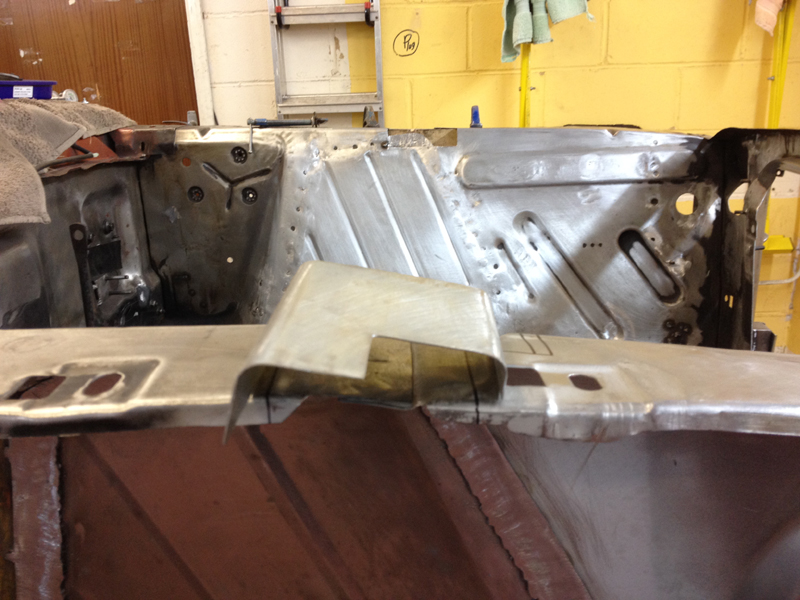
The passenger front inner wing had previously had some rust repair work done, going this far into the car we thought it was best to replace the whole panel, so removed all the suspension and steering from the car too:
After the panel was removed we found a little more rust around the radiator support, with the inner wing out the way, we were able to repair this section with a localised repair:
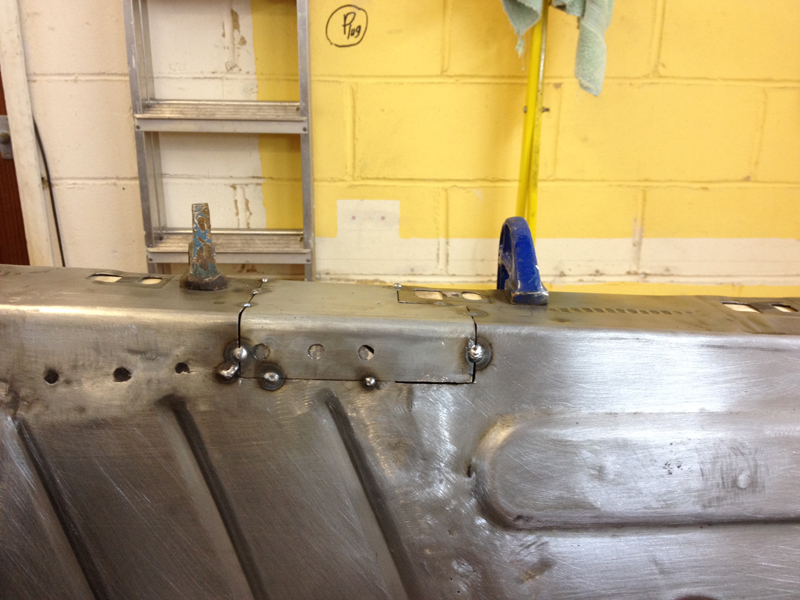
The new panel was trial fitted into place with sheet metal screws. Before welding we checked everything lined up correcty:

Once we were sure that everything lined up correctly we welded the panel into place using plug welds:
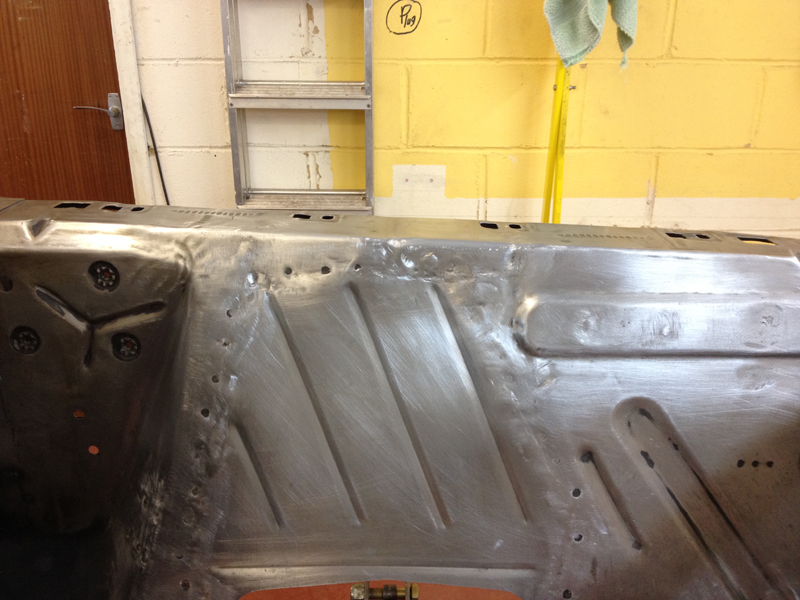
And then ground the welds down:
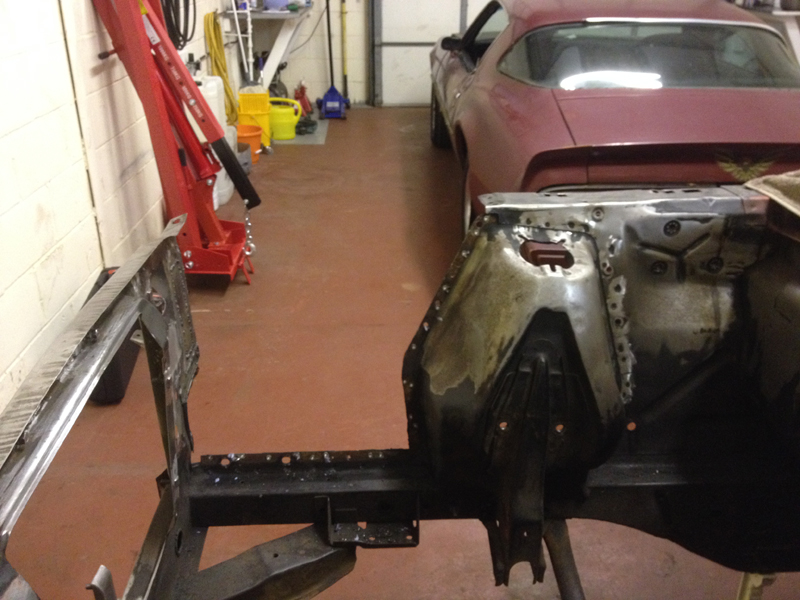
With that finished it was time to move on. We wanted to upgrade the front suspension, steering and braking system with a more modern set up to help the car drive better. With so many set ups now available for the first generaton Mustang its hard to make a decicion, but in the end we opted for the Rod and Custom Motorsports Mustang 2 set up. The first thing we did was make sure the car was square and level before doing anything else:
Then we removed the shock towers:
Before we could install the new subframe, this lip on the chassis leg had to be removed:
With the lip removed and the chassis welded back up and all the remainder of the old suspension mounting points removed, the chassis was coated in some weld through primer to ensure it wont rust in the future:
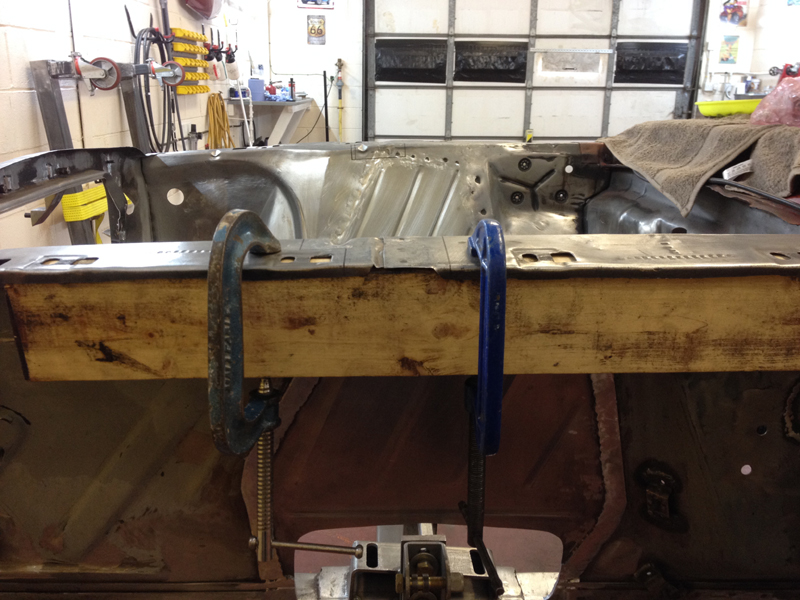
Once both sides were done, the car was ready for the new subframe to be installed:
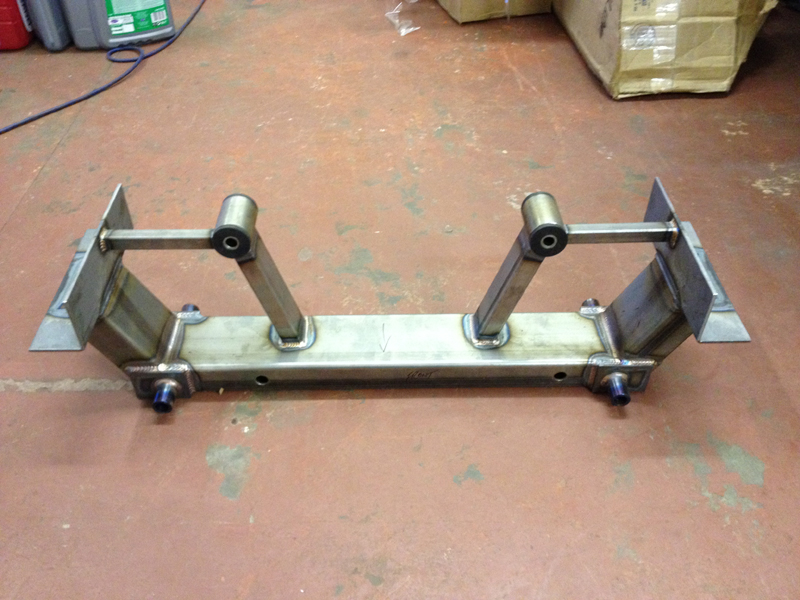
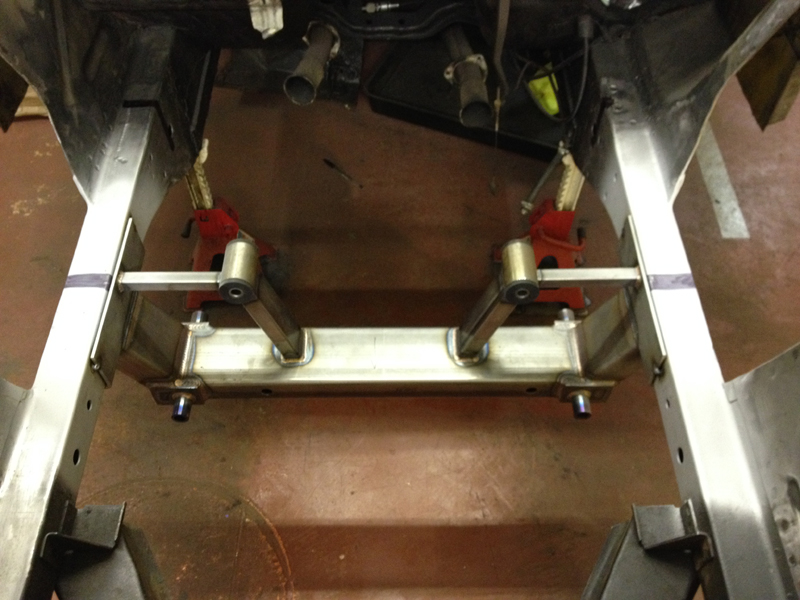
This is the Rod and Custom Motorsports main subframe that gets welded between the 2 chassis legs, the engine, suspension and steering will all mount to this:
We trial fit the subframe in the car to see how it fits:
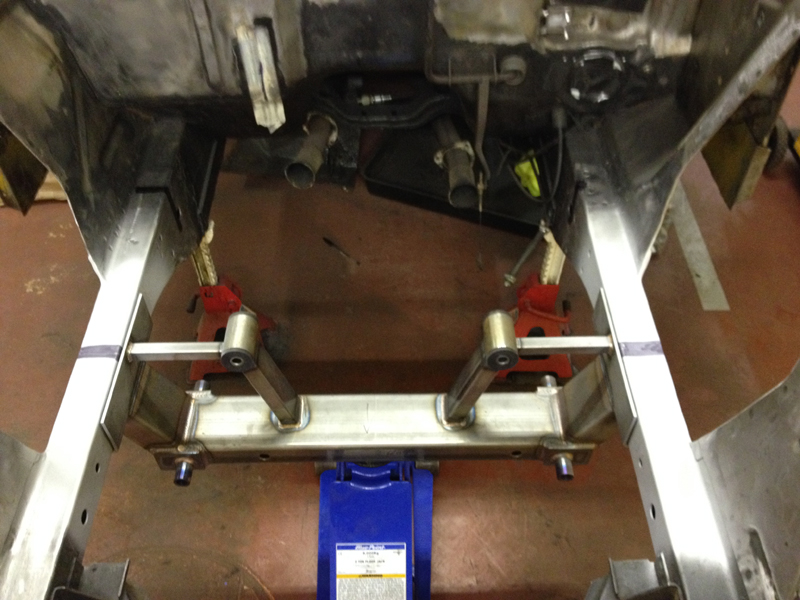
Before any welding at all is done, carefull measurements are done to make sure the subframe is in exactly the correct place. Even the slightest bit out will mean the car won't drive correct:
Once we were happy that the subframe was in the correct place, we tack welded it into place:
And then fitted the upper suspension arm brackets in place and fully welded the whole assembly to the car:
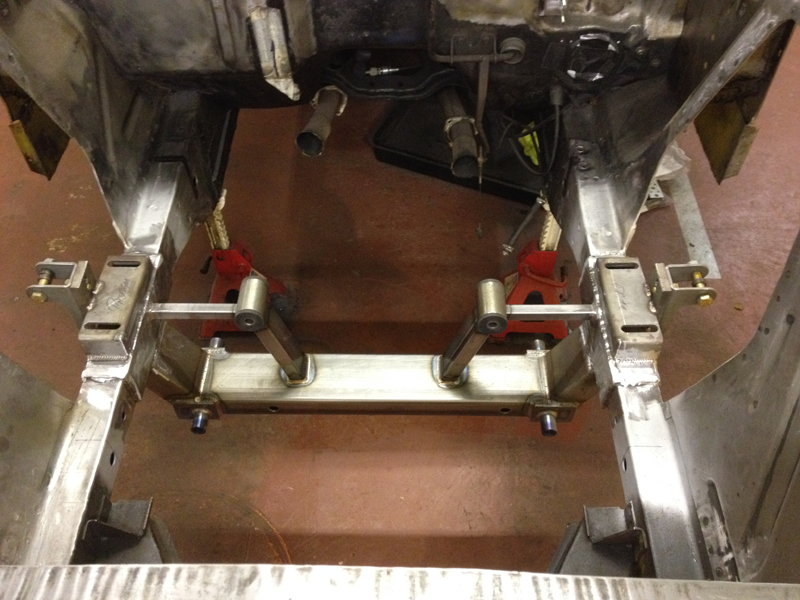
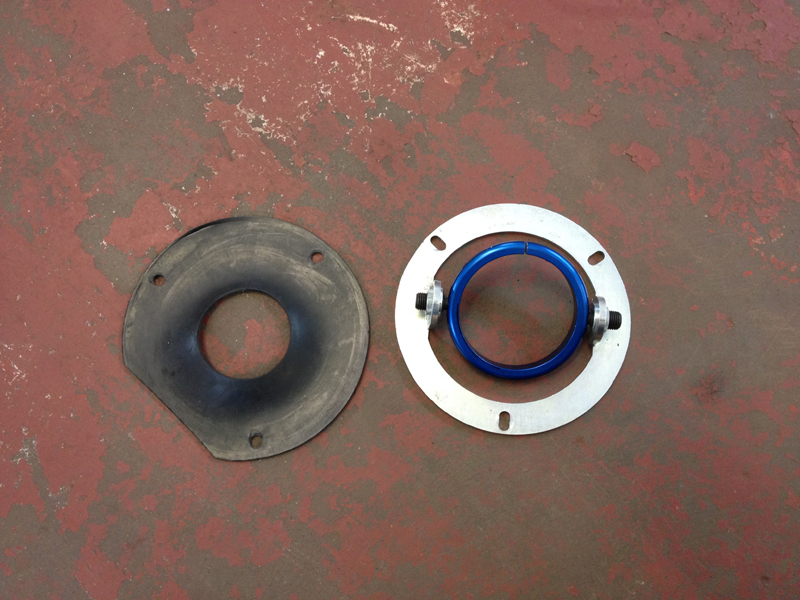
With the main component in place it was time to fit the new front anti-roll bar. Unfortunatly the new bar doesn't fit the factory mounting locations but the kit does come with new ones. The first job is to completly remove the original mounting brackets from the chassis legs. Here is the mounting hardware for the new anti-roll bar including the new brackets that require welding to the chassis:

Again we must test fit everything into place to ensure the set up will work 100% correctly, this is checked several times before any welding takes place. Once we were happy with the placement of the brackets we welded them to the chassis:
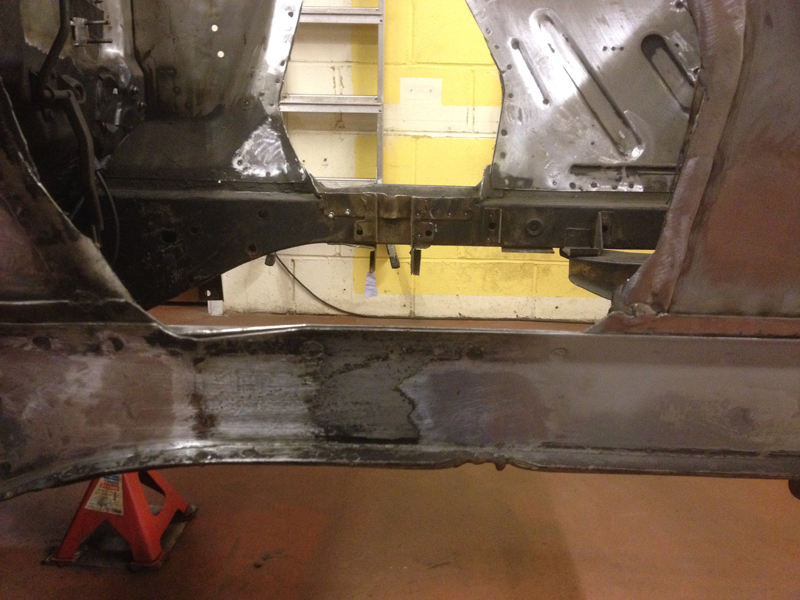
Once the anti-roll bar brackets are welded into place we can then tackle the 2 large holes left in the engine bay that are left from removing the shock towers:
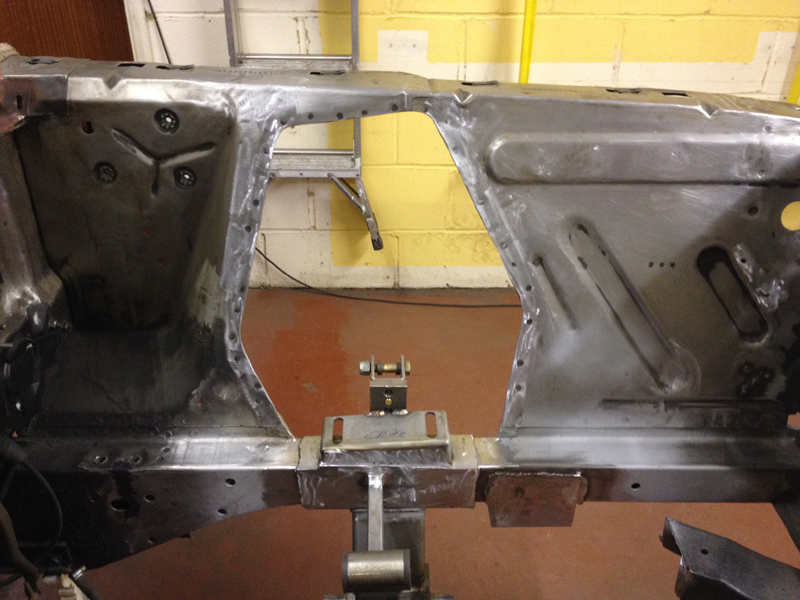
The conversion kit comes with oversize panels that fill the holes. The panels are oversize so that you can fit them how ever you want, from bolting to the car to welding in place. We chose to weld flush with the engine bay panels for a cleaner look. This required some marking up of were to cut:
The panel is then carefully cut before it can be tried in the hole:
Once we are happy with the fit it is tacked into place in several spots:
Before we go much further with welding it in place we need to address the bottom of the panel. The panel needs to have some matierial removed from it to allow the upper suspension arm to travel freely without binding and also to allow the arm to be removed from the car incase future repairs are needed. Some measurements are taken and the panel is carefully marked up:
We carefully removed the marked area using an air saw for a fine smooth cut. We also used the cut out metal as a template for the other side so that we can make sure that both sides of the car look exactly the same:

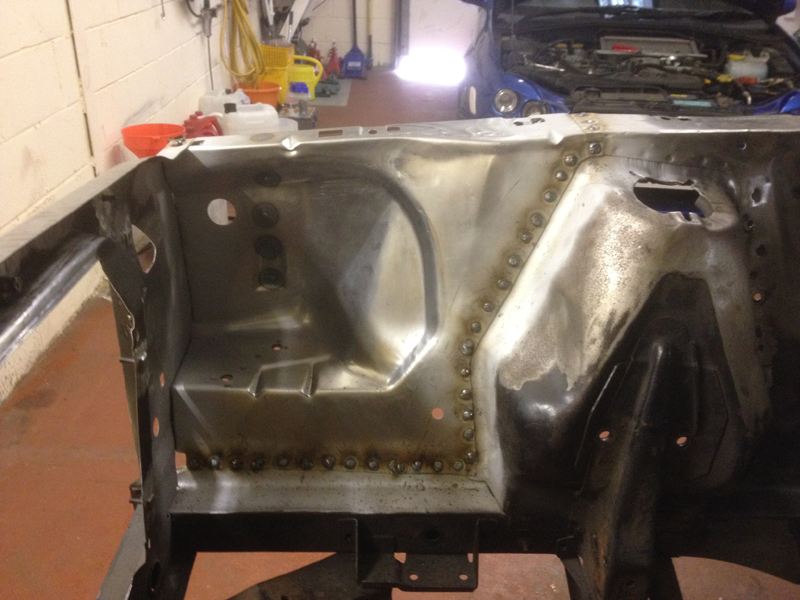
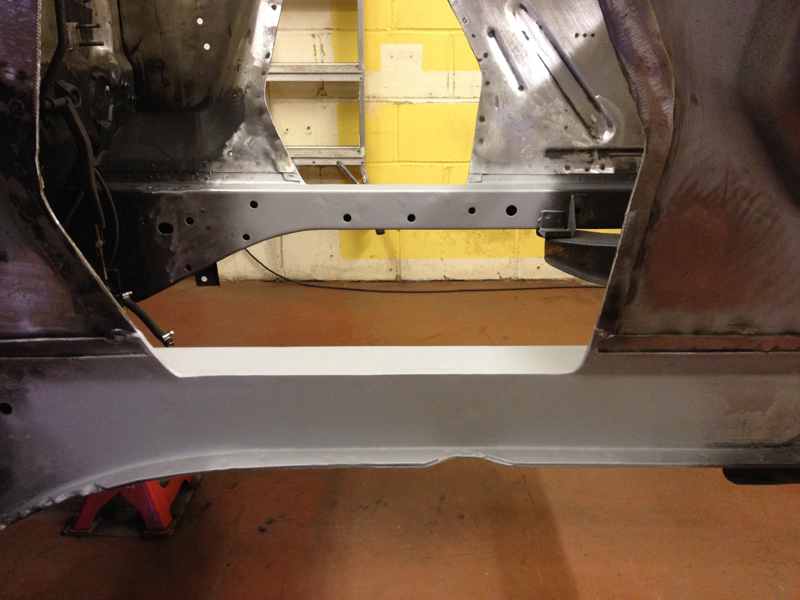
Once the panel is welded in fully, all the welds are ground smooth and this is the final result:
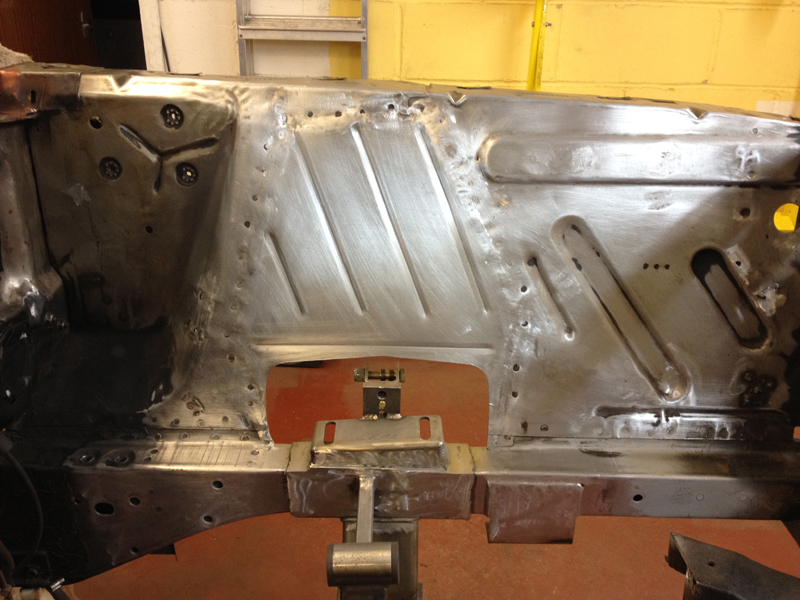
This is now how the front of the car looks with the metal work side of the conversion complete:
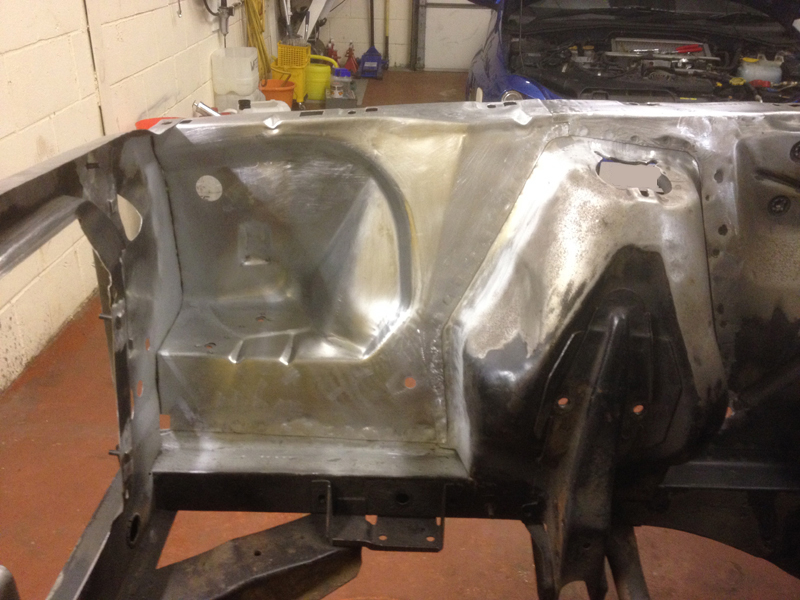
One thing that was bugging us after doing the sides of the engine bay, was the factory join between the front and rear inner wing looked a bit out of place, so we decided to cut this section out and weld in a piece flush. The factory join is one piece of metal lapped over another piece. First we marked out the section to remove:
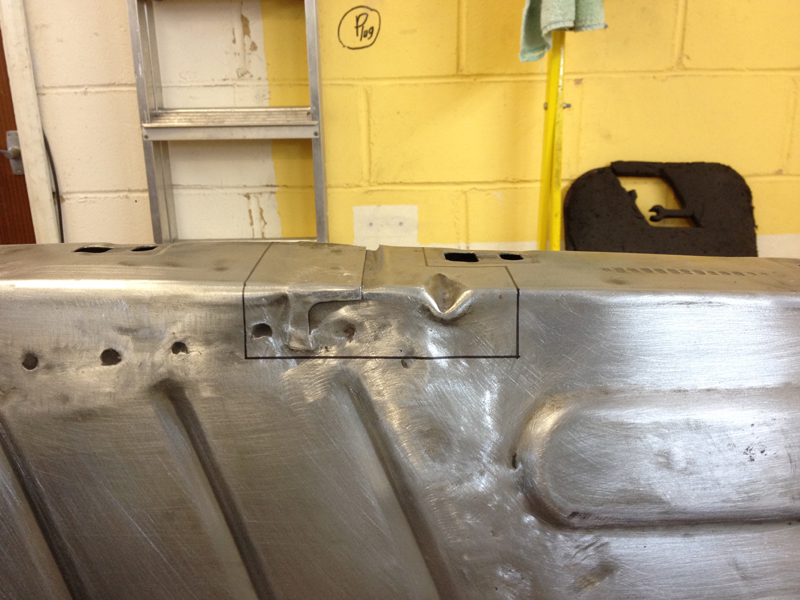
Then we braced the area for some extra strengh, removing this join actualy makes the side panels flex quite a bit, so this helps keep the area solid until the new piece is in place:
With the old section removed and after some measurements are taken, a new piece is fabriacted:
The new section is carefully tacked into place:
And this is how it looks once the welds have been ground flush. Much better. The same process was carried out for the other side after:
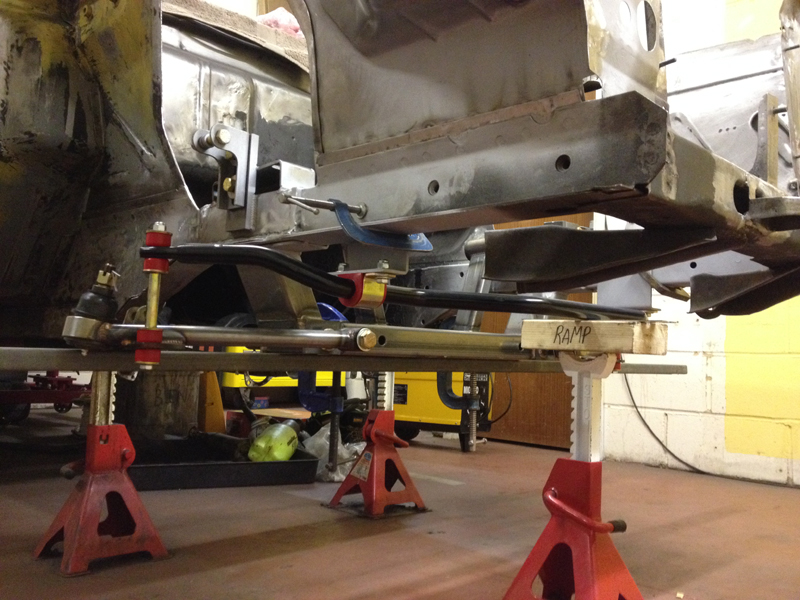
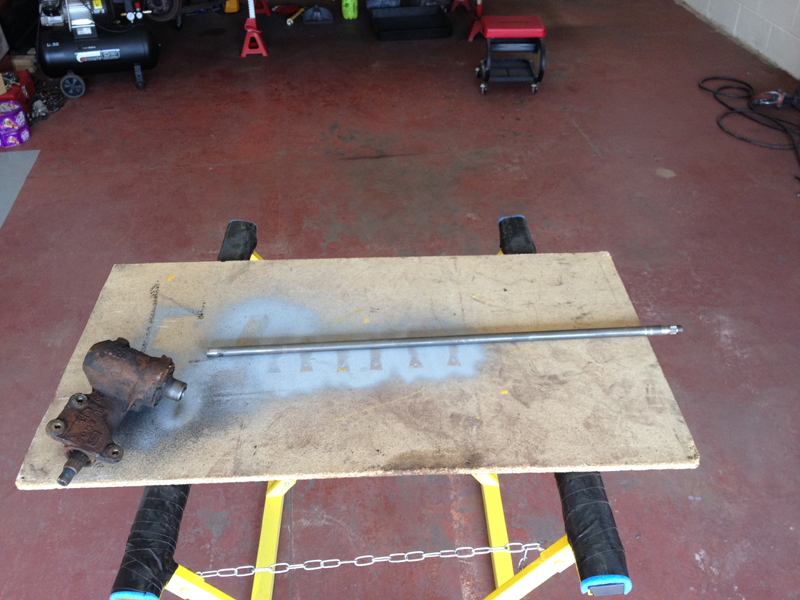
Next we wanted to install the steering rack assembly and modify the steering column. Here is the original steering box with the column as part of the box. With the Mustang 2 suspension conversion you can use a more modern column but we chose to use the original to keep thinks looking more stock inside the car:
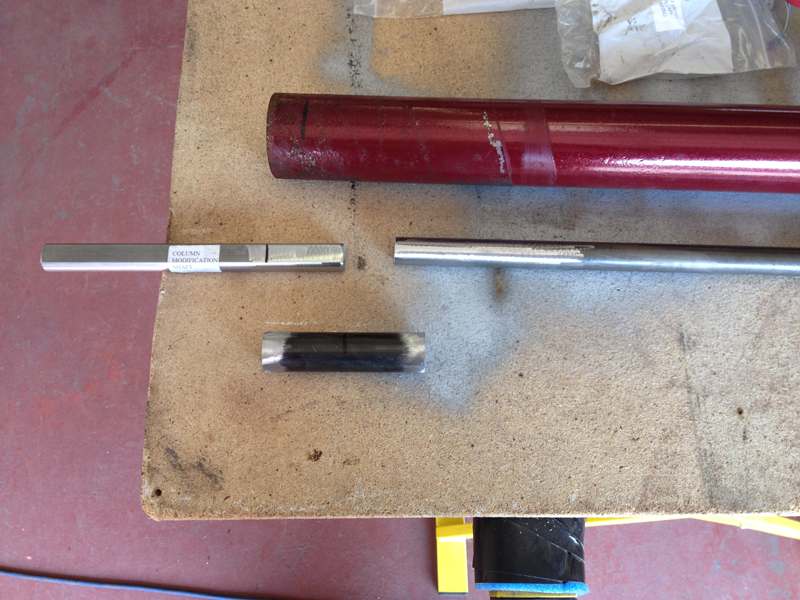
First step was to remove the column shaft itself from the box, as its part of the box and we no longer need the box, the shaft is simply cut off from the box:
After some carefull measuring, we cut the shaft down to the correct length it needs to be. The shaft then needs to be attached to a piece of "double D" shaft to make the new steering linkage up:
Everything is measured up several times and the 2 shafts are placed eaqualy inside the joining tube:
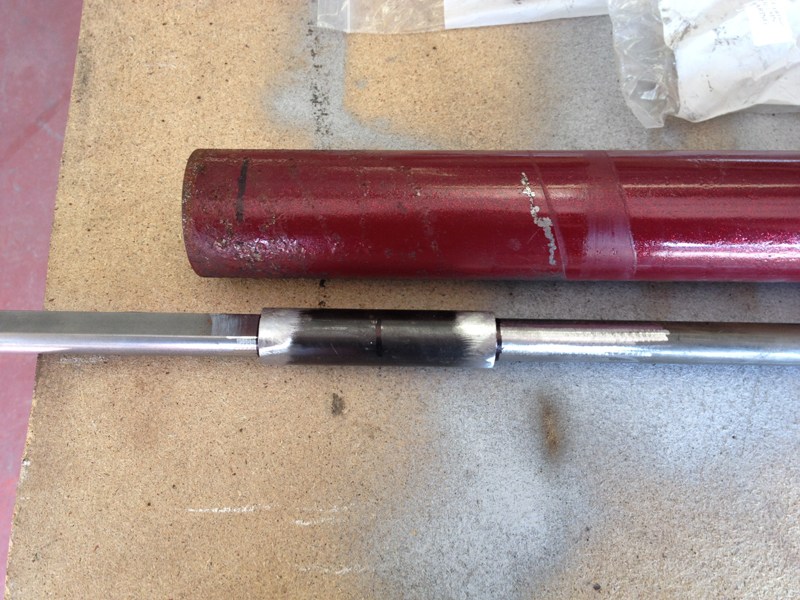
And then carefully welded together. Once its all welded together we tidy the welds up a bit but do not grind them flush. We also drill 2 holes through the entire shaft and insert a roll pin in either end of the shaft as a saftey precaution as per the kits intructions:
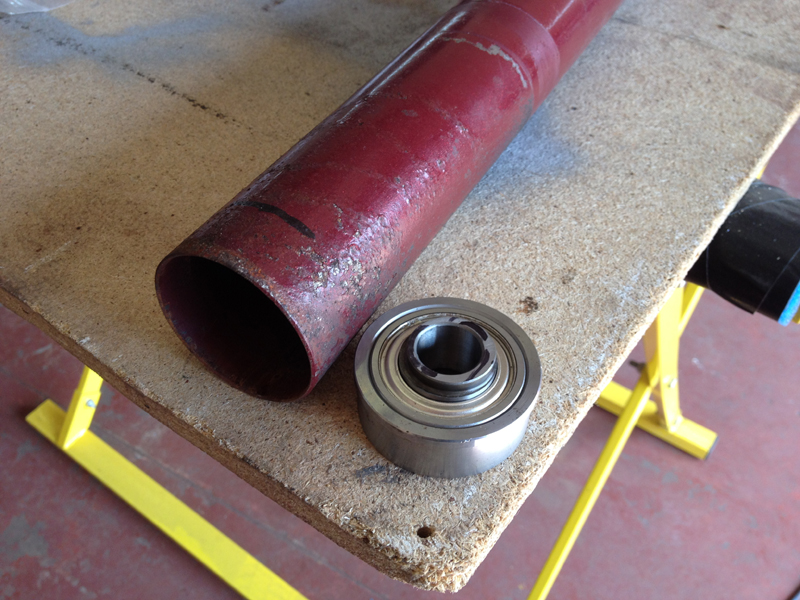
Next this bearing needs to be installed in the bottom of the steering column tube. The bearings ensures the column turns straight and stops the steering shaft from moving about from side to side:
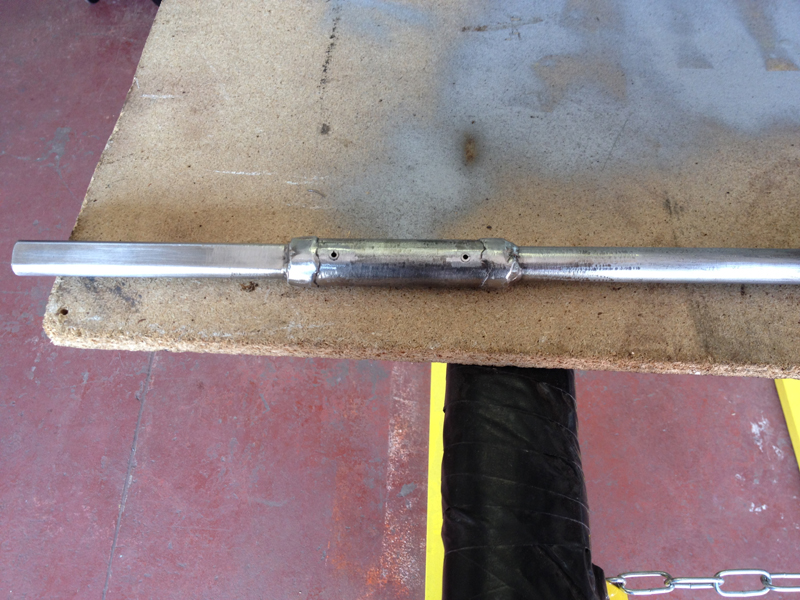
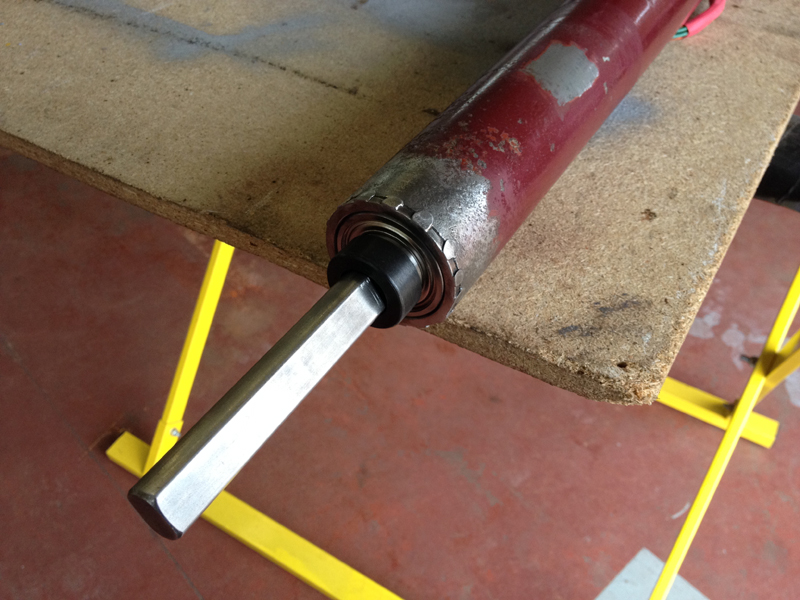
First we install the new shaft inside the column, then press the bearing into place. The instructions state to weld the bearing to the column roughly every 1/4 of an inch around the column to hold it in place, this must be done carefully to stop the bearing from getting to hot. Once the bearing is installed, the welds are cleaned up but not ground completly smooth and then a locking sleeve installed on the lower part of the shaft to stop the shaft moving in and out the column:
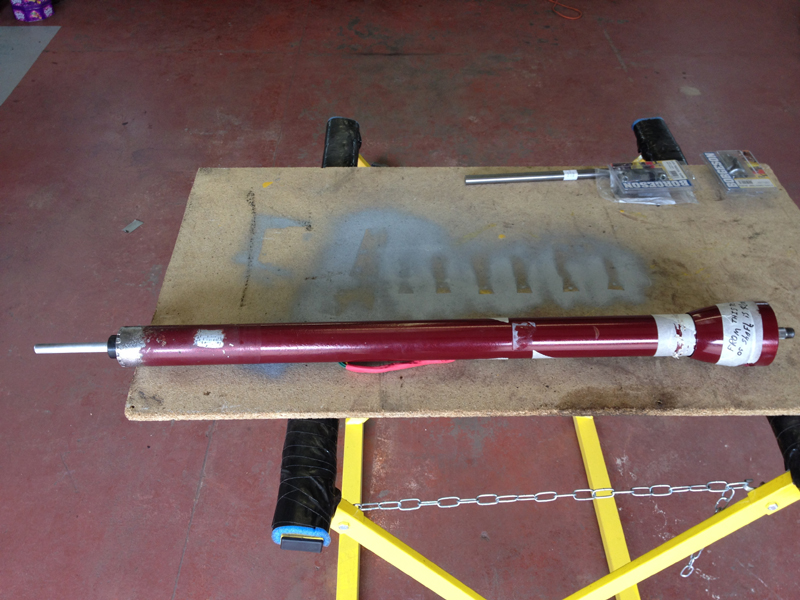
Here is what the finished product looks like. Obviously it will all be painted again before the cars final assembly:
This is the new steering rack that will replace the steering box and all the linkages:

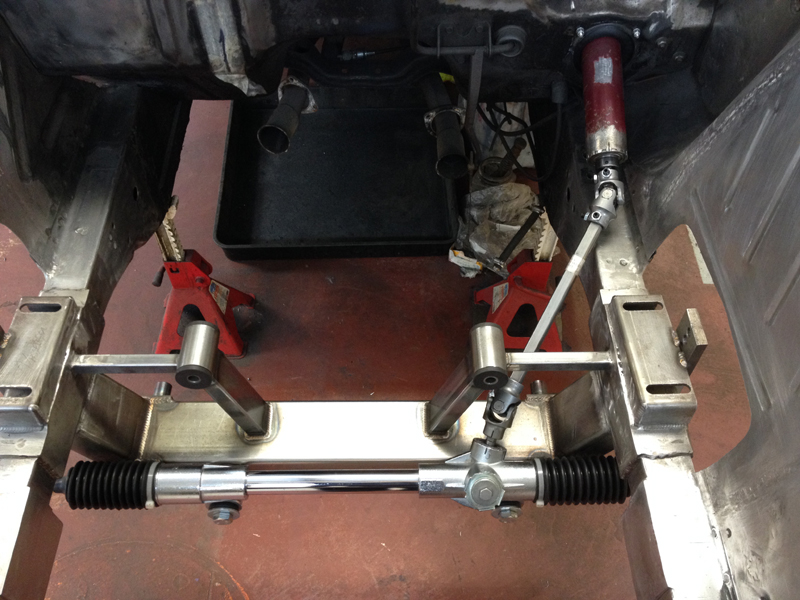
Next we installed the steering rack onto the car so that we could make the steering column linkage between the column and the rack. This is done by installing the steering UJ on the rack and the column and then carefully measuring the distance between the 2. Once this is done we transfer the measurement onto another "double D" shaft and cut it to lengh. Once installed everything is checked and the steering wheel turns the rack smoothly and freely without any binding at all:
We also installed a bulkhead support bearing for the column tube itself. This item is not included in the kit and available from Total Control Products. It supports the base of the steering column extremly well and is well worth investing in if your doing this conversion:
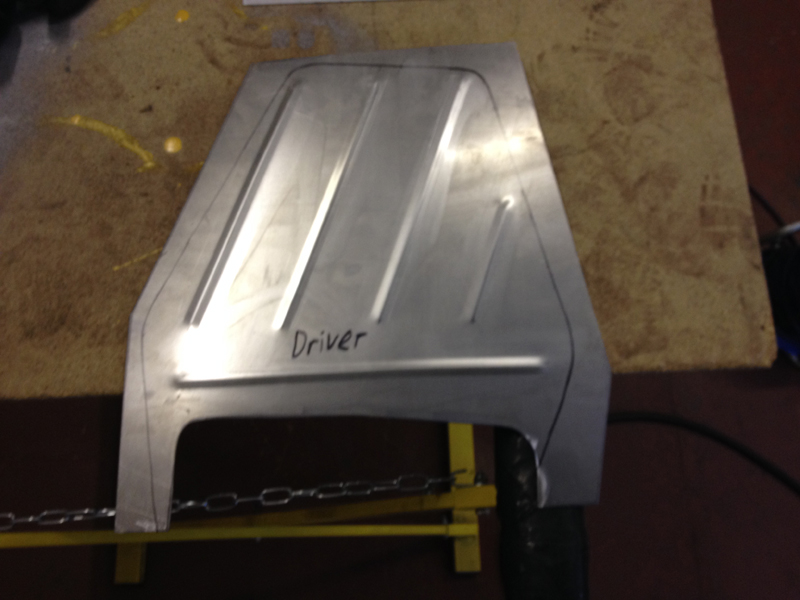
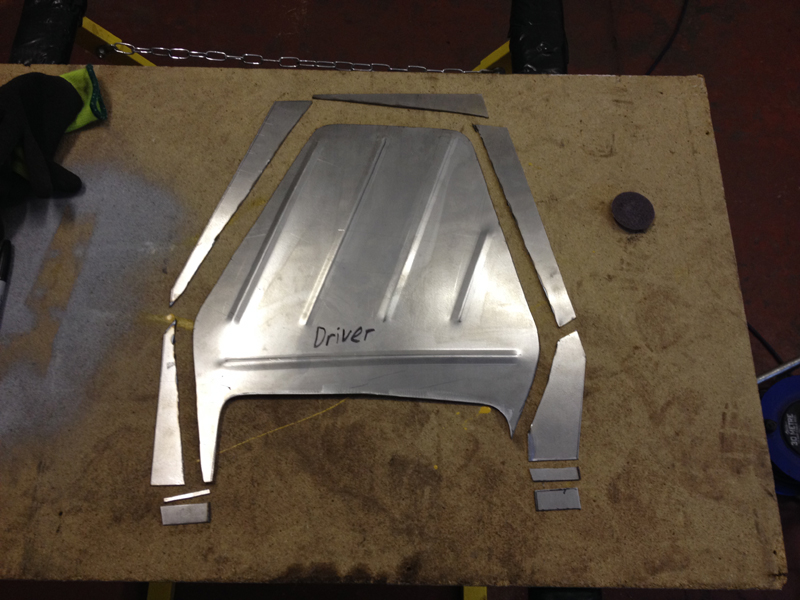
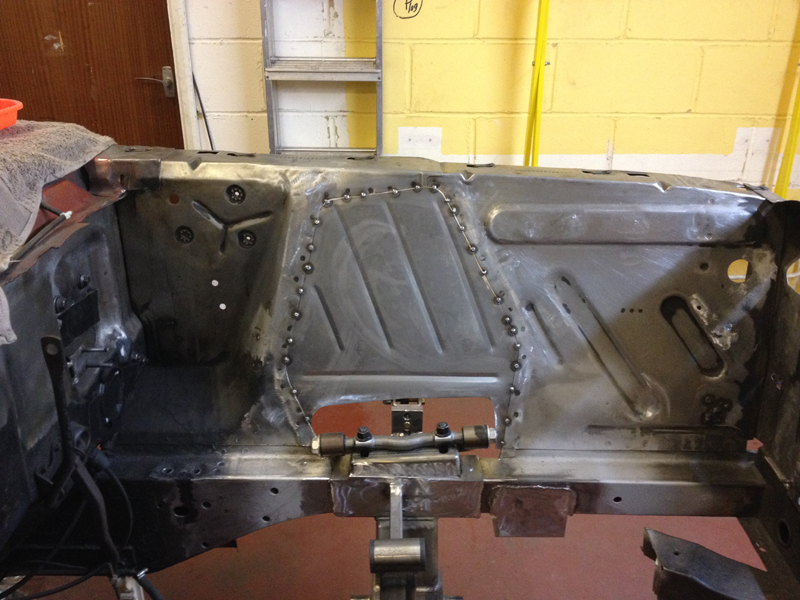
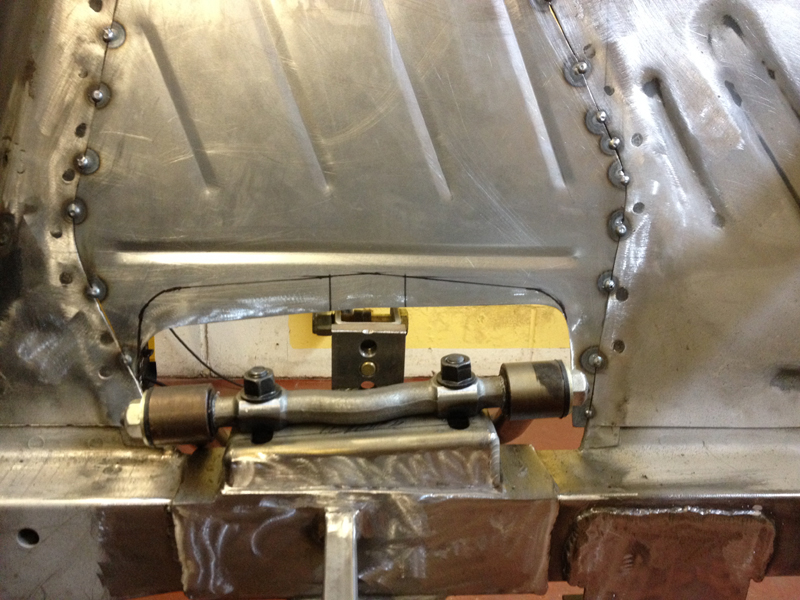
With the steering set up completed we removed it off the car to keep it safe. Next step was to work out how we can hide the cars front wiring loom. We decided to make up these small brackets so that we can attach them to the drivers side inner wing:
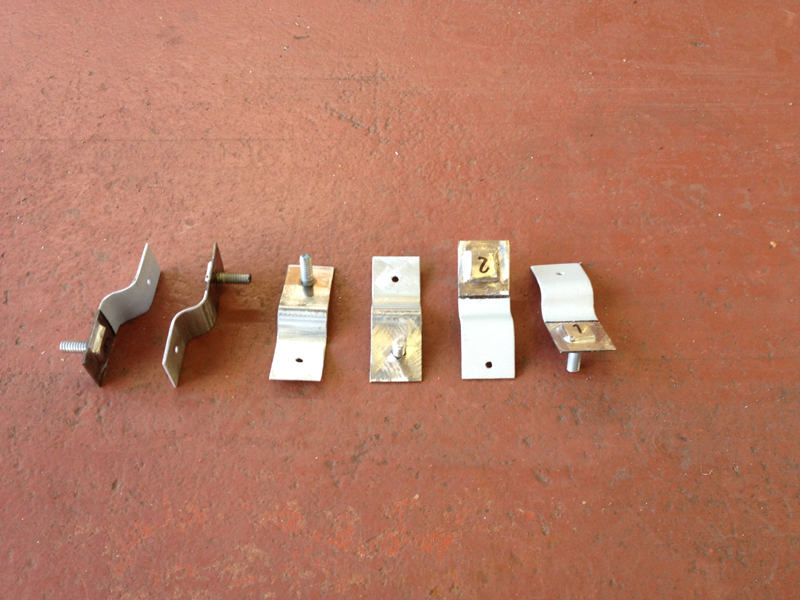
The brackets and area of the car where they will be mounted to were coated in weld through primer and then the brackets held into place with "cleco" fastners before being welded to the car:
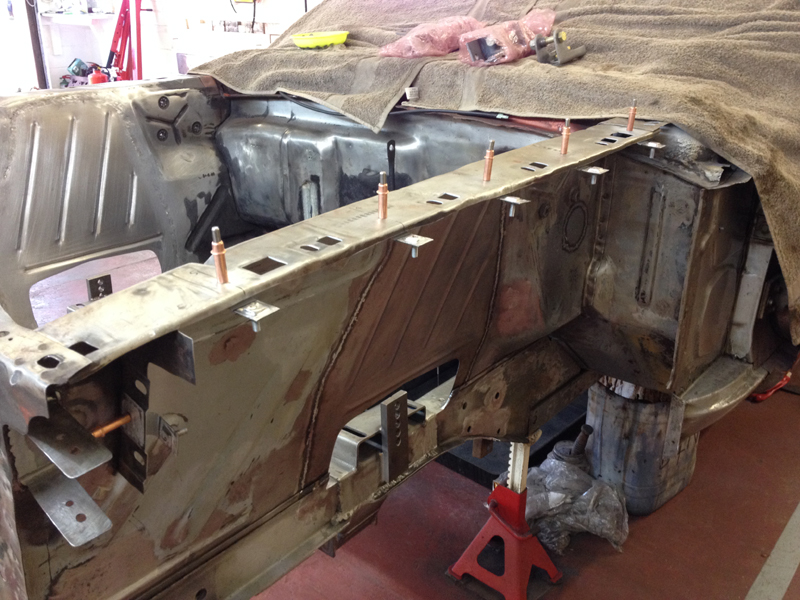
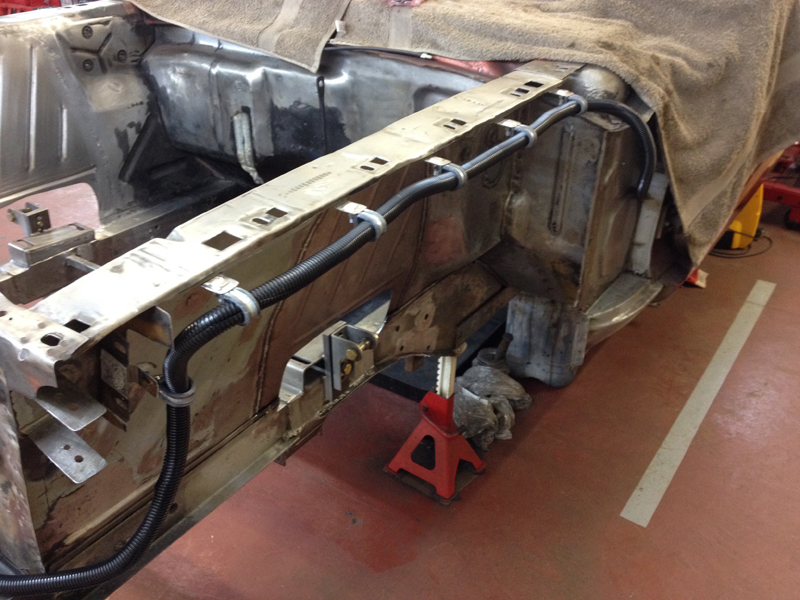
Once welded to the car, the welds are ground flush and some wiring conduit installed to show the route that the wiring will take to the front of the car. With the wing installed this will all be completly hidden out of site but easily accessable from inside the wheel arch incase any repairs are needed:
Unfortunatly due to lack of space in our workshop and customers cars taking a priority over our own, we ended up putting this car into storage. After sitting in storage for 5 years untouched we made the decision to sell the car. The new owner plans to finish the car and use it as much as possible.