


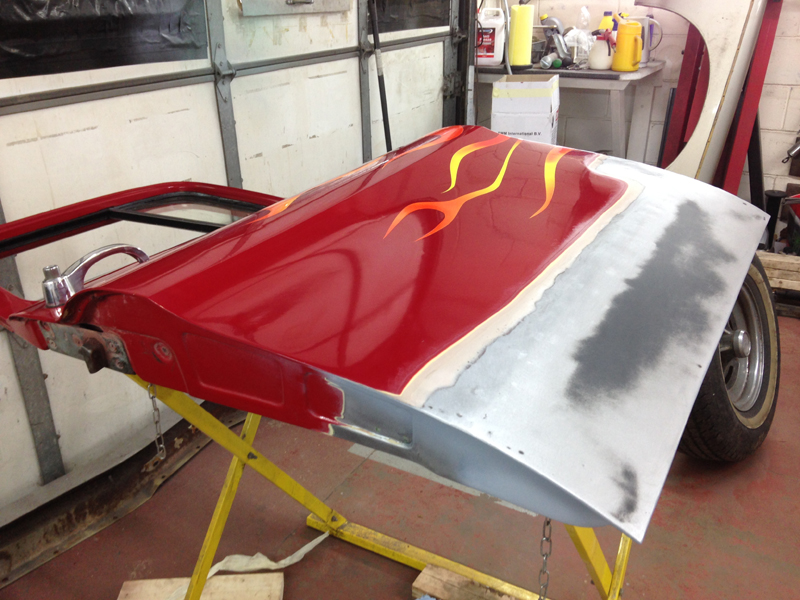
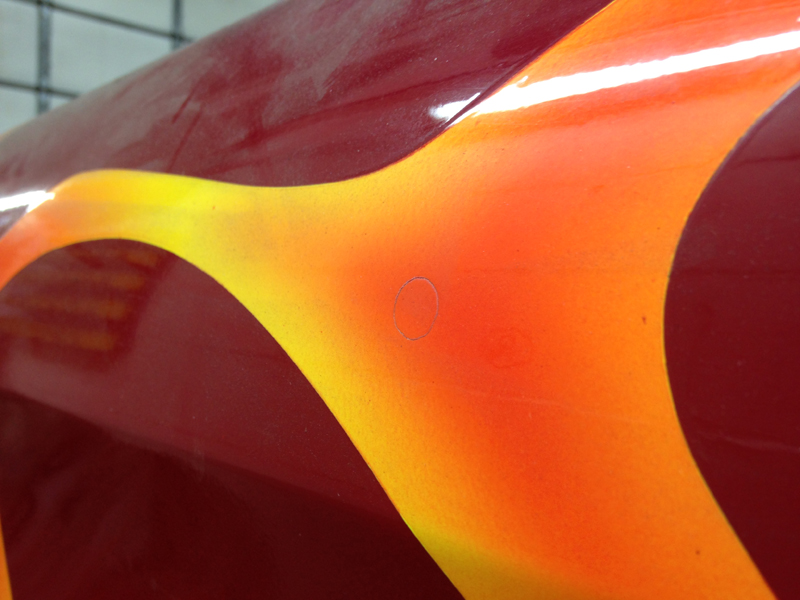
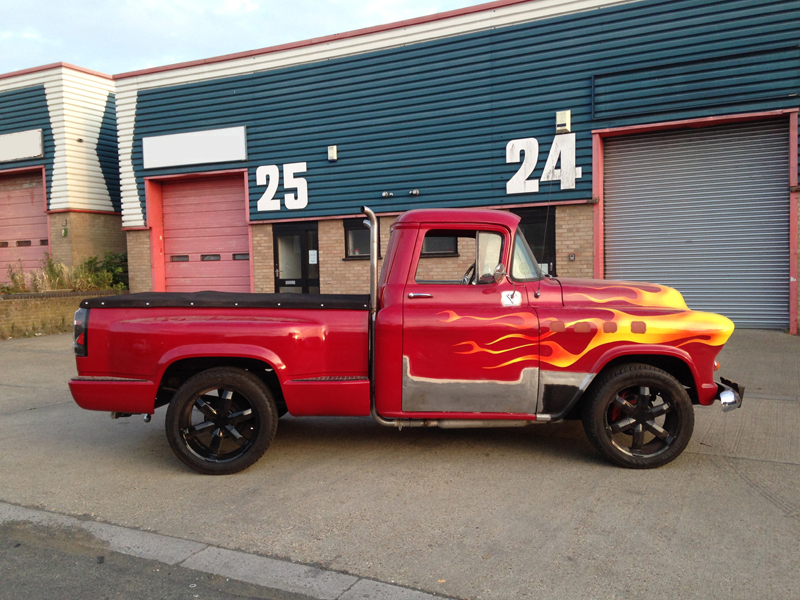
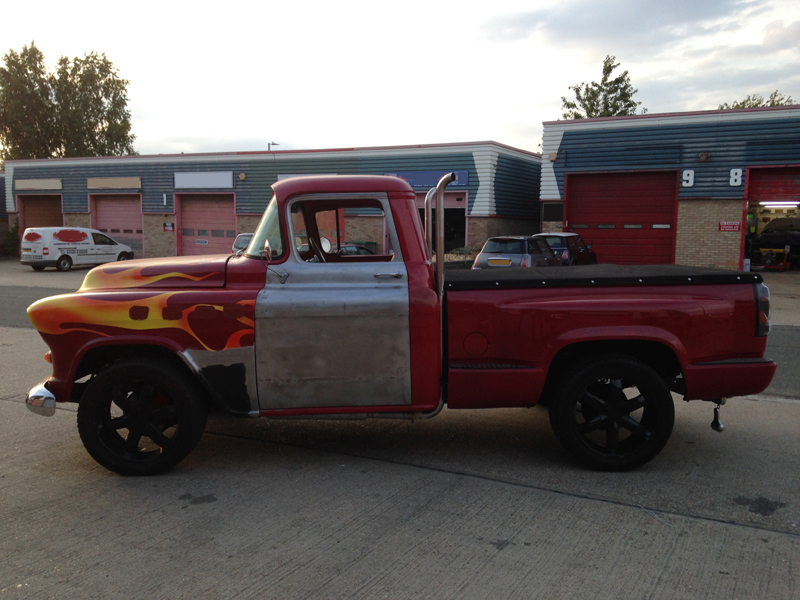
1956 Chevrolet 3100 Pick Up
This customised Chevrolet truck came into us for a few jobs, front upper and lower ball joints, replace the instrument clustor and replace the footwell vent cablesThe front of the truck and the cab are the original 1956 body panels:
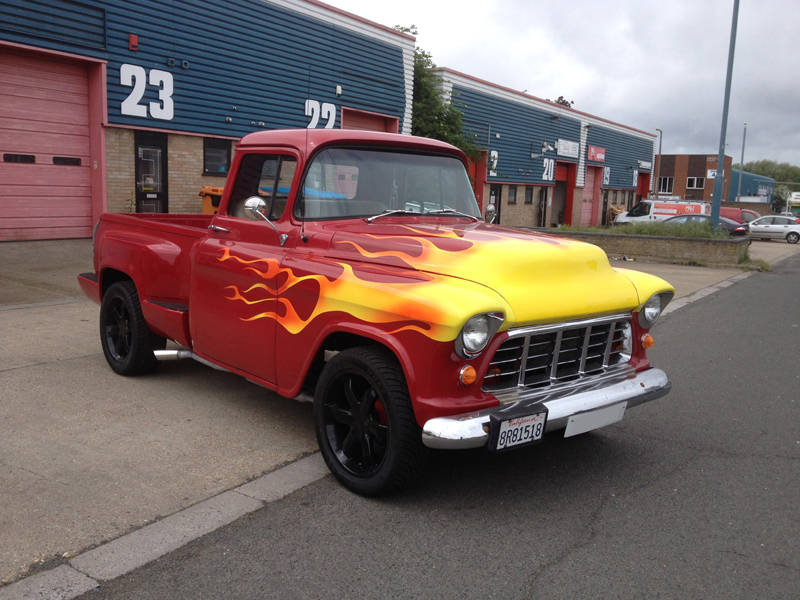
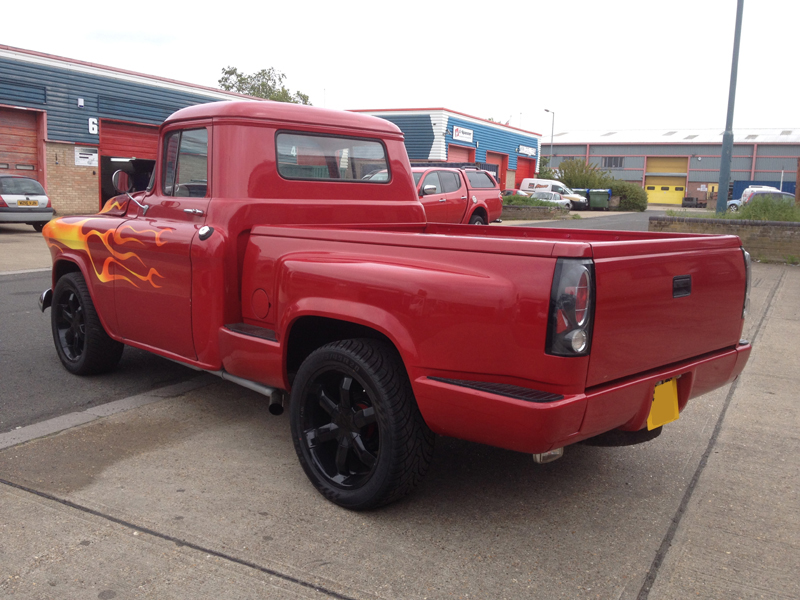
Whilst the bed, chassis, drivetrain and running gear are all from a later model of Chevrolet truck:
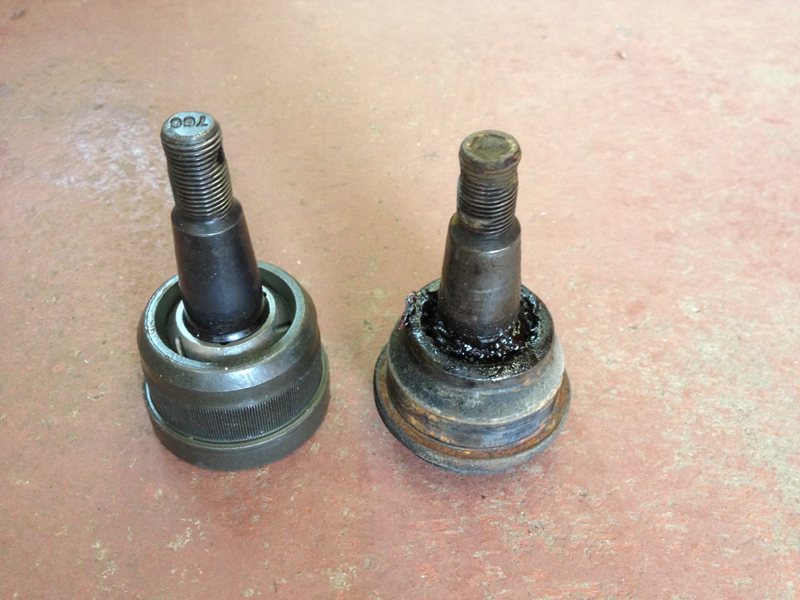
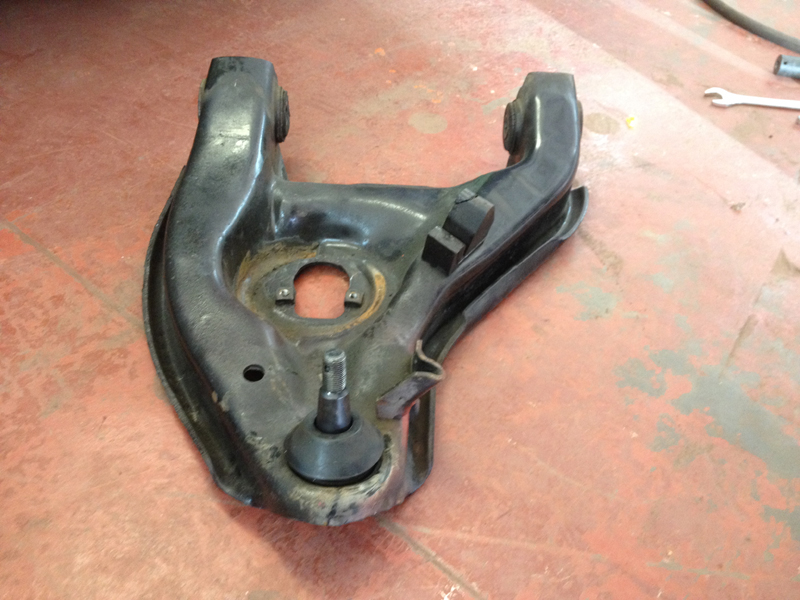
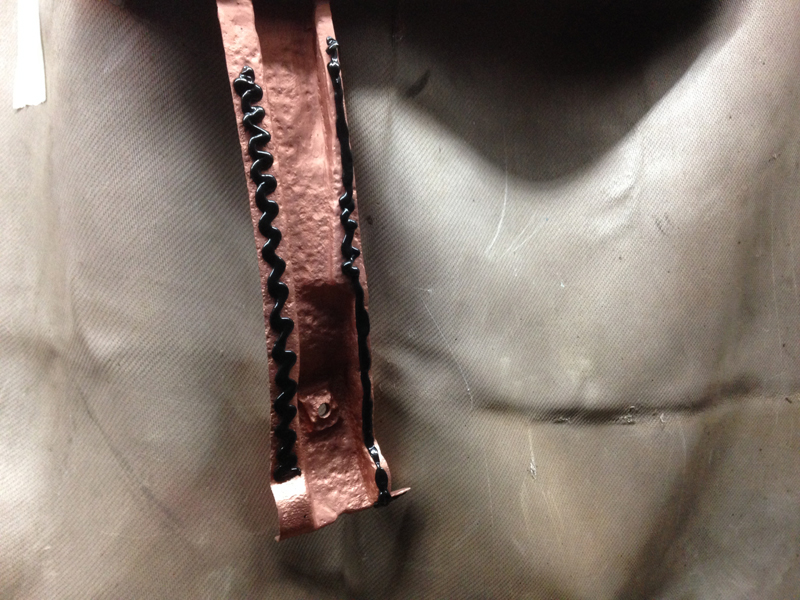
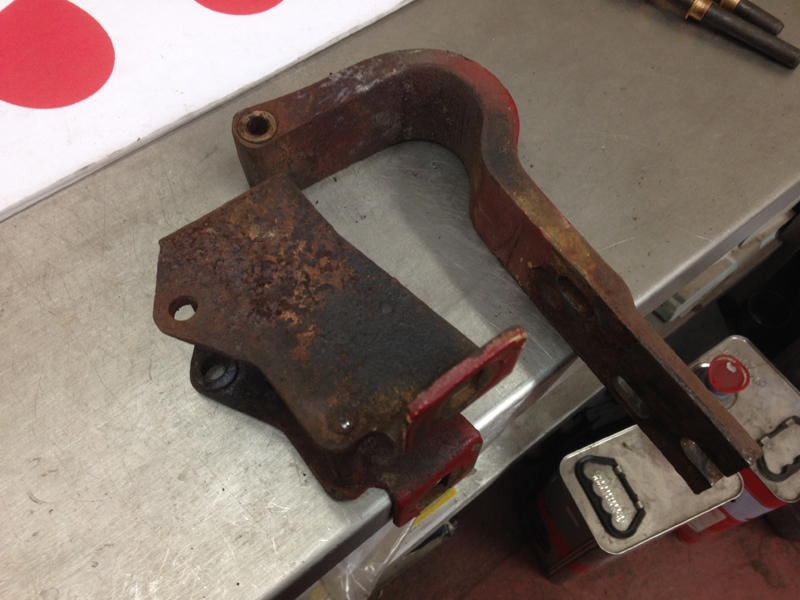
To replace the front lower ball joints we had to remove the lower suspension arm from the truck as the ball joint is pressed into the arm:
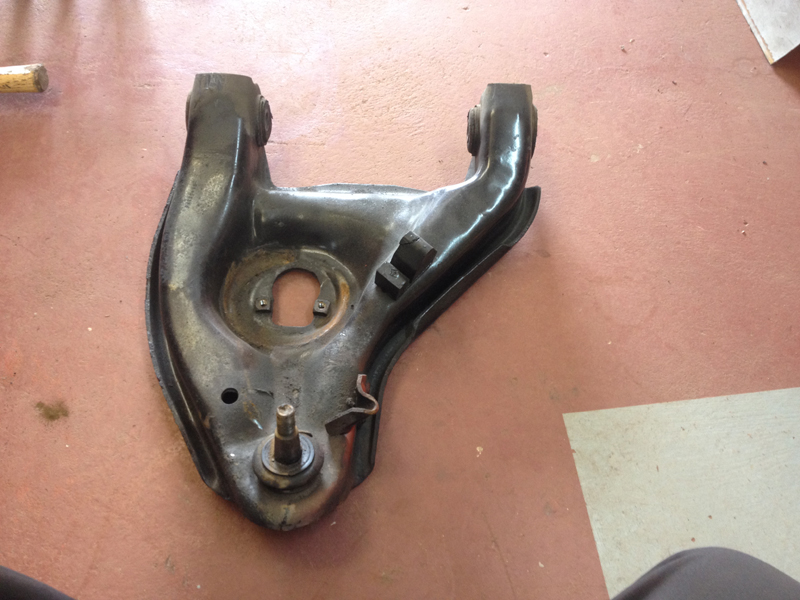
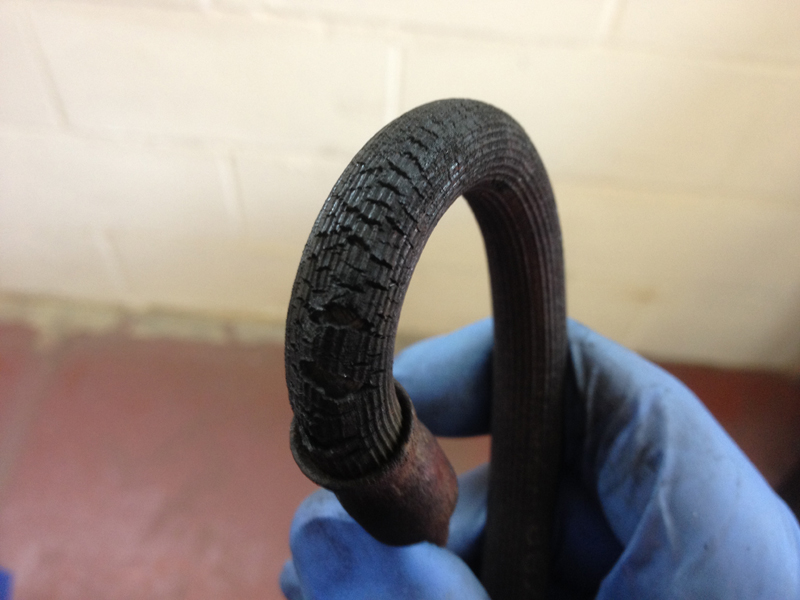
The old ball joint on the right had a split dust boot allowing dirt to get into the joint causing the joint to wear and knock:
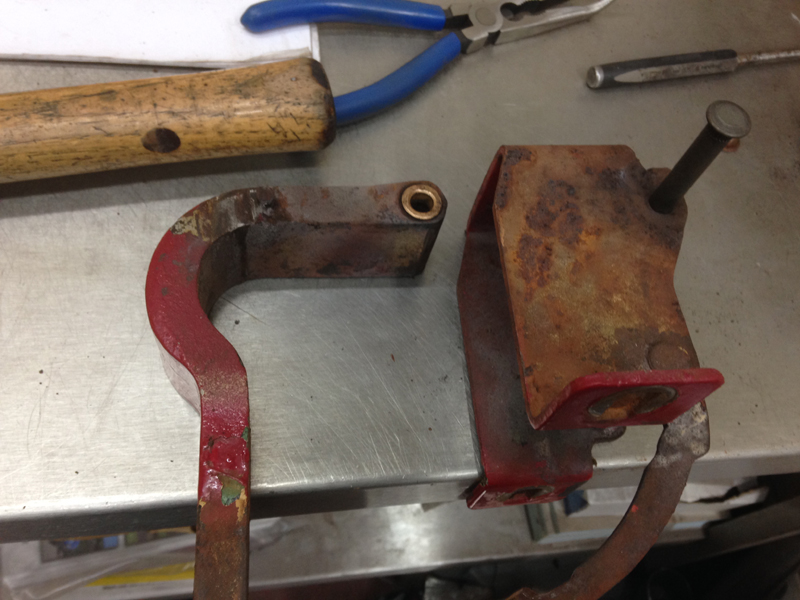
Once the new joint was pressed into the arm the new dust cover is fitted, once re-installed on the car we can fill it with fresh grease for years more service:
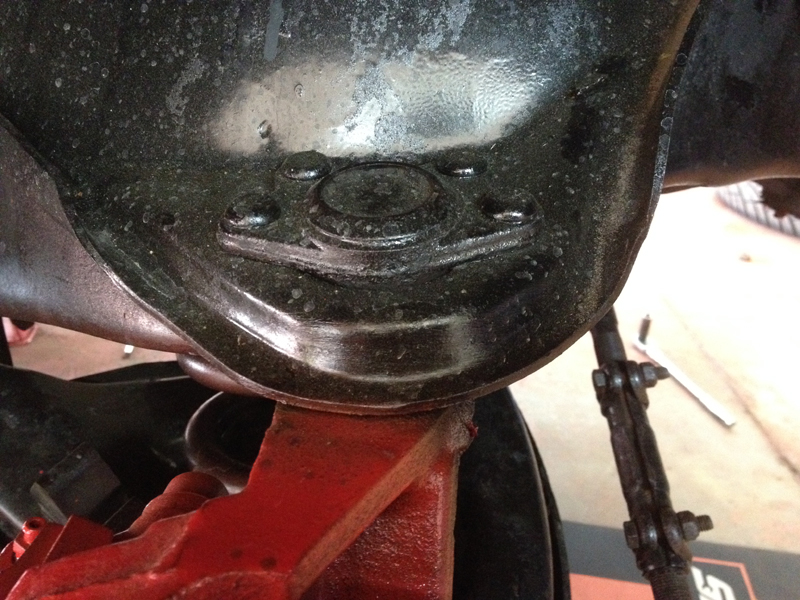
The upper ball joints are fitted from the factory with large rivets:
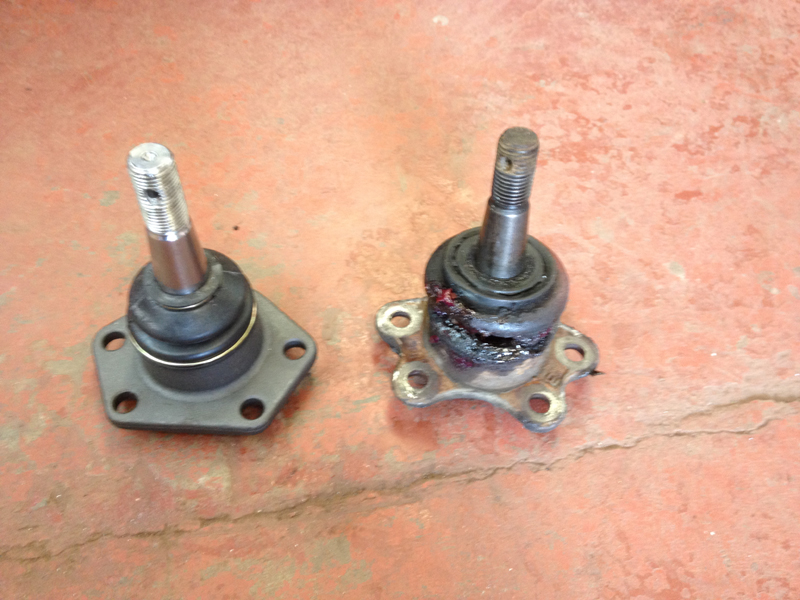
Same as the lower ball joints, the dust covers on the upper ones were split eventualy causing the joint to fail:
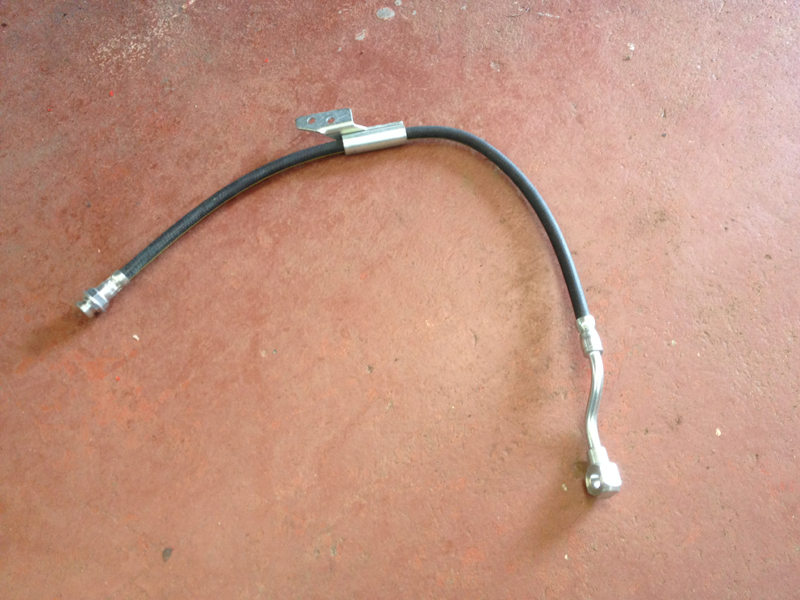
Whilst working on the front suspension we noticed the front brake hoses were completly perished and split:
So we replaced them with new ones:
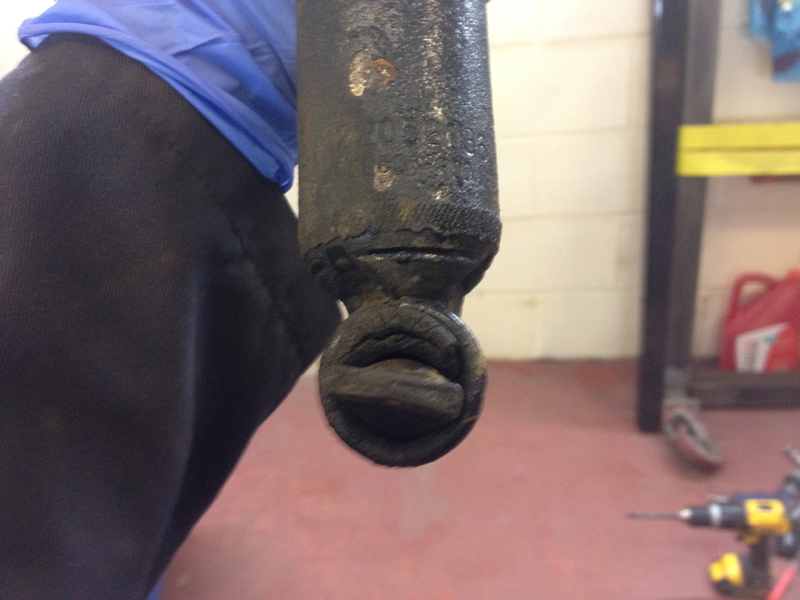
We also noticed that the front shock absorber lower bushes were completly worn and the mounting bar was knocking against the body of the shock absorber:
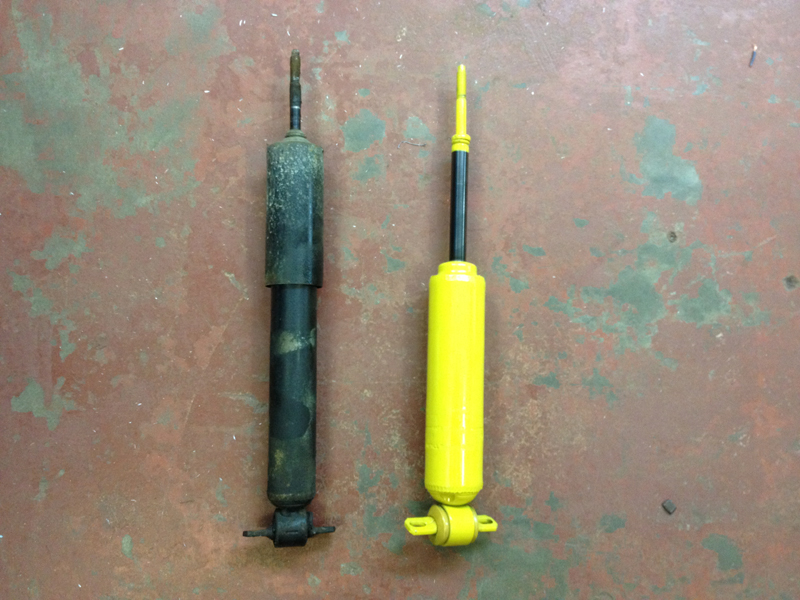
The old and new shocks side by side:
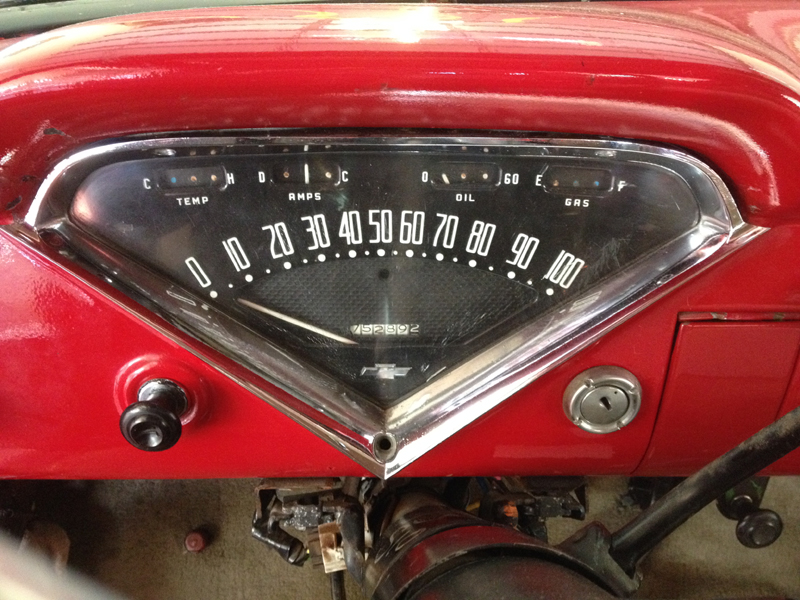
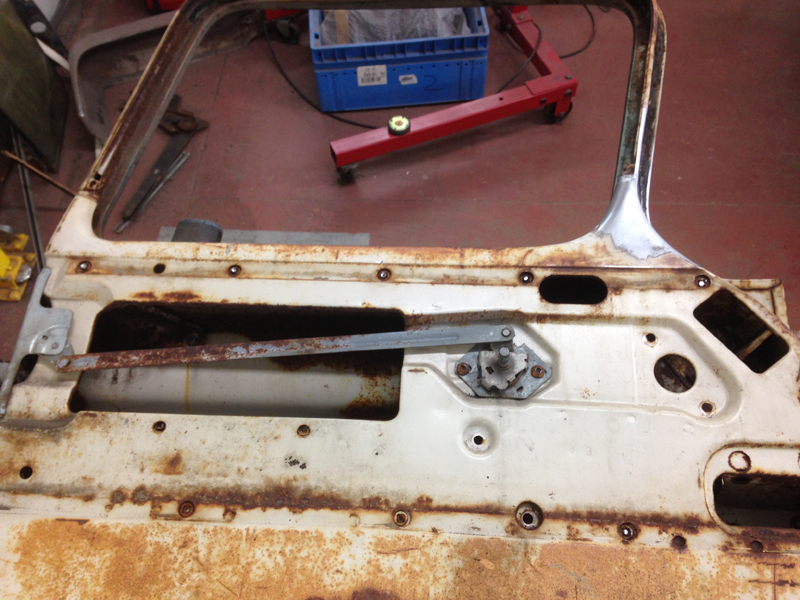
With the suspension finished we moved onto the interior of the truck. These are the original gauges, the only one that still worked was the oil pressure gauge:
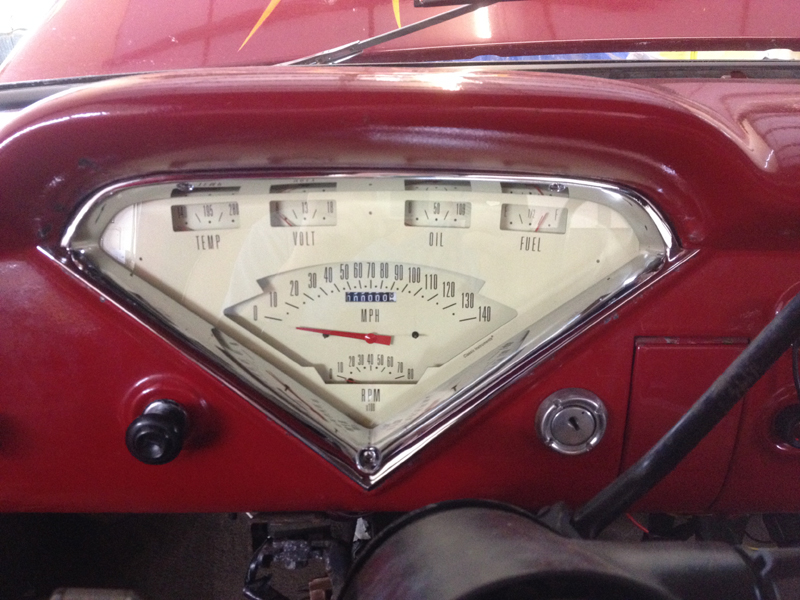
The owner of the truck supplied us with this new gauge kit from Classic Instruments, this new instrument cluster utilises all electronic instruments including the speedometer which gets its signal via a GPS unit for extreme accuracy. It also comes with new sender units to replace the original ones on the engine. We had to do some re-wiring due some badly done previous repairs but appart from that the kit is a straight forward install and now lets the driver know exactly what is happening under the bonnet:
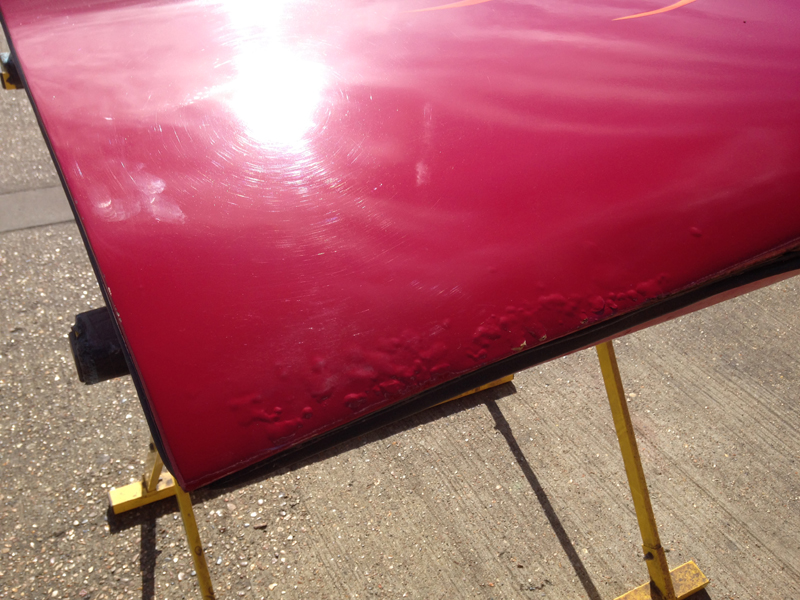
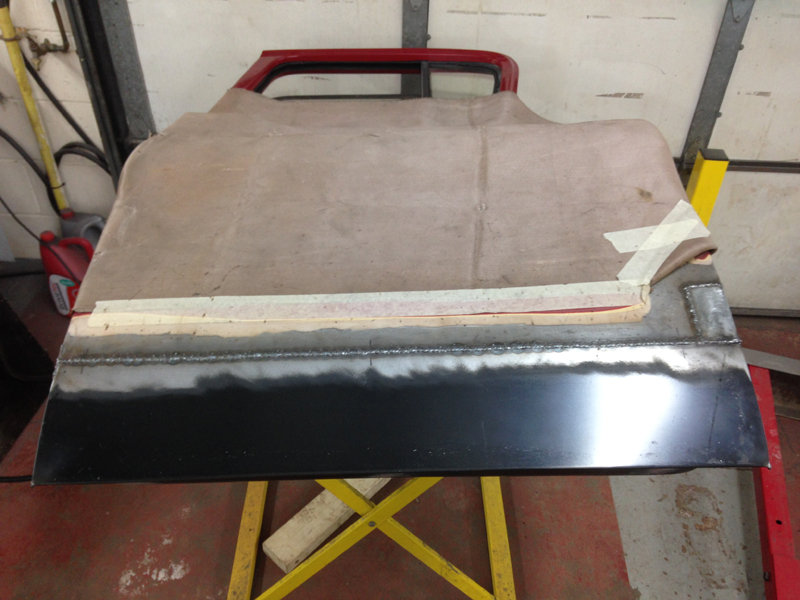
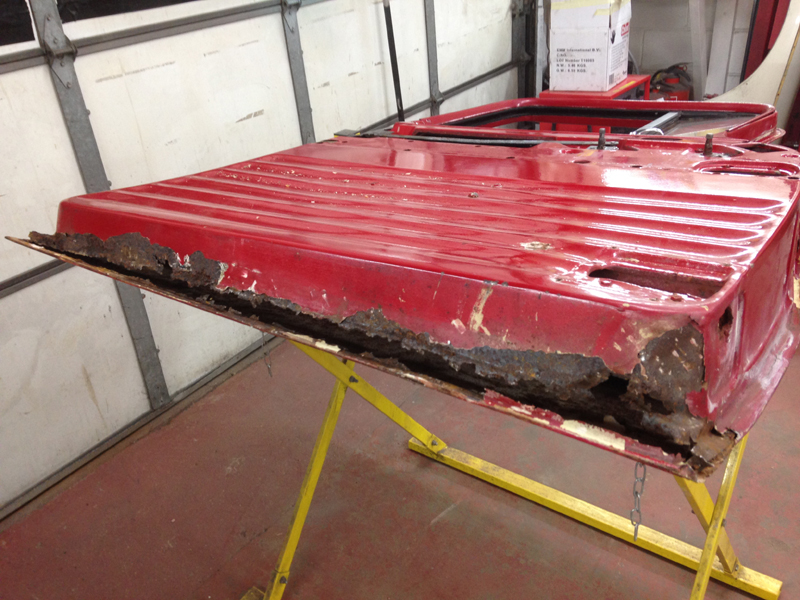
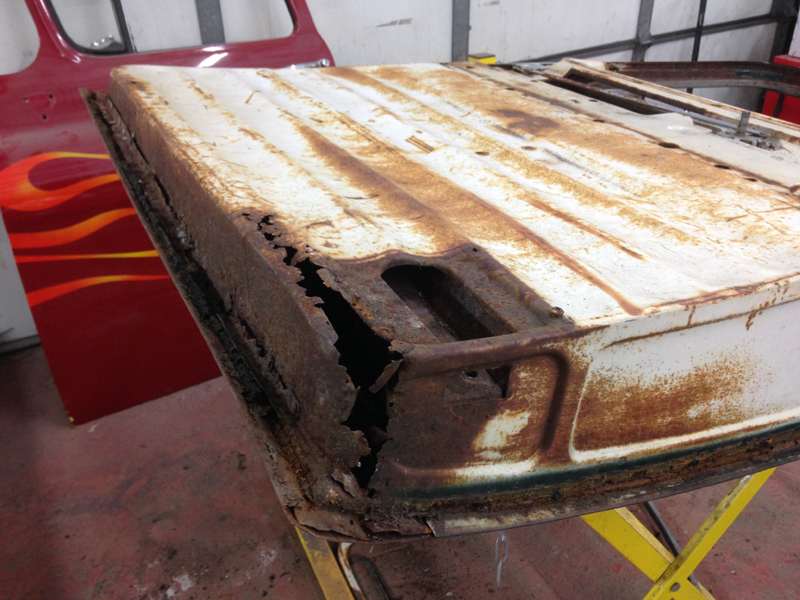
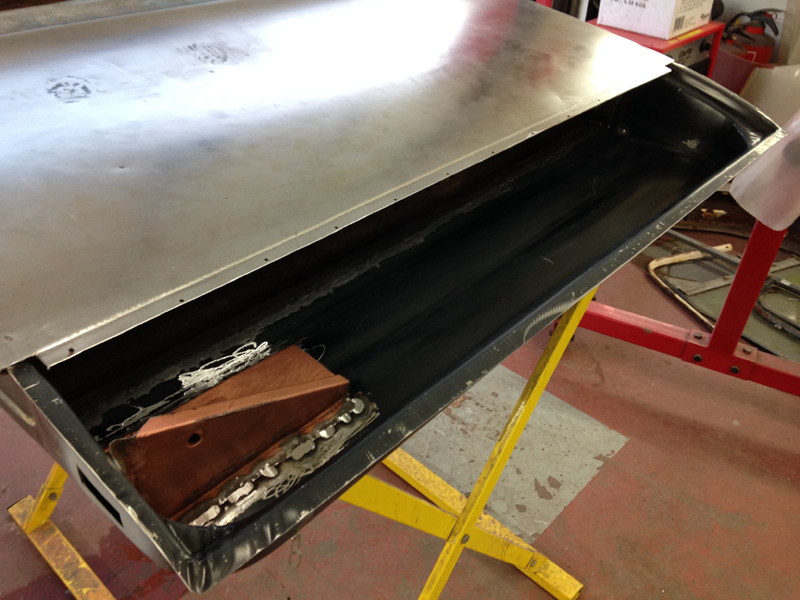
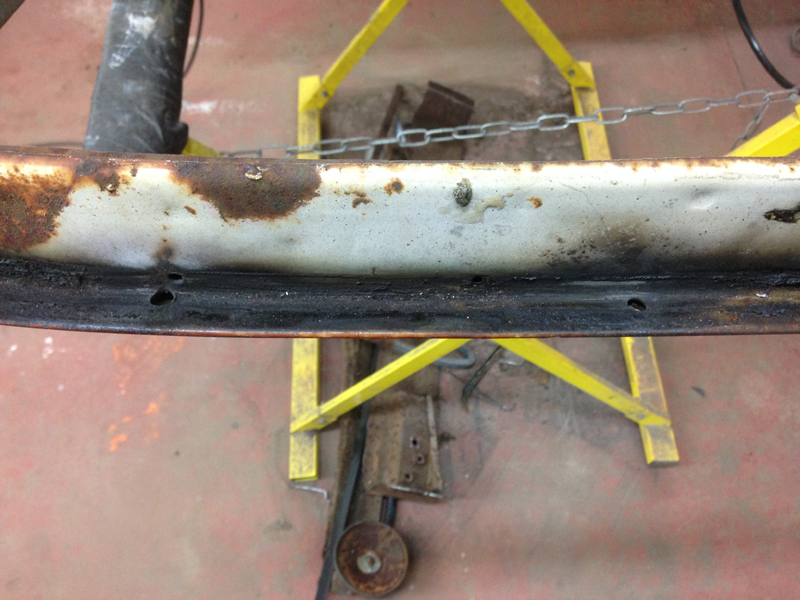
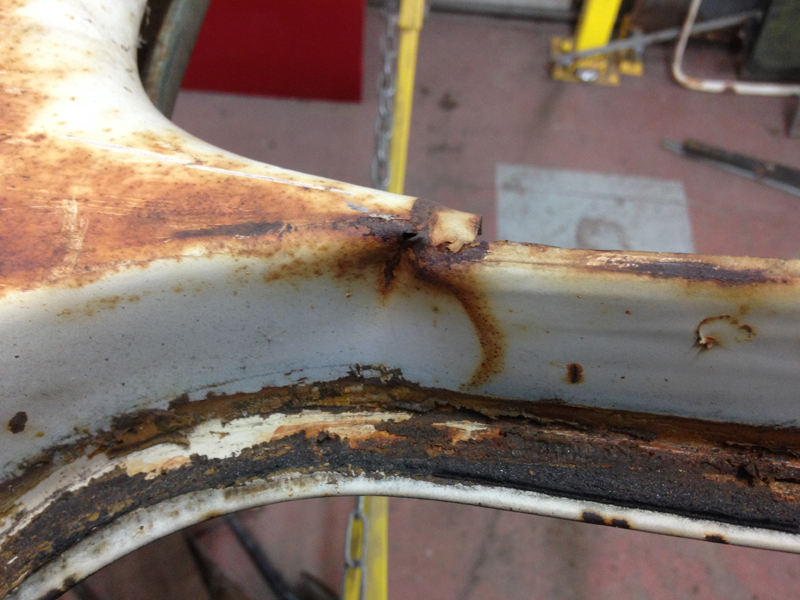
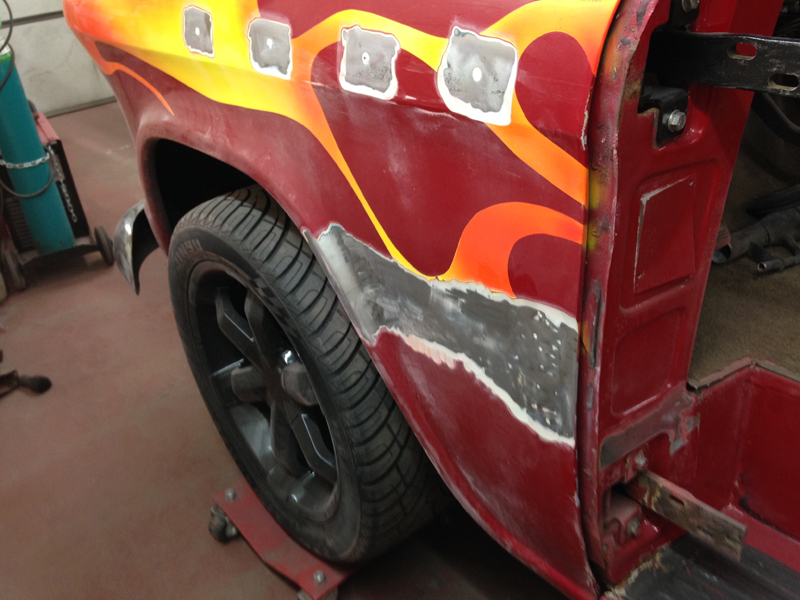
Some time later the owner of the truck contacted us again to take care of some rust issues in preparation for it having a repaint. The main issues where the doors, bottoms of the front wings and the cab front corners where the door hinges mount to. The first port of call was the passenger door:
The rust has bubbled under the paint quite badly along the bottom edge:
The entire way along the bottom of the outer skin:
And then along the inner frame of the door:
Again the entire length of the door:
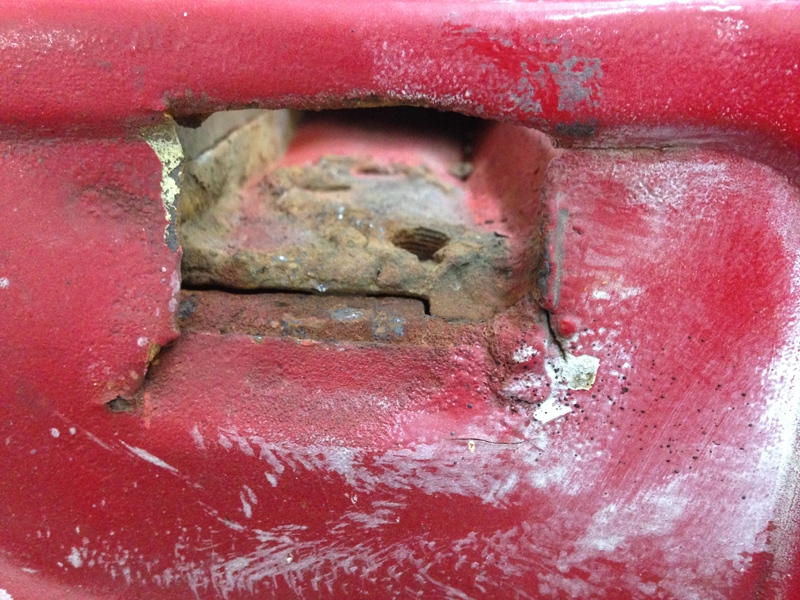
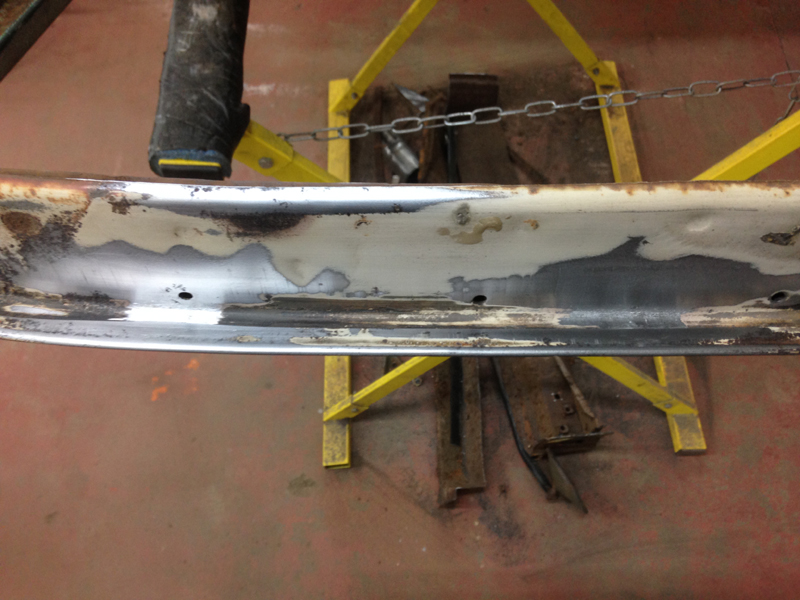
To find out exactly what we are dealing with, it was time to strip the paint from the rusted areas and inspect the damage:
It wasn't looking good, someone in a past life had just used body filler to cover all the rust and rust holes along the entire inner door frame:
And the front of the door was the same story:

The corner of the door was missing and just made from body filler:
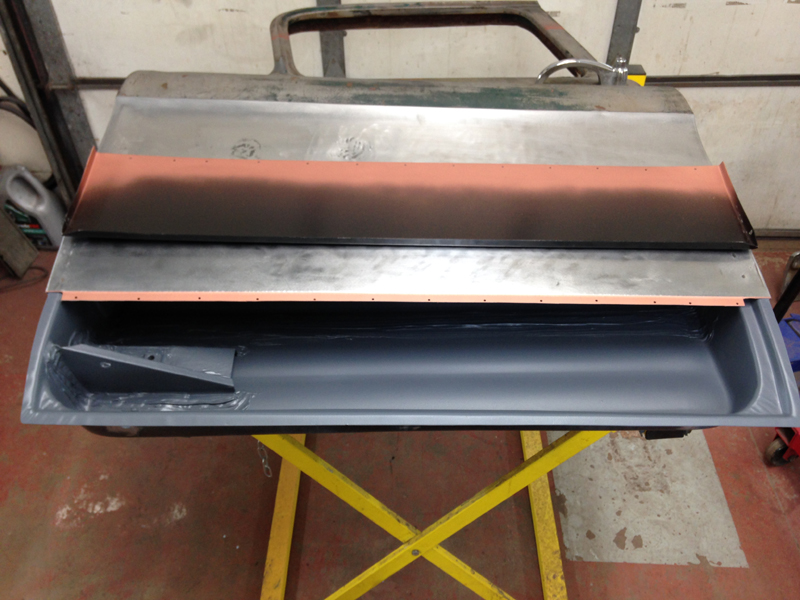
We decided rather than fabricate small patch panels that it would be quicker and easier to purchase entire door repair sections and weld those into place. The first step was to try the replacement panel on for size and mark up where to cut the panel and the door:
Then we can cut the entire lower section of the rusted inner door frame away and trim it to size and clean the metal up:
And then trim the repair section to size and get the edges cleaned up ready for welding:
Once we were happy with the fit of the repair section we welded it into place and ground the welds down flush:
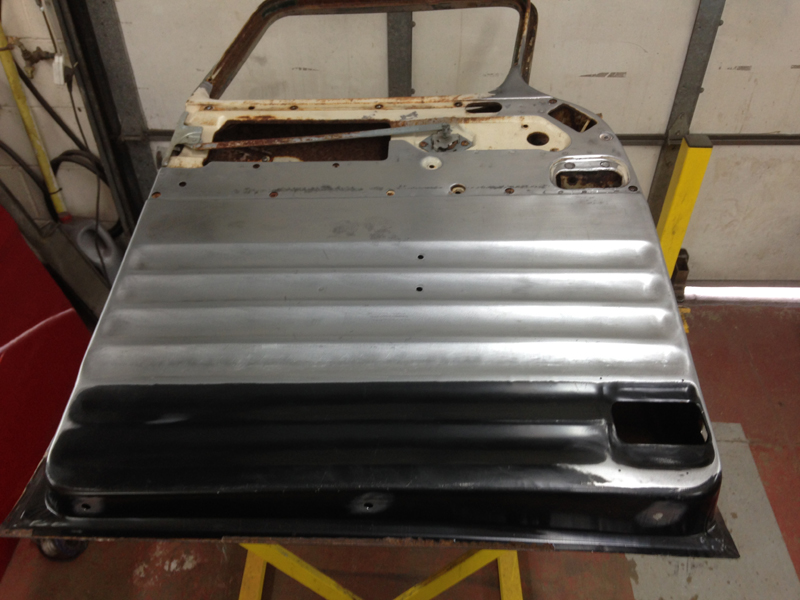
With the repair panel in place we turned out attention to the inside of the door, we keyed up inside the door and removed any loose flaking paint or dirt. Note the lower hinge mounting point that we had to remove from the original metal and weld onto the new metal. This piece is not available new which is why we had to re-use the original one:
And then painted the inside of the door with one coat of acid etch primer, followed by a thick coat of high build primer to protect the metal:
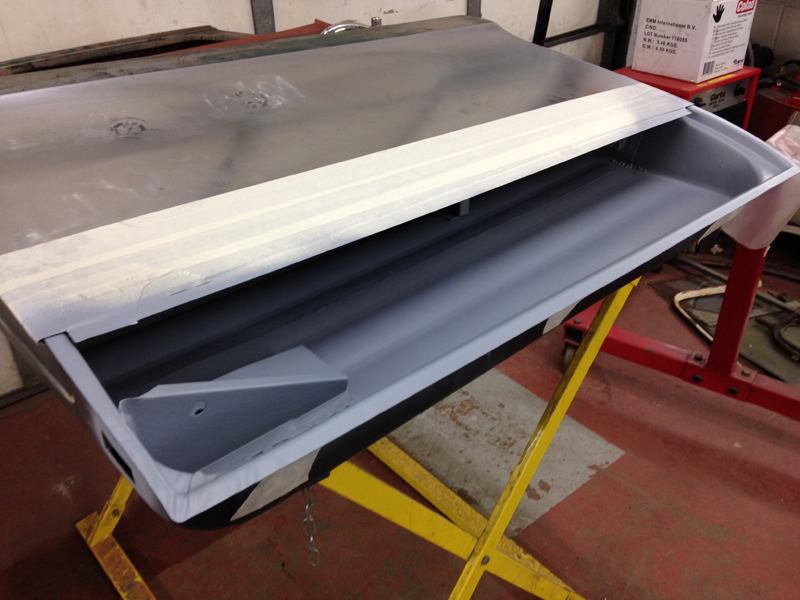
Once the primer had dried we applied seam sealer over all of the welds and joins to stop water and moisture eating into the welds in the future:
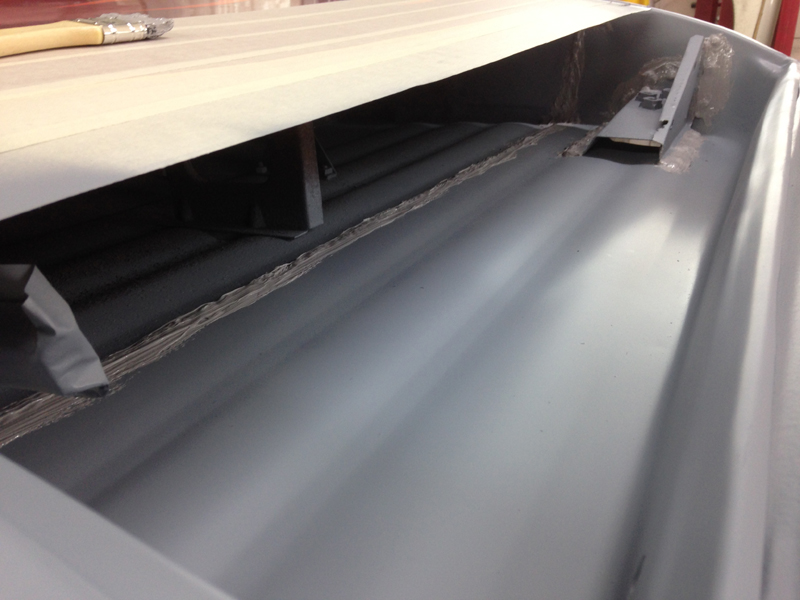
And then coated the entire lower section in a grey underseal to protect the inside of the door for many years to come:
The underseal is very thick and will hold back any damp and moisture from making its way into the metal underneath it:
Next we can turn out attention to the outside of the door skin itself. Again we trial fit the repair panel on and off and trim away at the panel and the door until we are happy with how it fits. Note the small rectangular hole in the right hand end of the door, the rust had eaten this section away but unfortunatly the repair panel wasnt large enough to cover it, so we will have to fabricate this section ourselves once the other purchased piece is welded in, one advange of this hole though is that we can use these style of clamps to hold the panel in place while welding and them slide then pull them back out of the door with and extendable magnet, this wouldn't have been possible otherwise:
With the lower outer skin repair section welded in place we fabricated a small rectangle shapped piece and then welded it in to till the remaining hole:
The edges of the door skin are a folded over lip which holds the skin firmly to the door frame. We paint and then seal this lip so that water can't get trapped in the seam. Note the round hole in the bottom of the door frame, we made 3 of these holes along the bottom of the frame to let water out of the door, we did this before undersealing the inner door frame. First we prepare the metal seamed edge for paint:
And then paint with acid etch and high build primer as before:
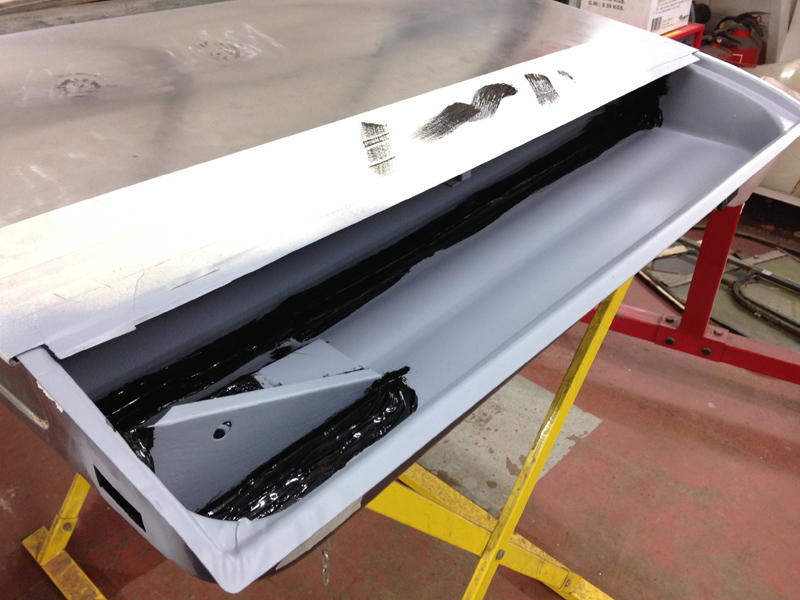
Then neatly apply seam sealer over the door seam:

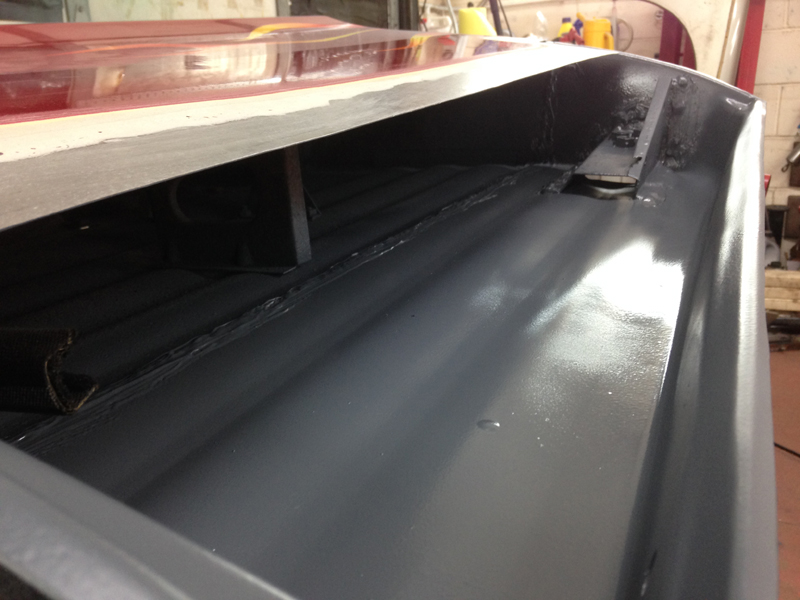
Followed by a 2nd coat of high build primer to cover the seam sealer which will in turn leave this seamed edge just about ready for the actual paint when the time comes for that:
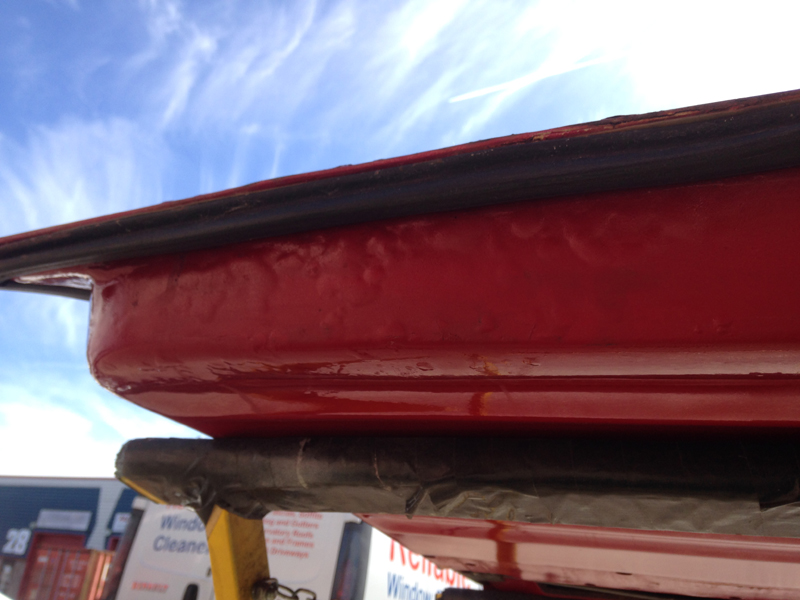
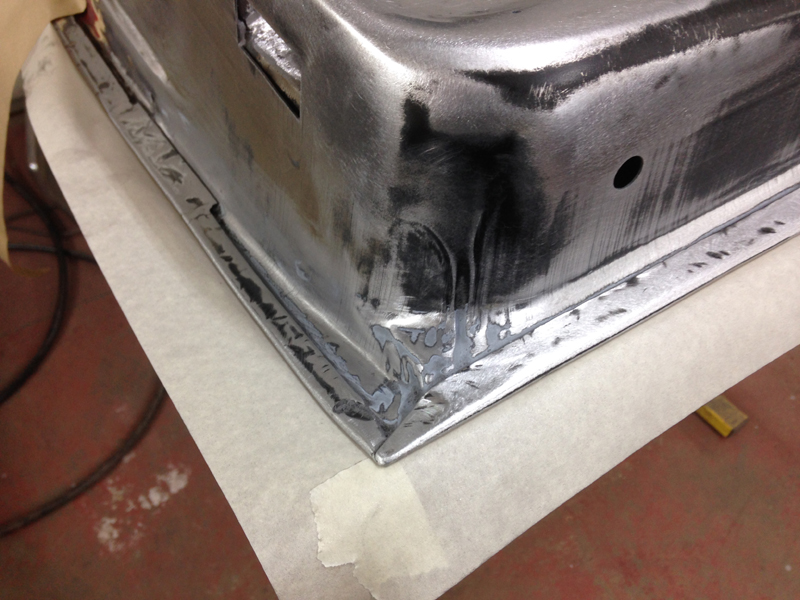
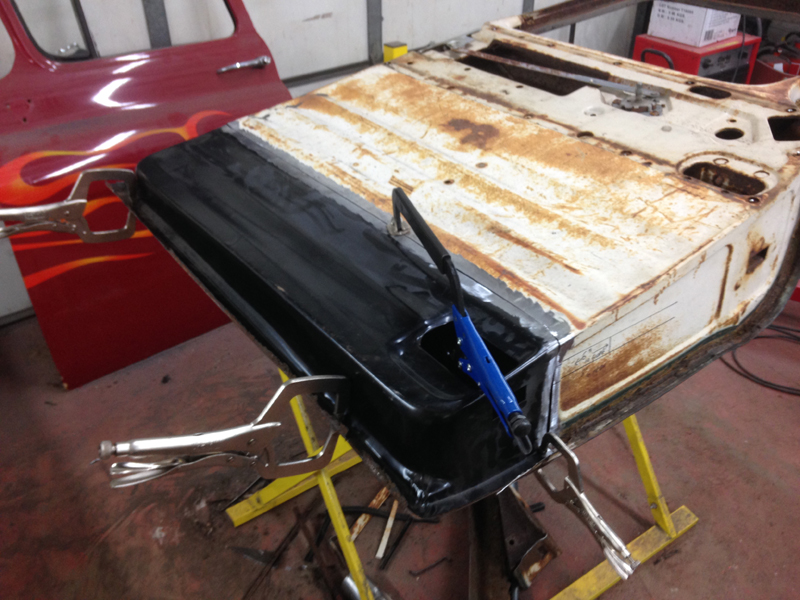
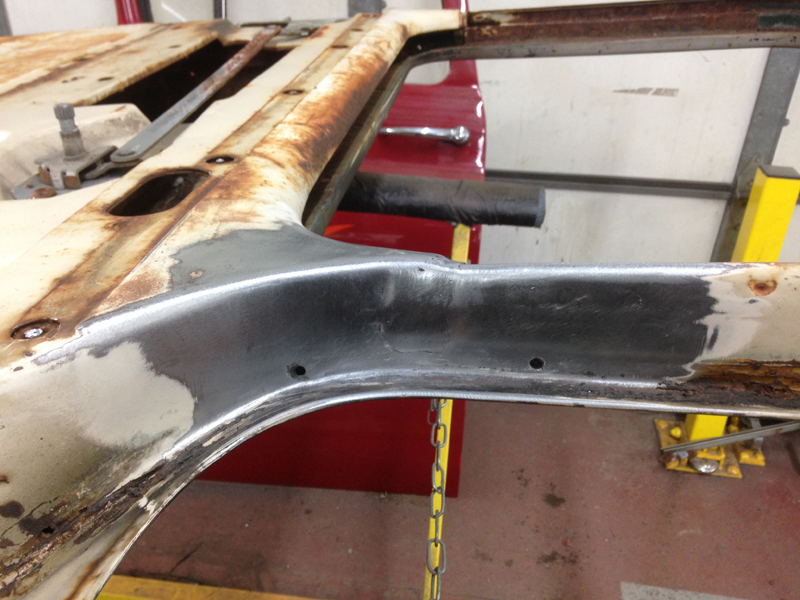
The lower inner and outer door repair sections are now repaired:
The door mirror mounting nuts on the passenger door where missing and someone had mounted the mirror to the door using nuts and bolts. While there is nothing really wrong with this, it does make mounting the mirror a little awkard and if you drop one of the nuts inside the door with the door on the truck then you don't have much chance of getting the nut out as access to the lower section of the door is very limited, then every time you close the door you can hear the nut rattling around. So we decided to repair the mounting point, first clean up the metal:

And then weld on some new nuts with large spreader washers onto the inside of the door. The door mirror can now be installed just as the factory intended:
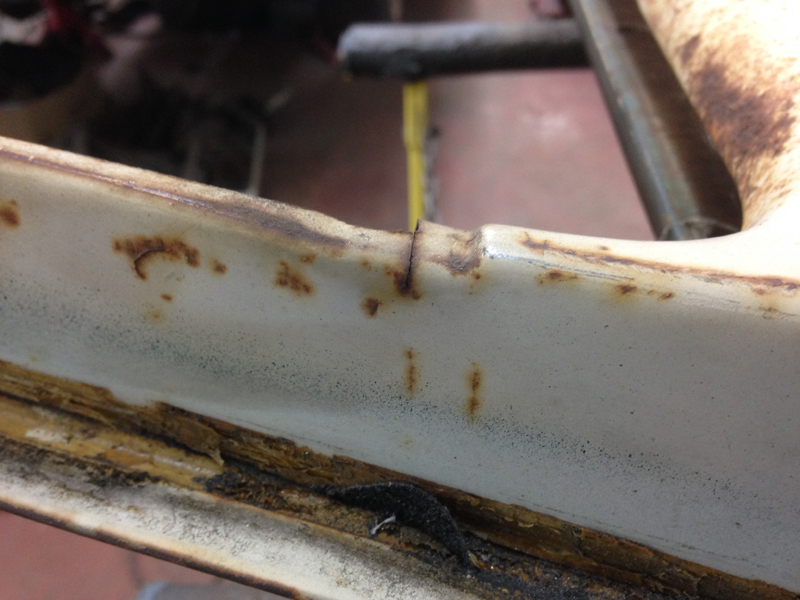
The upper hinge mounting point looked out of shape on the door:
And what looked like a possible crack in the steel:
So we decided to investigate. We found the area to be damaged and out of shape, with cracks in the steel and broken spot welds for the mounting point itself:
After heating up the metal and pushing it back out from the inside with various bars welded up the cracks and ground the welds and then took our attention to the actual hinge mounting point. The door was so out of shape and so many welds were broken that the mounting point was now in the wrong place. So we decided to drill out the remaining welds, add some extra holes for new ones and then clamp the mounting point back into the correct place:
The areas that we couldn't get clamps we used sheet metal screws to pull the metal tight and then remove them one by one welding the 2 pieces of metal together as we went:
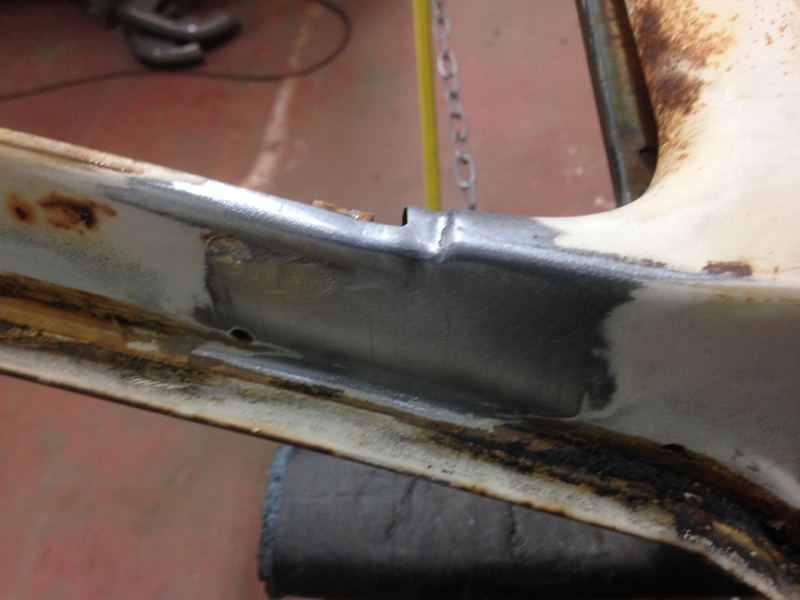
Once the mounting point was all welded back together, we ground the welds and tidied up the metal around this area. The door is now strong again and can be mounted back onto the truck correctly:
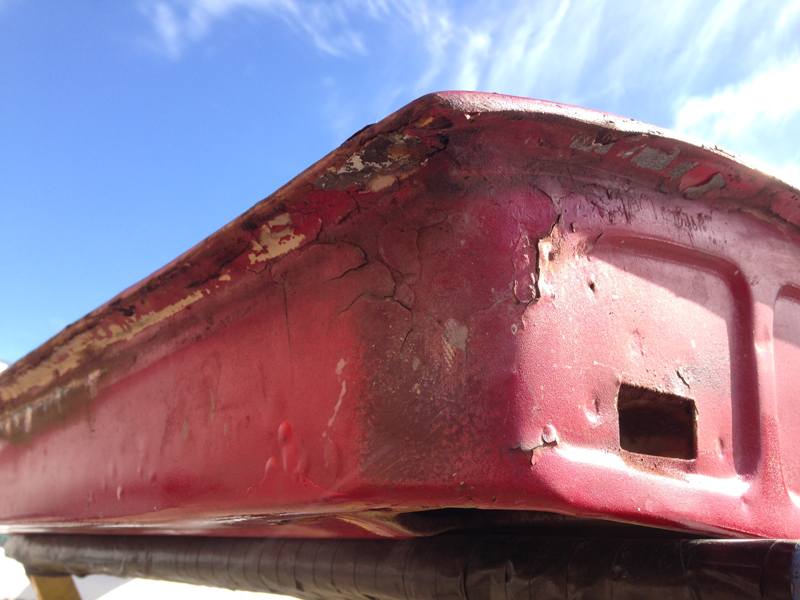
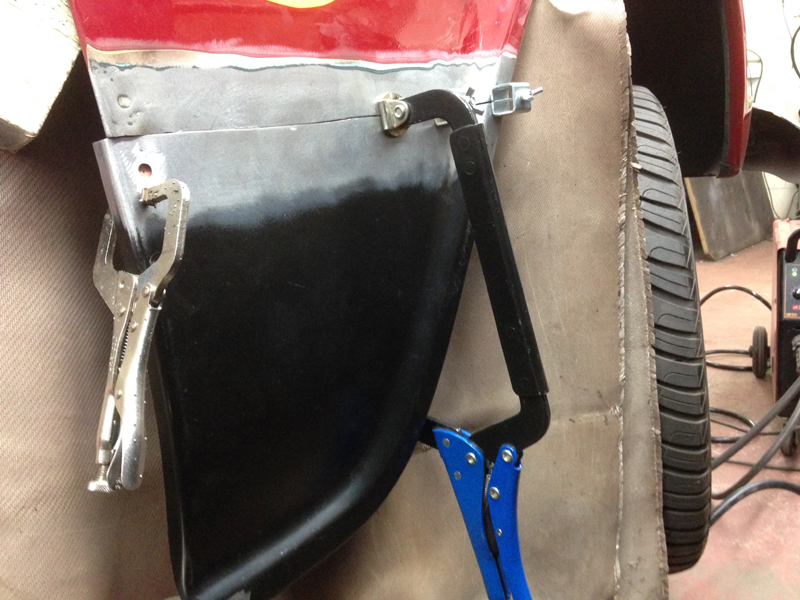
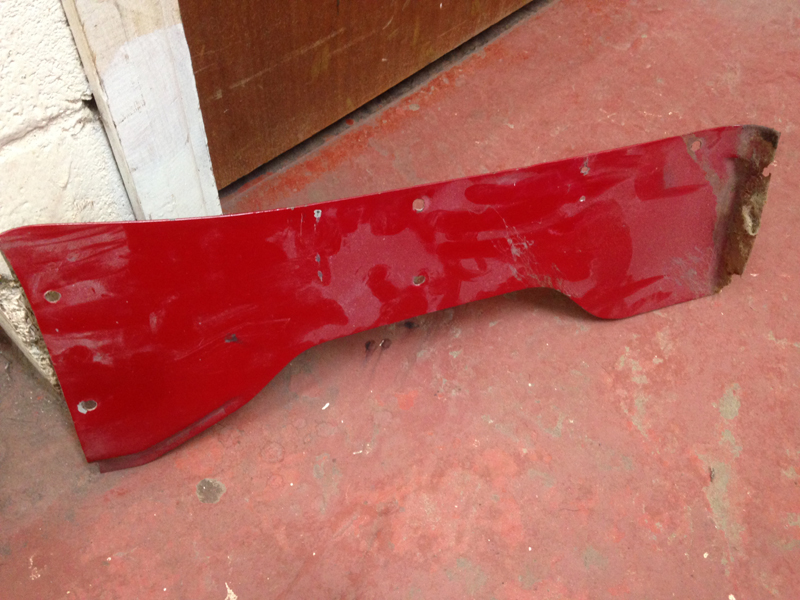
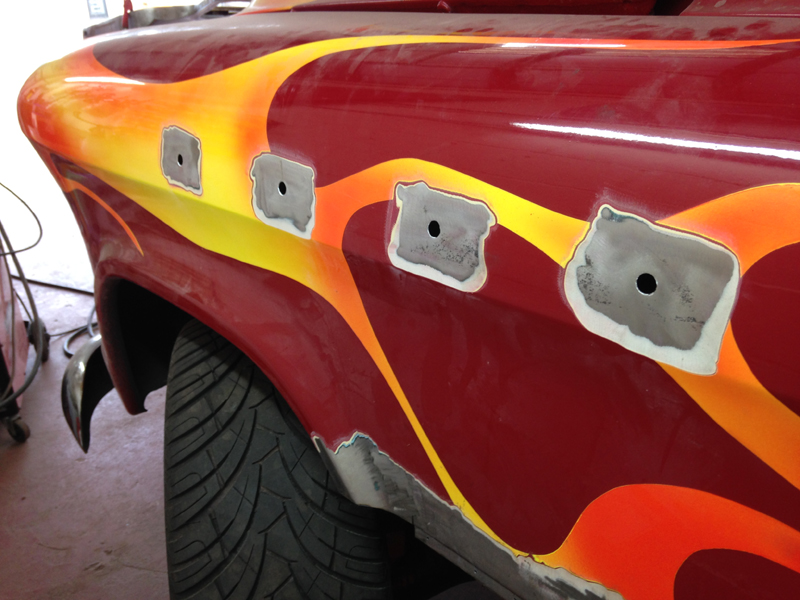
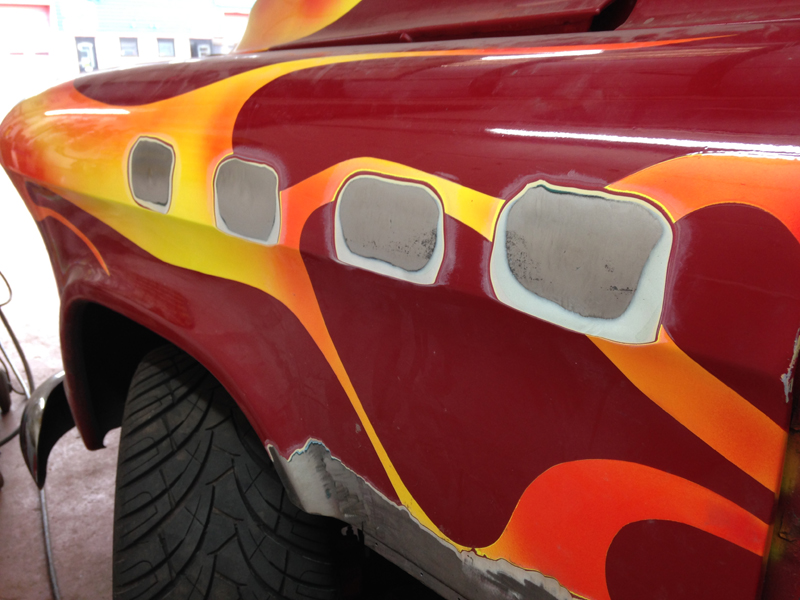
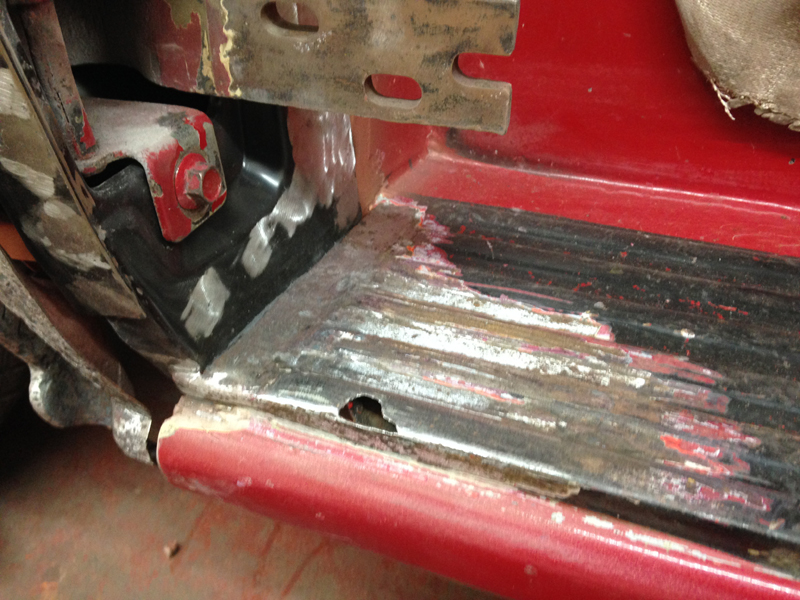
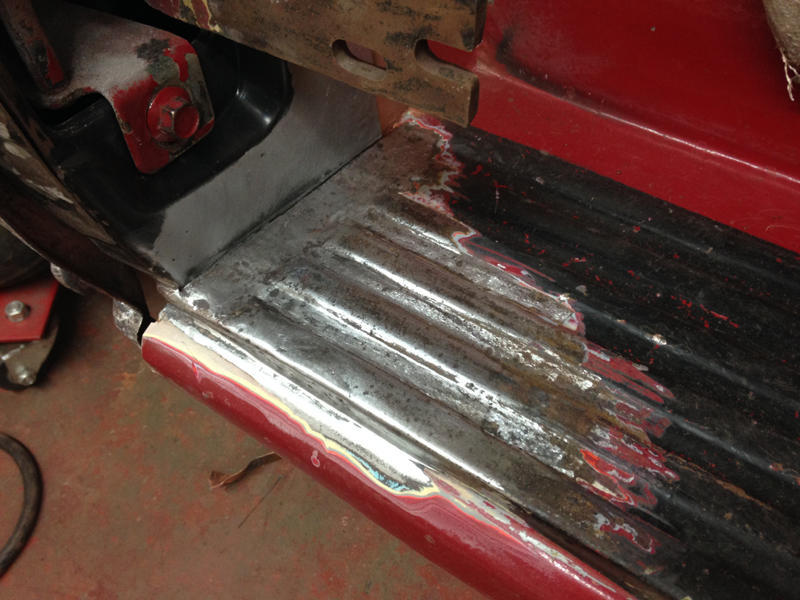
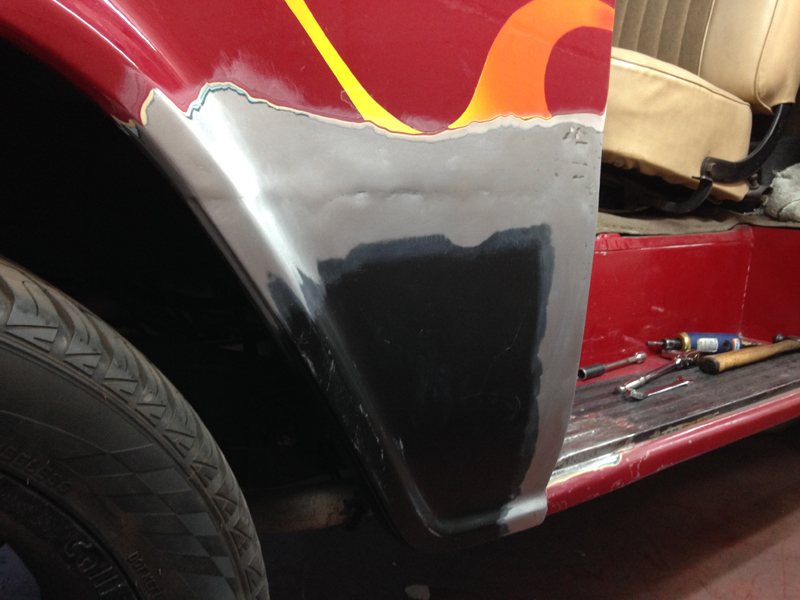
With the passenger door complete it was time to move onto the next step. The bottom edge of the front wing was very thick with body filler and starting to rust out in places, it was also in the way for carrying out the repairs to the cab lower corner:

So we marked out where we wanted to cut and then removed the lower section of the wing:
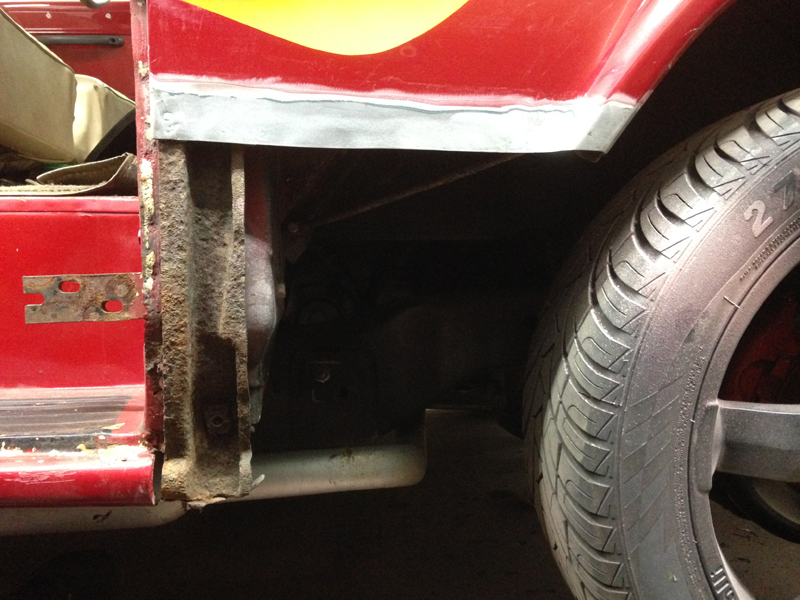
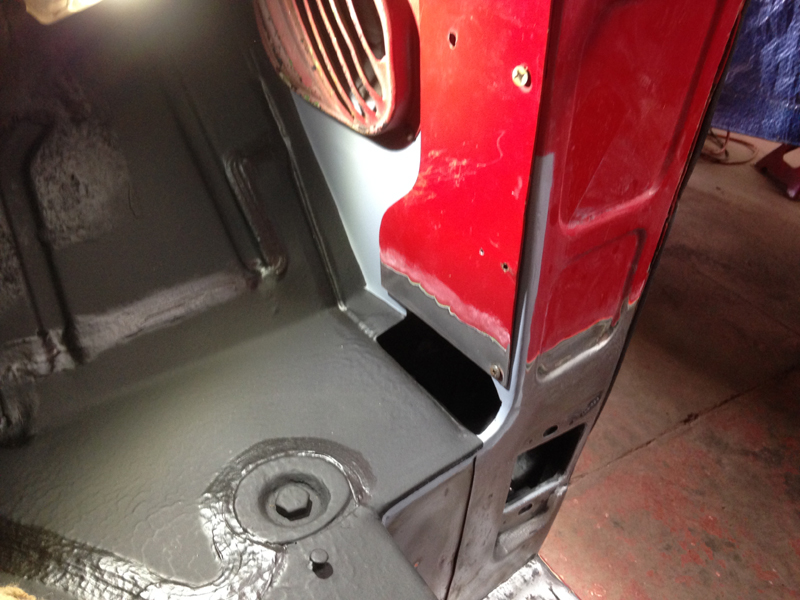
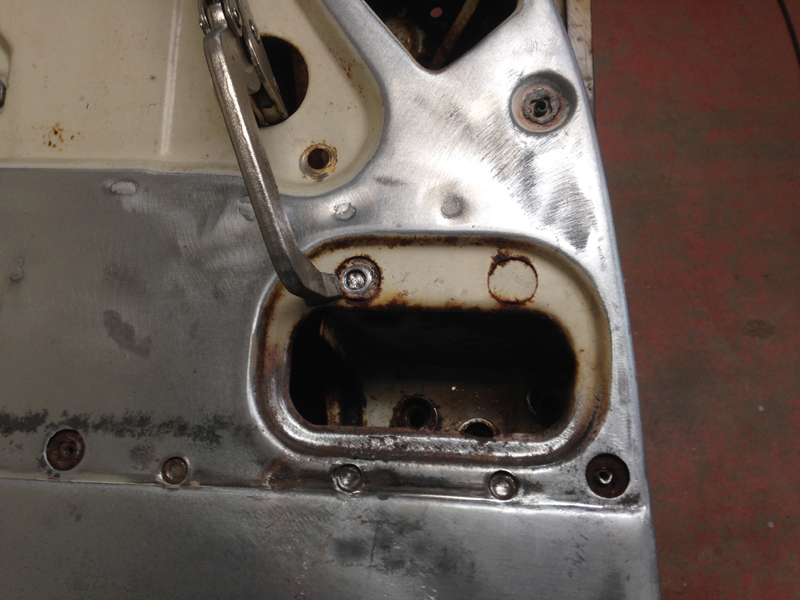
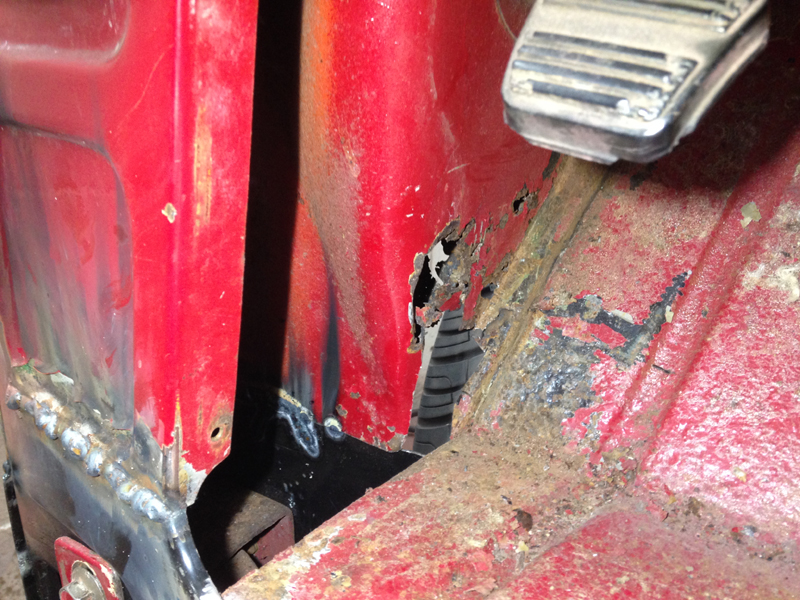
We also removed the inner door pillar hinge access cover to take a look at the rust, we could see straight out the bottom of the cab through here, this should be a sealed area:
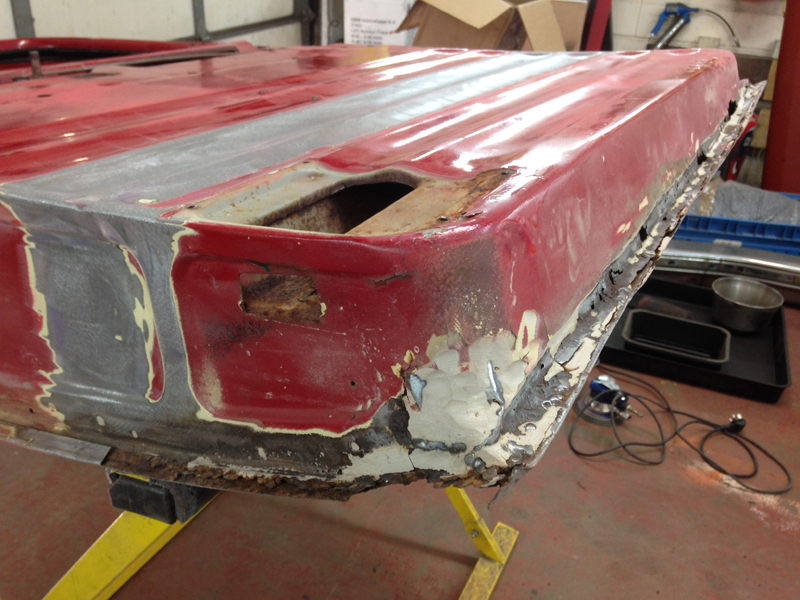
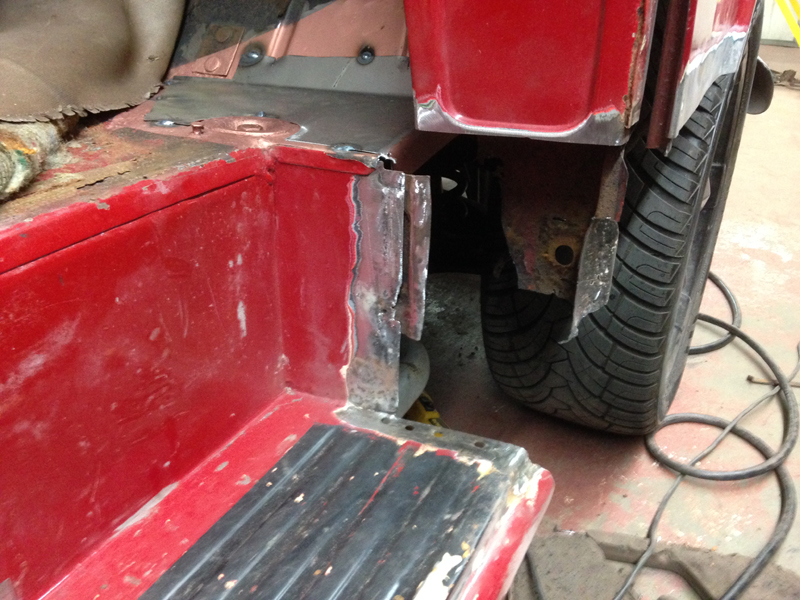
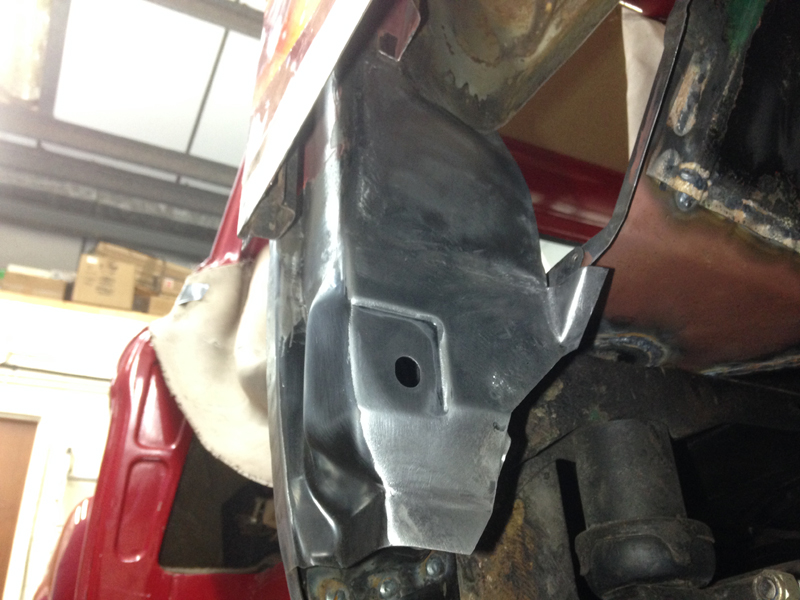
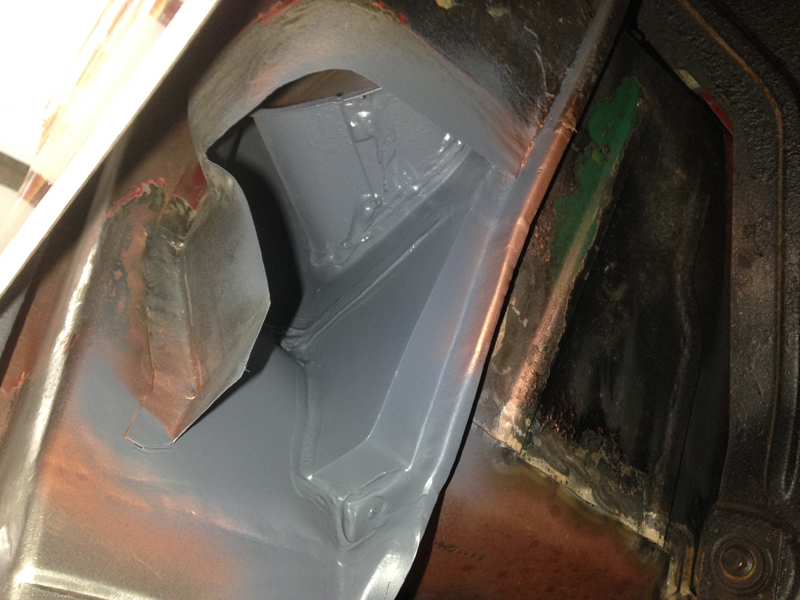
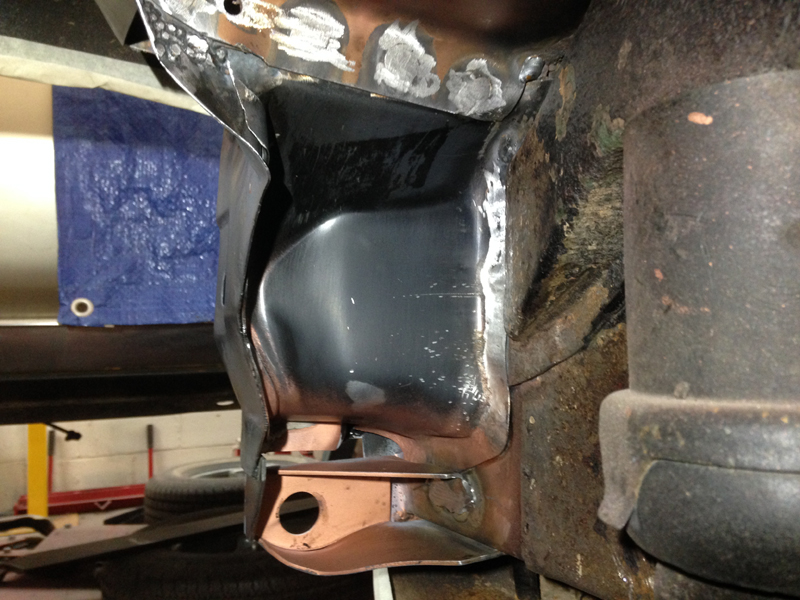
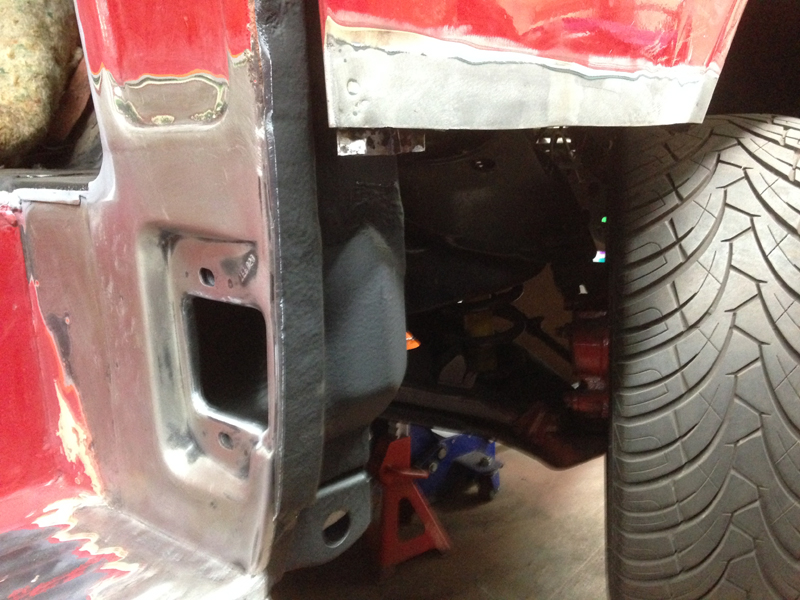
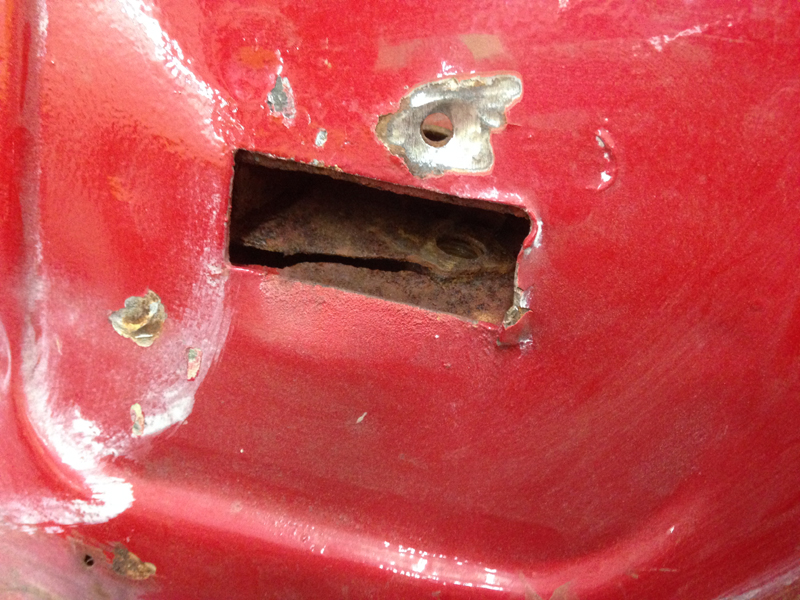
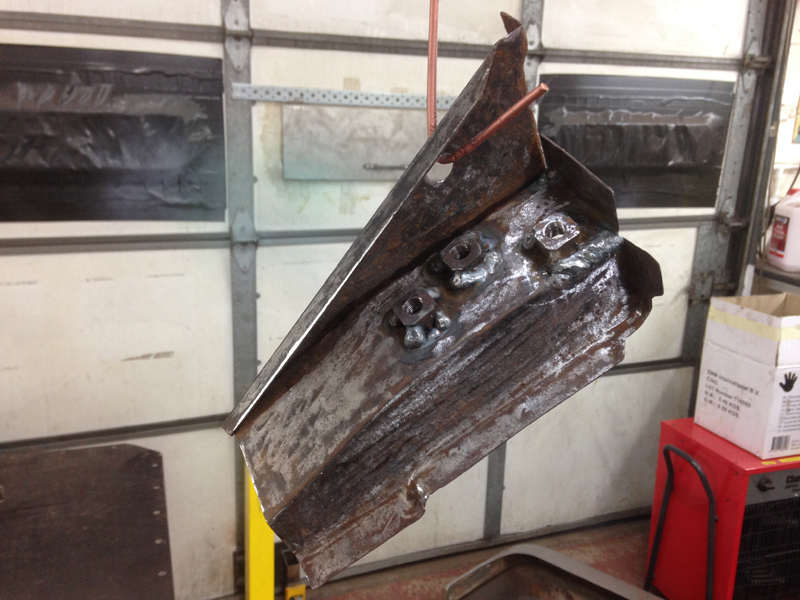
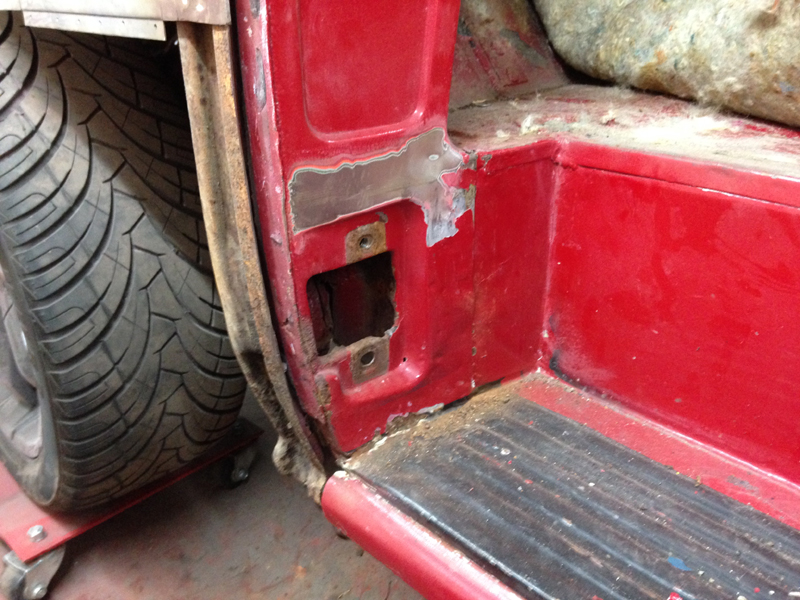
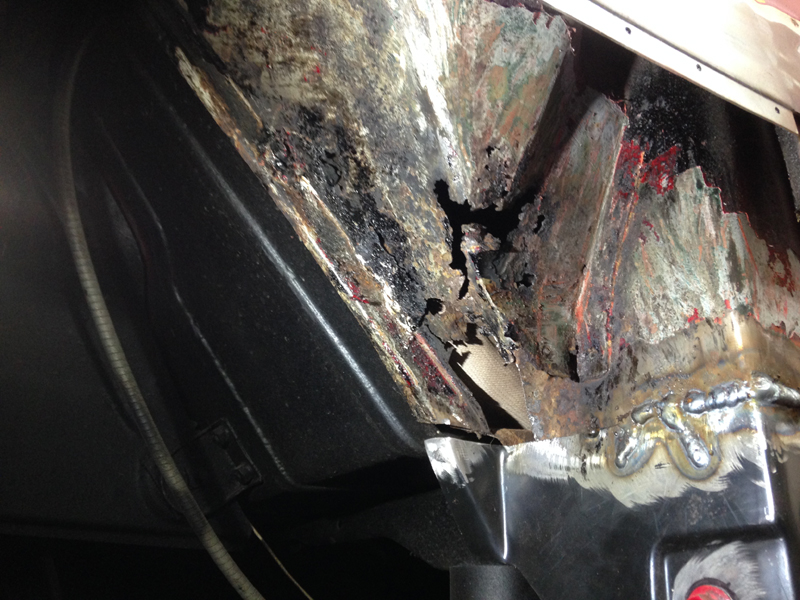
The outer lower corner of the cab was completly rotted out:
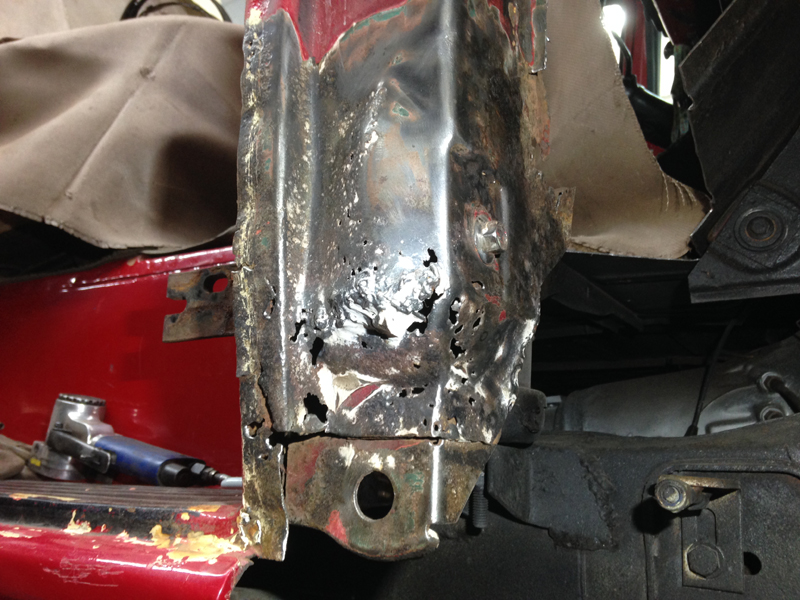
This section is a 4 sided box section that is the main structure of the cab's body and what the door hinge mounts to. 1 side of this box section was completly missing, the rest was rusted out and made of body filler:
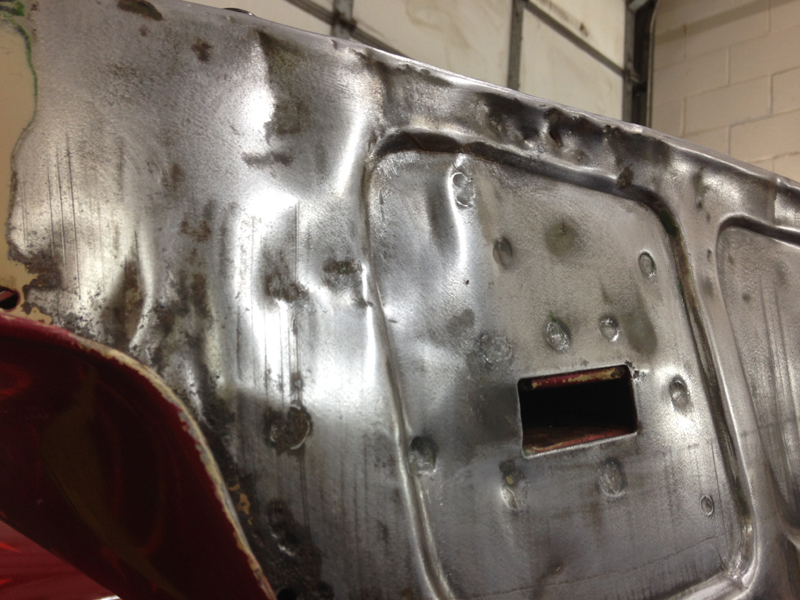
The lower scuttle panel area was also full of rust and had to be cut away along with a rusted section of floor and a section of the side of the inner A pillar:
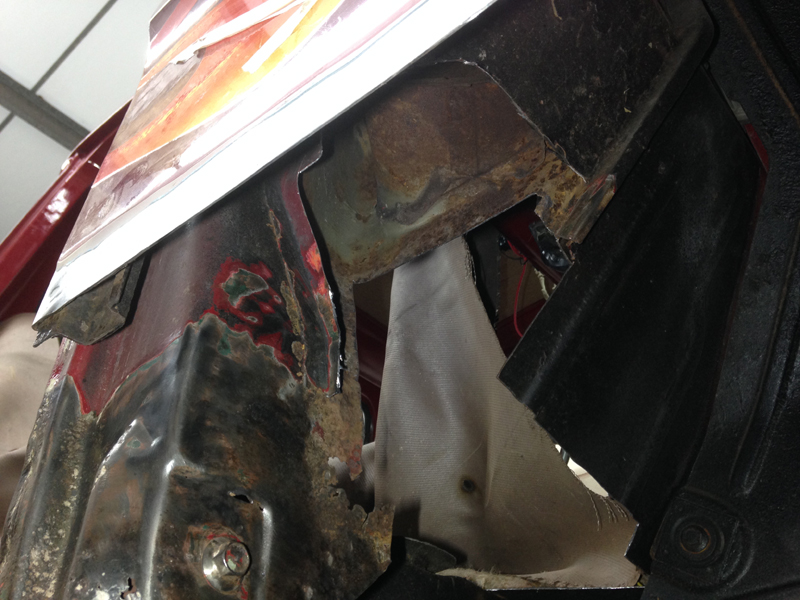
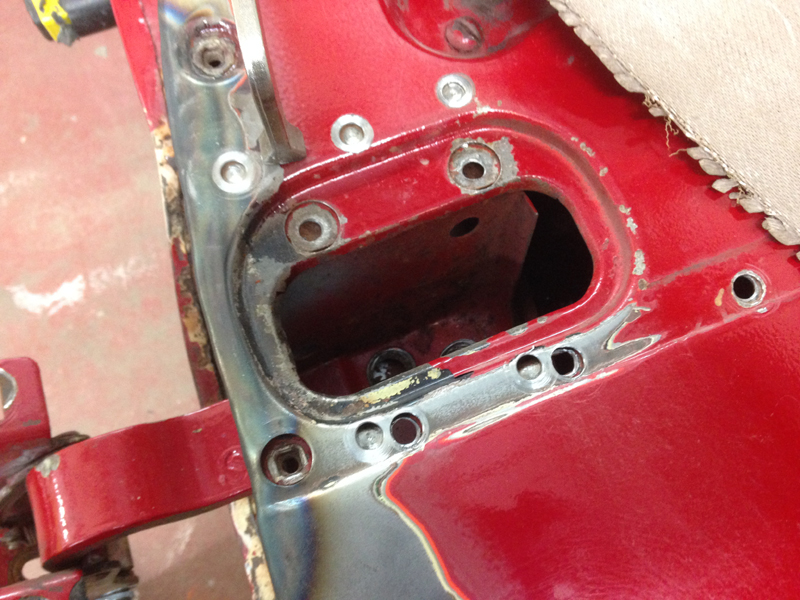
This photo shows the missing side of the 4 sided box section/hinge mounting point. You shouldn't be able to see the door hinge at all or the lower mounting bolt, the section is completly missing:
First up was to trim the floor back to solid metal, even though there is still some pitted metal in the floor, its solid and has no holes in it, we cleaned the rust out of the metal and treated the metal and then painted it in a weld through primer:
As is was only a small section of floor we needed, rather than buy an entire floor pan we decided to fabricate a small section. We painted the inside in weld through primer aswell before welding it into the cab:
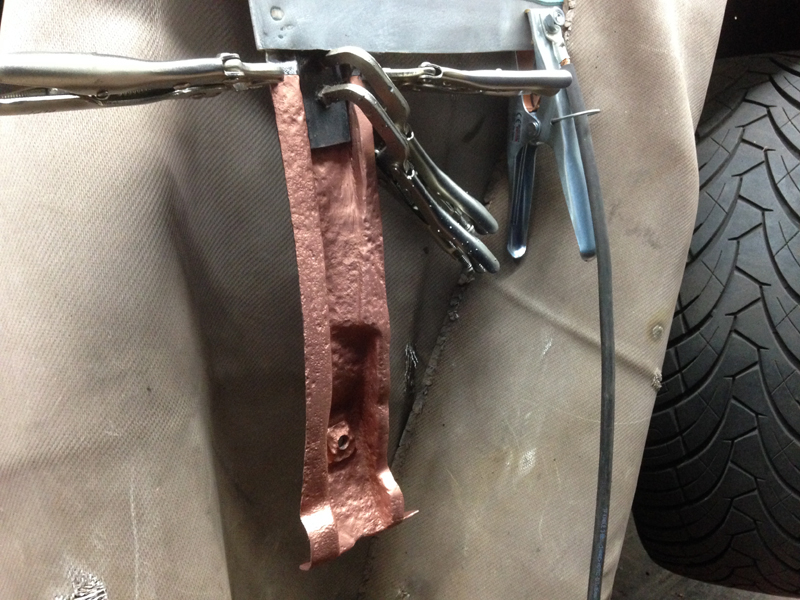
We tacked the floor section in place for now to start adding some support back into the cab and then cut out the first piece of the hinge mounting area:
Then we trial fitted the repair panel in place and began welding it in:
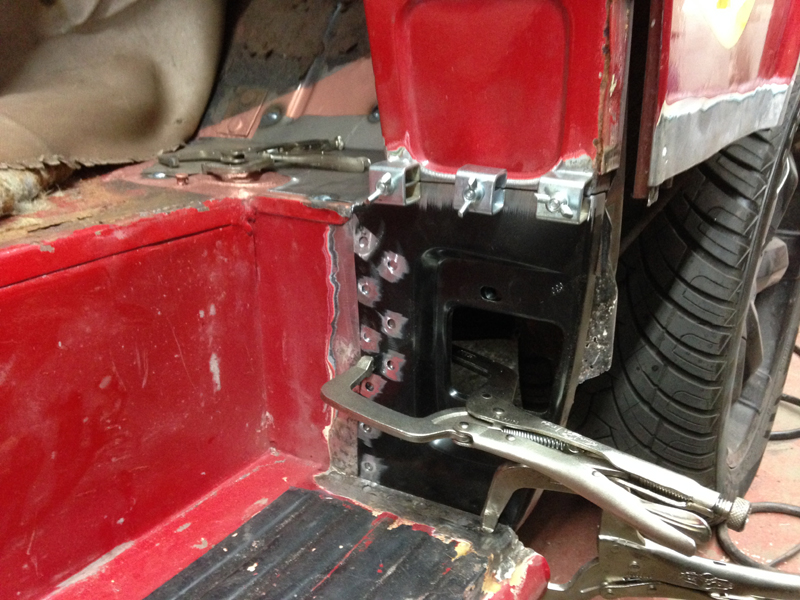
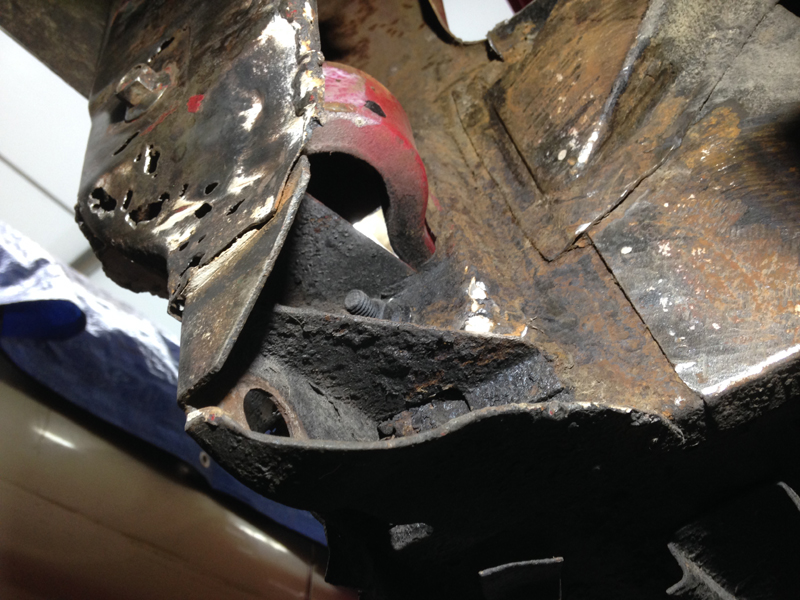
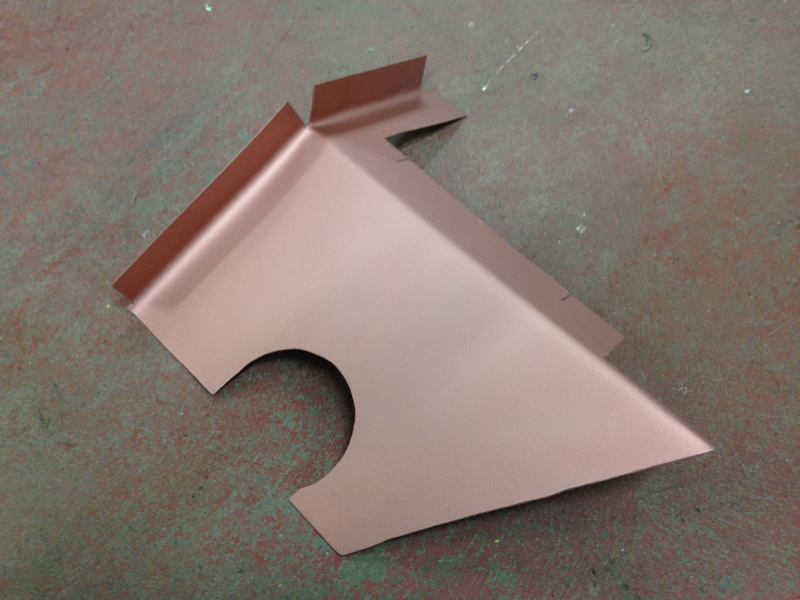
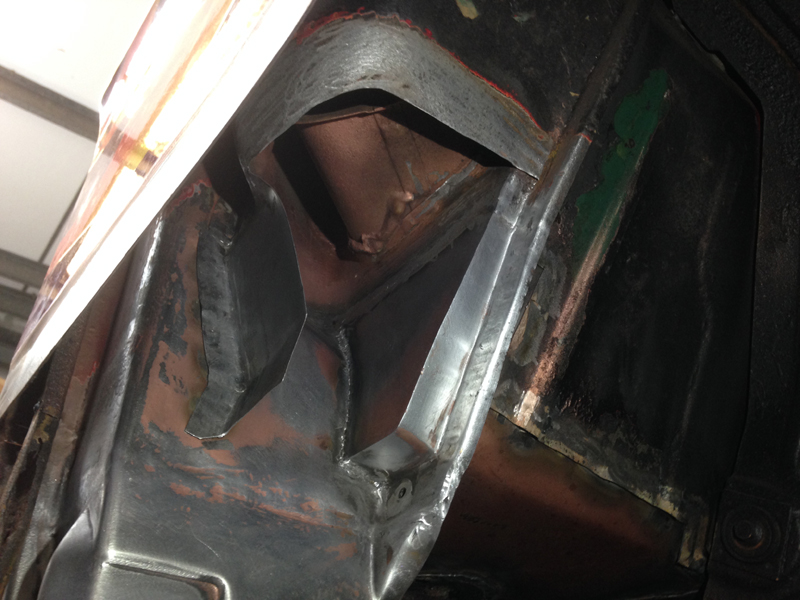
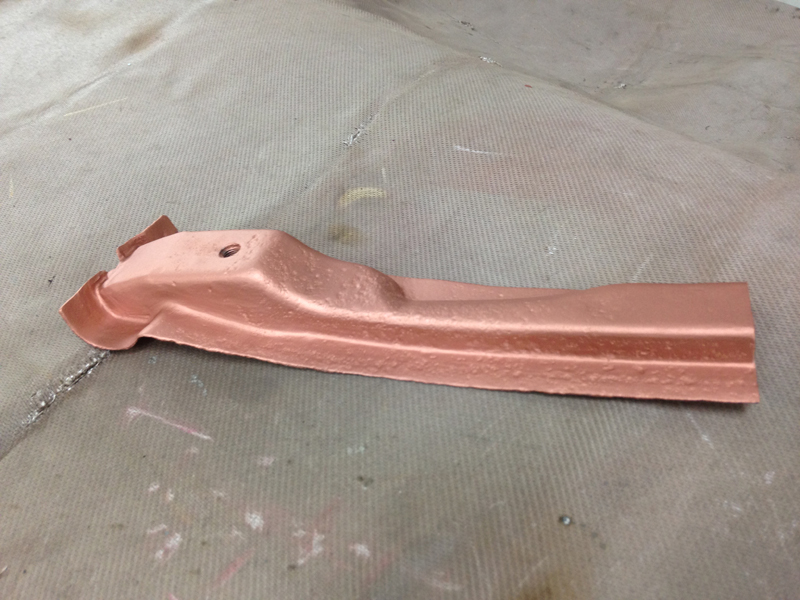
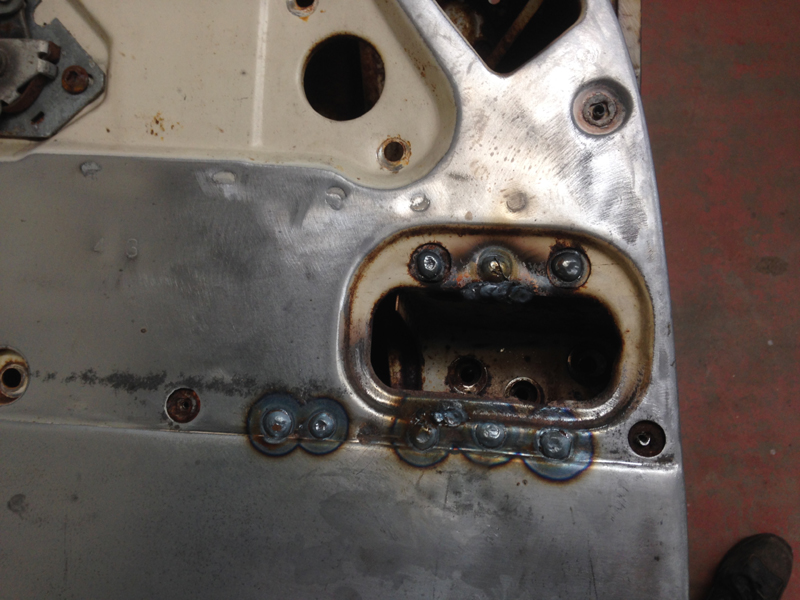
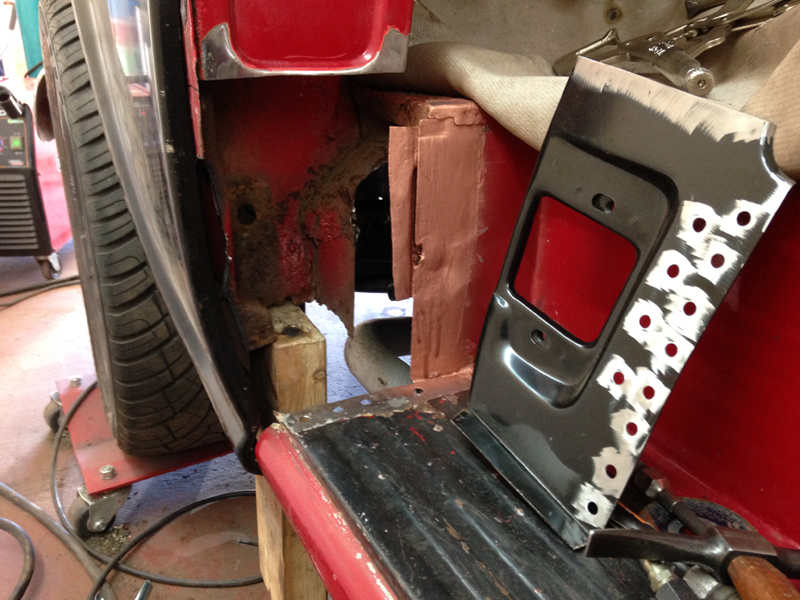
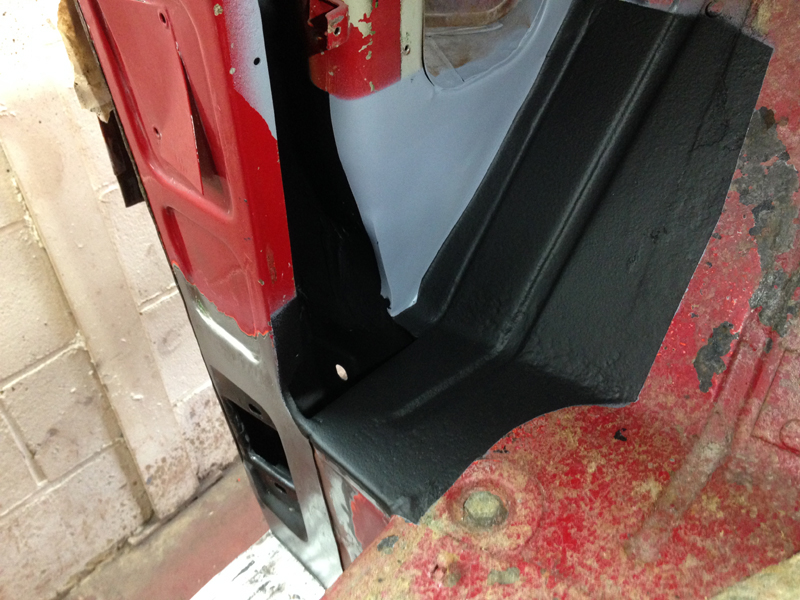
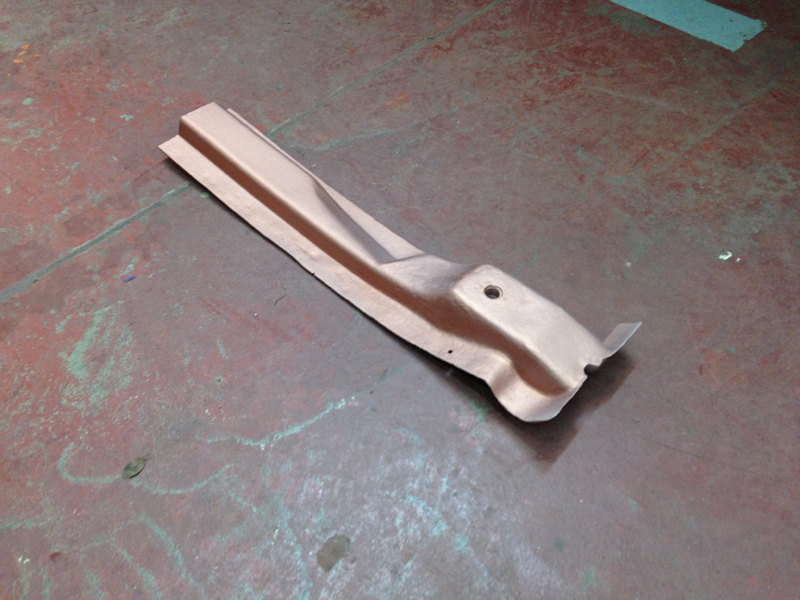
This repair panel is the side of the hinge mounting point that was missing. This is how it should look and cover the door hinge from behind:
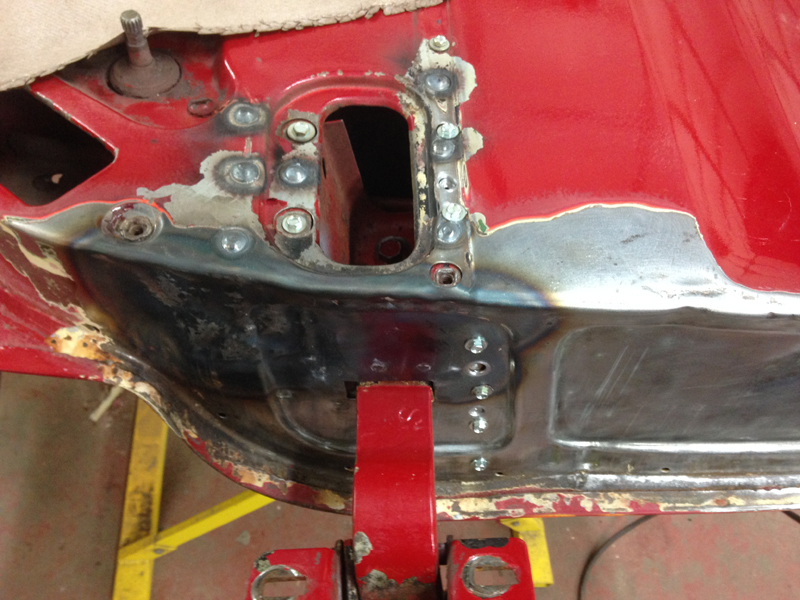
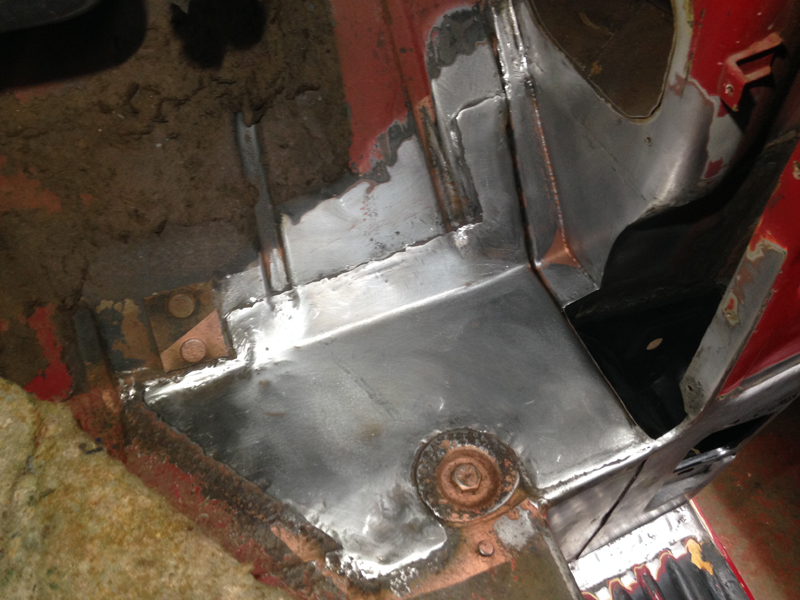
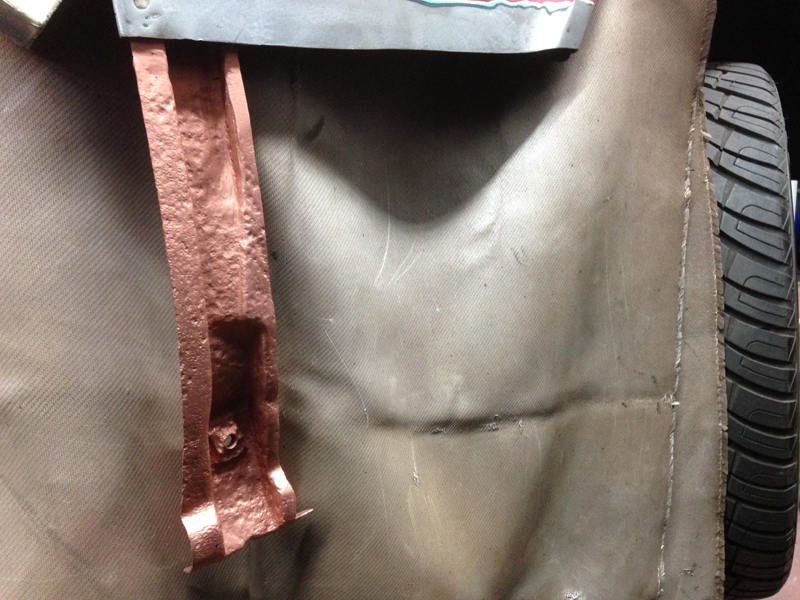
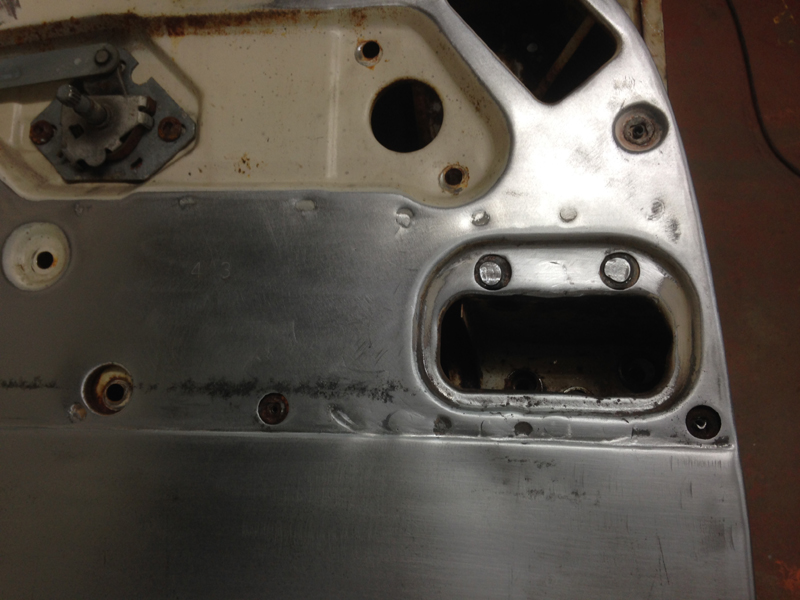
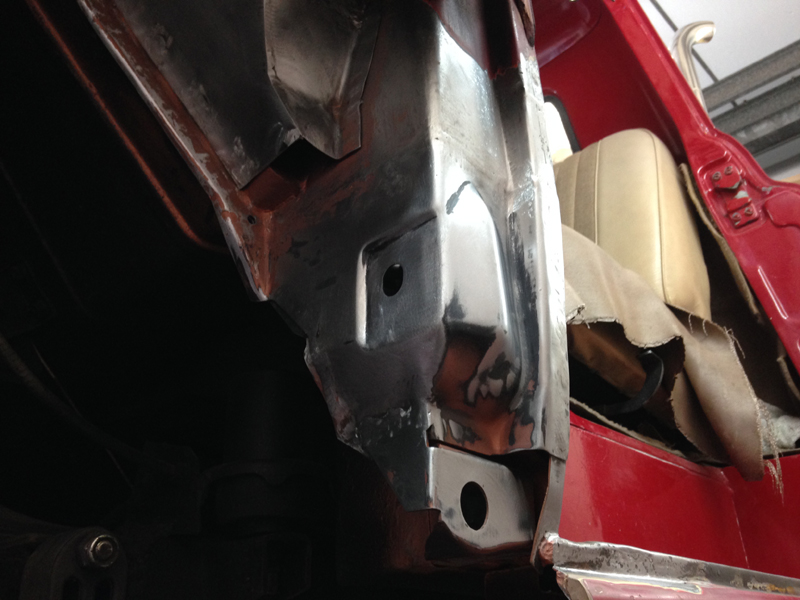
With all 4 sides of the hinge mounting point welded back in place we could move up with the repairs. This section of the inner A pillar was full of rust so we had to cut it out:
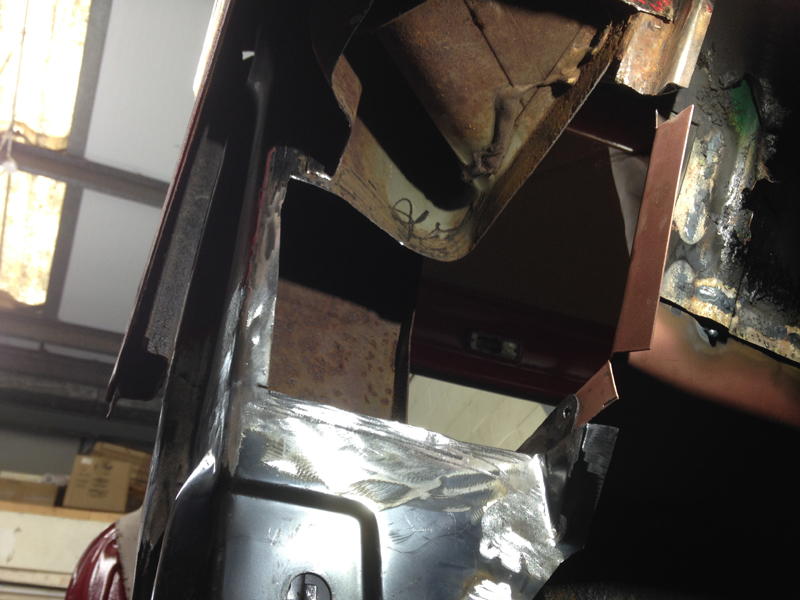
And then fabricate a new piece and weld it in. Once welded in we ground the welds flush. Here you can see the repaired lower hinge mounting point all with fresh metal in place, creating a nice strong structure:
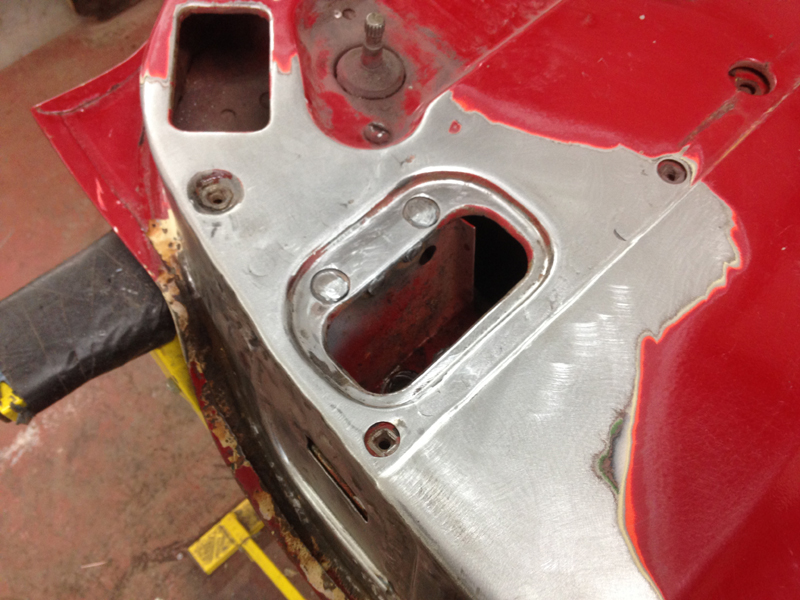
We then turned out attention back to the floor pan and finished welding it into place and finished fabricating the rest of the lower inner A piller and again welding that into place. Once welded all the welds were ground down:
We also finished the welding to the lower hinge mounting point and ground these welds too:
Then we began the repairs to the lower scuttle panel area having to fabricate each piece as we went along:
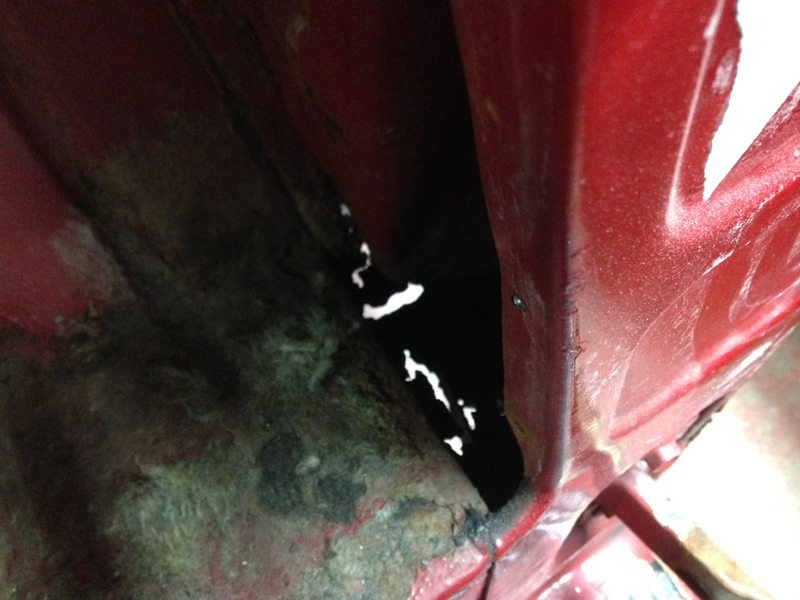
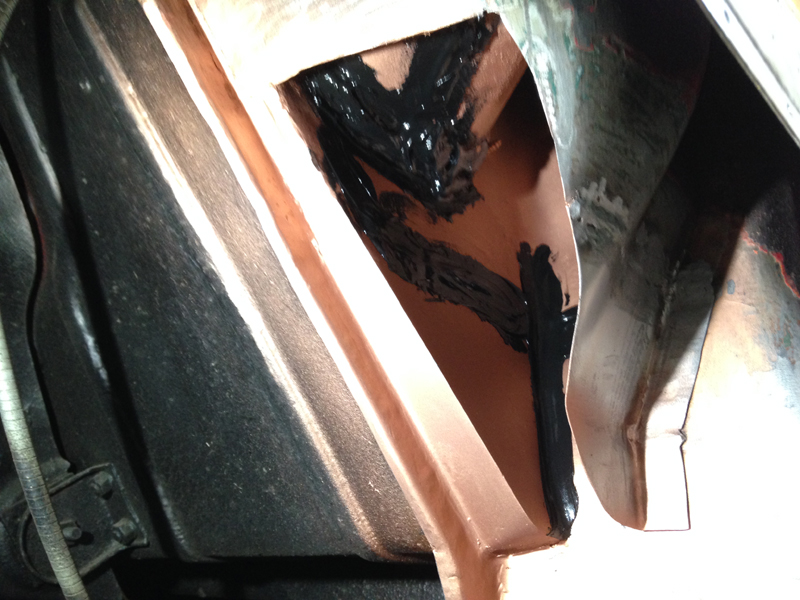
Before welding in the final piece of the puzzle we primed and seam sealed and primed again all of the welded joins to stop water leaking its way into the cab when its raining:
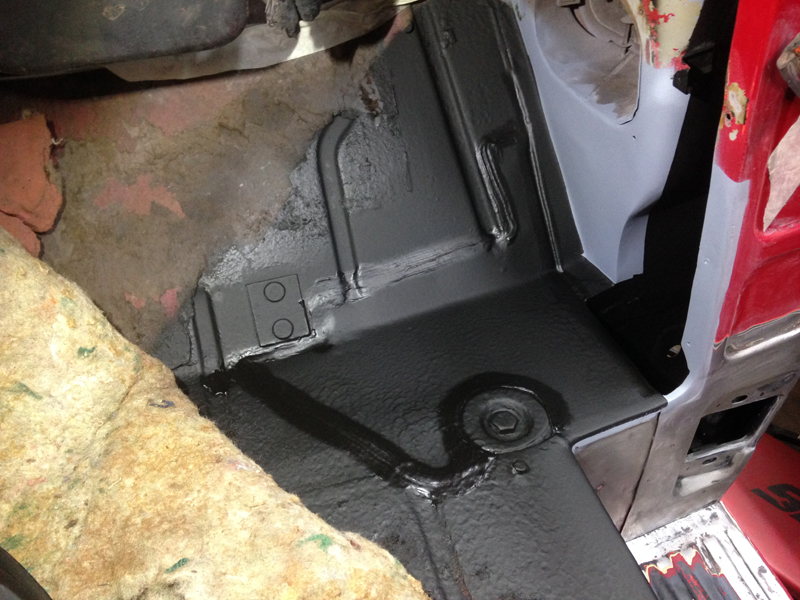
While that was all drying we prepared the inside of the cabs repaired floor for paint. Note that you can no longer see straight out the bottom of the hinge mounting pocket:

We then, primed, sealed and undersealed the floor on the inside of the cab, creating a water tight structure:
We then welded the final section of the scuttle drainage area into place and ground the welds:
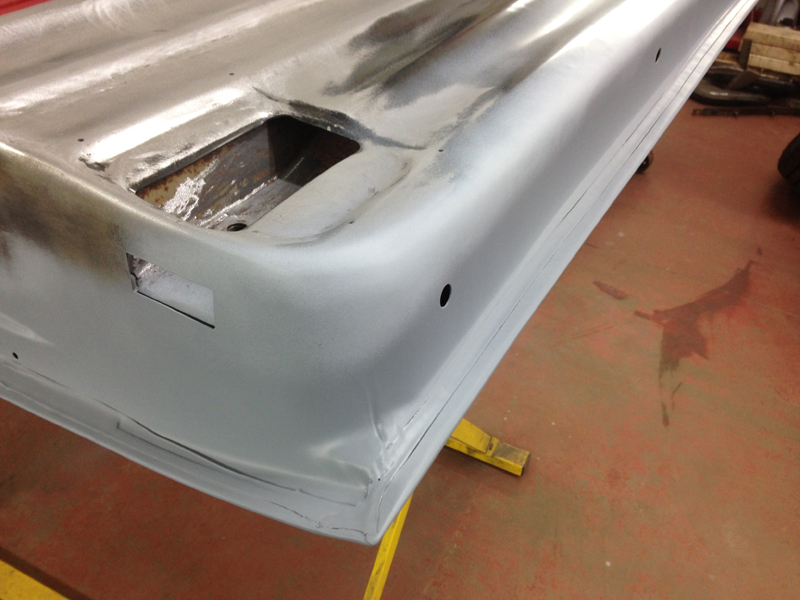
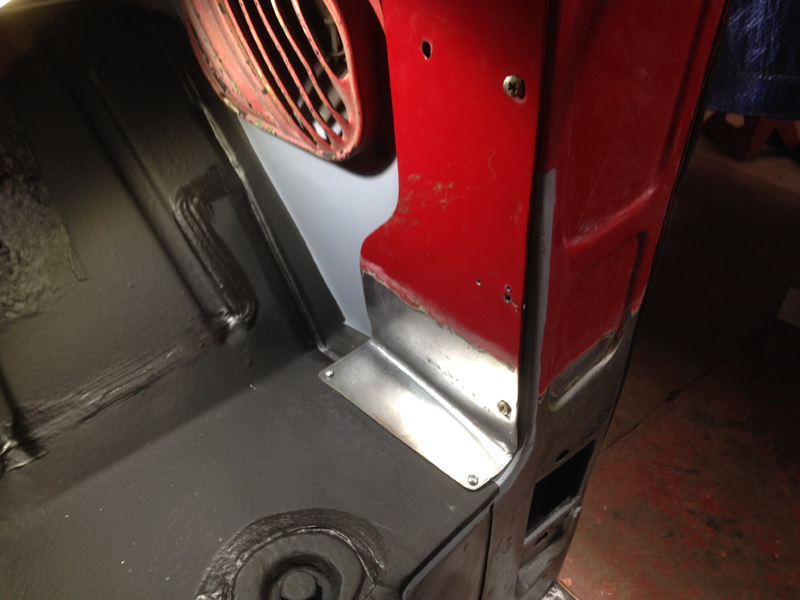
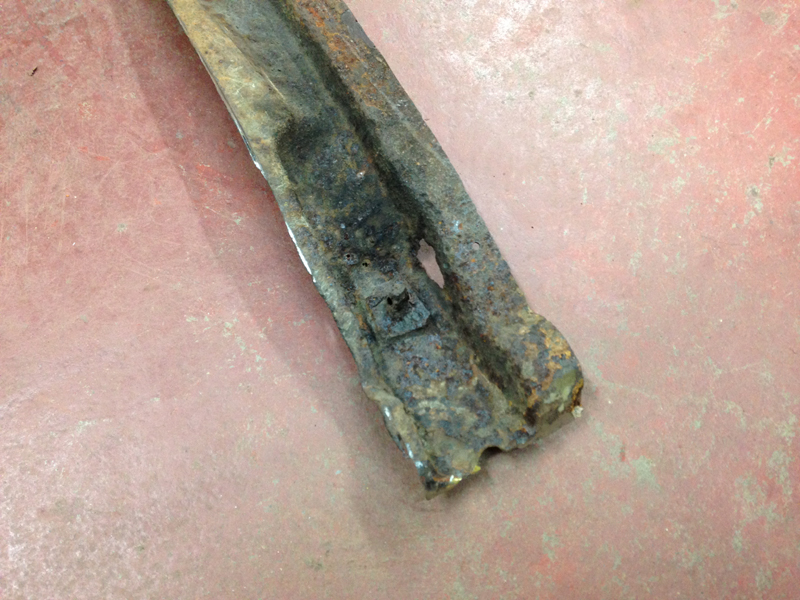
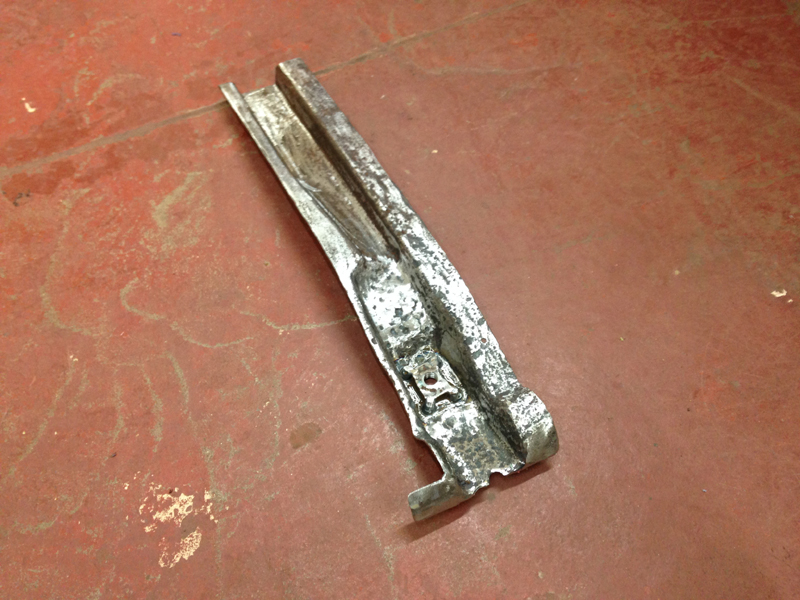
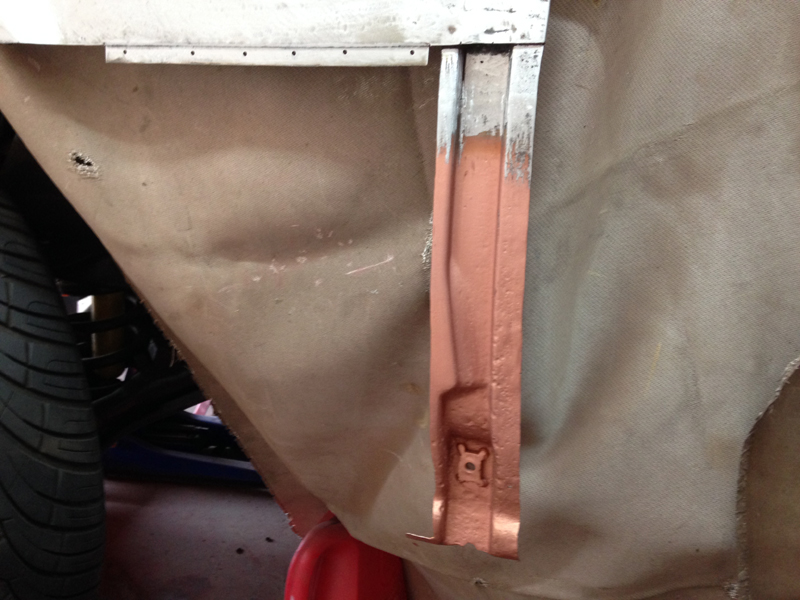
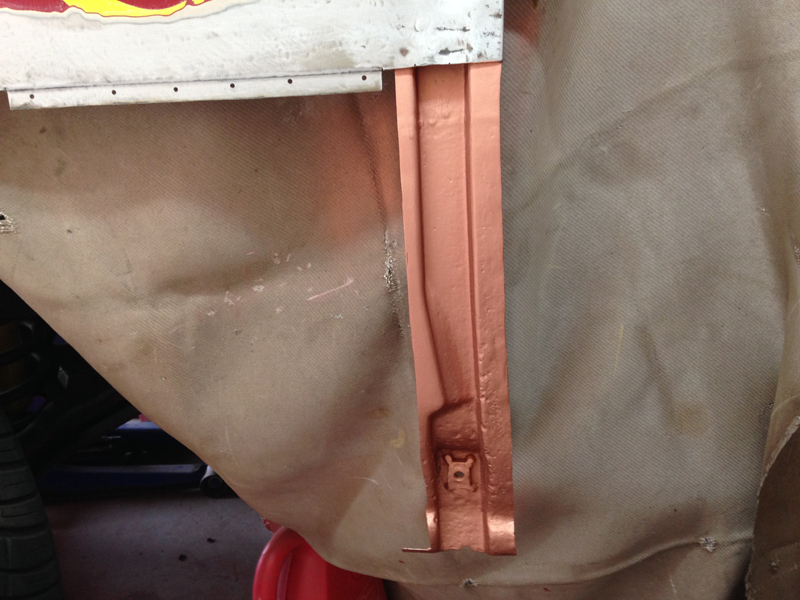
We also replaced the lower wing support mount (the lower left piece with the round hole in the side of it) as the original was rusted out:
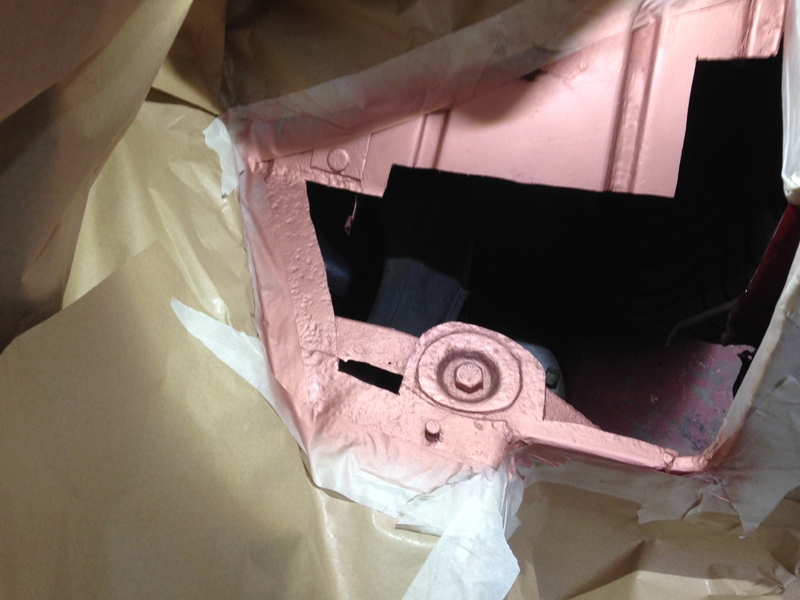
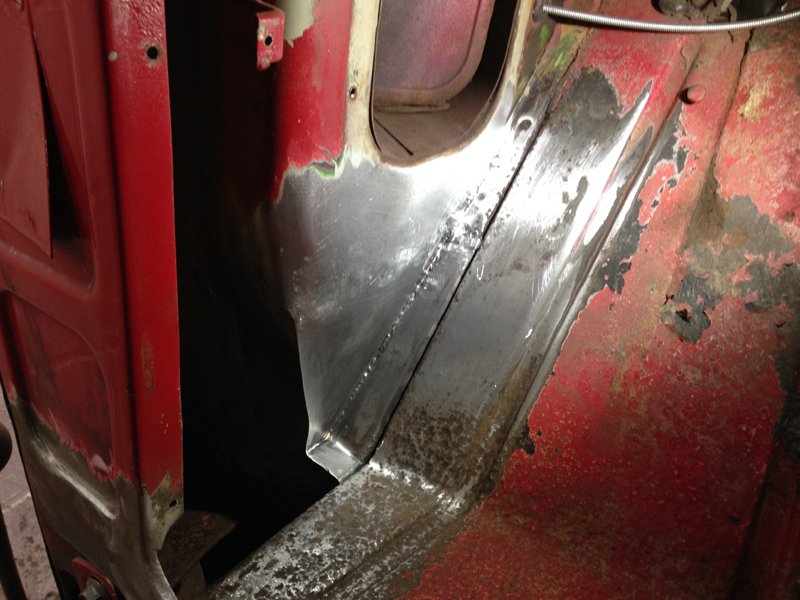
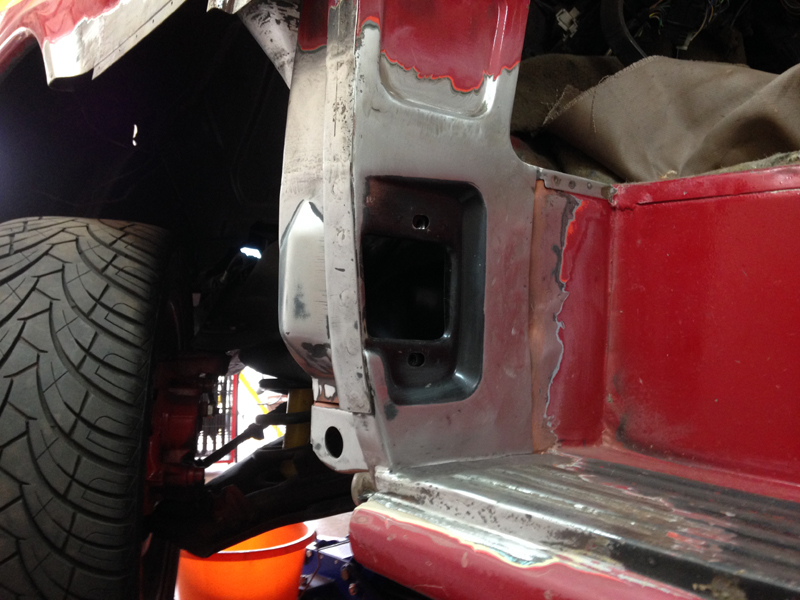
Here you can see where the missing 4th section of the lower hinge mounting area goes. Note how you can now see any of the door hinge itself or its mounting bolts now:
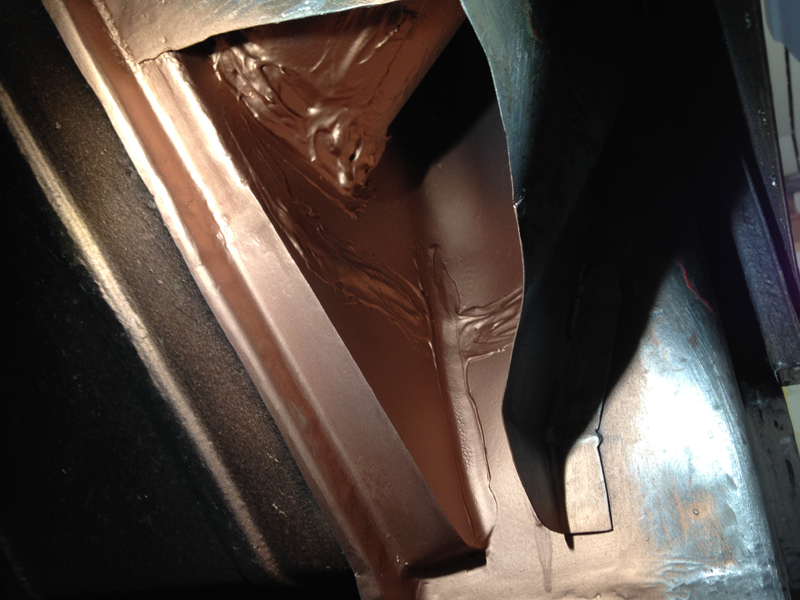
With all the welding to this side of the cab completed and ground down, we prepared all the repaired areas and local surrounding areas for paint and then primed it all:
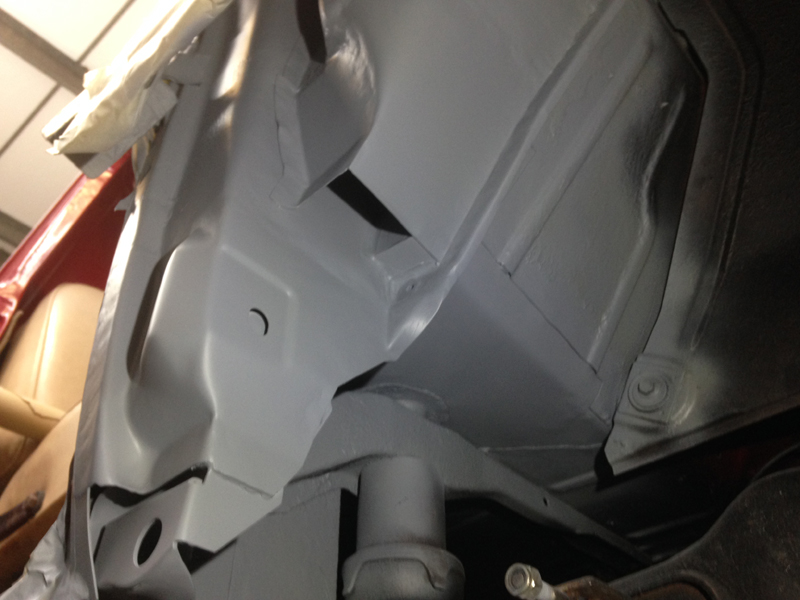
Followed by seam sealer on all the joins and welds:
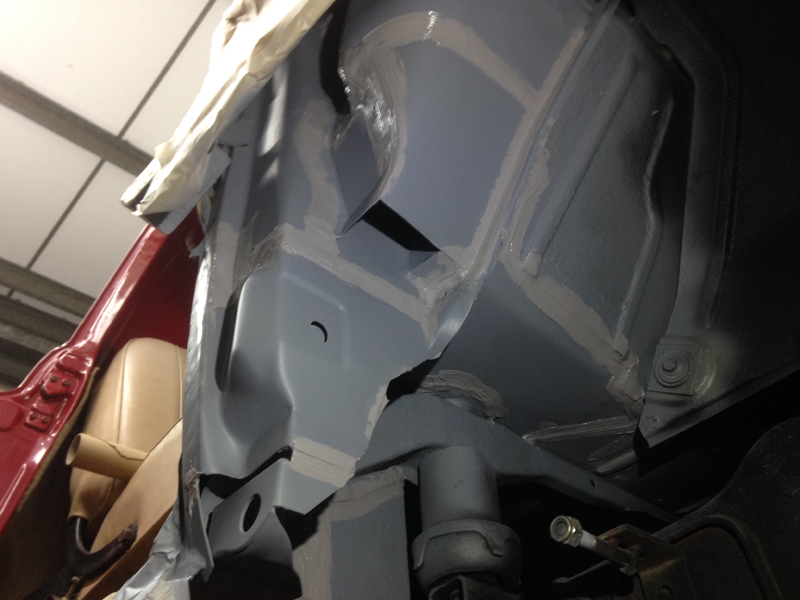
Followed by a thick coat of underseal for lasting rust protection:

And again but from a different angle:
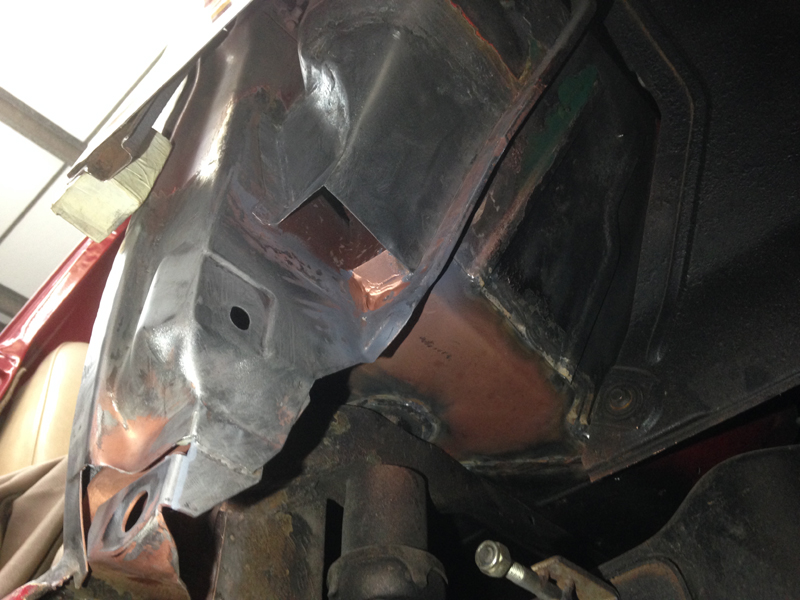
Next we needed to finish the repairs to the lower front wing. We had to cut off the wing support bracket which is part of the wing itself for 2 reaons, first; to carry out the repairs to the cab body, but also to repair the bracket itself which was rusted out in places:
With the bracket repaired and painted in weld through primer it was ready to be welded back onto the wing:
We clamped the bracket tighyly in place for welding. Even though the bracket is heavily pitted, there is no more rust holes in it and the rust has been removed from the metal:
The bracket is now welded back onto the wing and the welds ground and the ground areas painted with weld through primer:
We used a bonding agent to attach the new wing repair panel onto the support bracket. This stuff is the stuff that roof panels are bonded onto modern cars with and will make a permanant join once dry:
With the bonding agent applied we qucikly started our final fitment of the wing repair panel. Note that we had tried this on several time before applying the bonding agent:
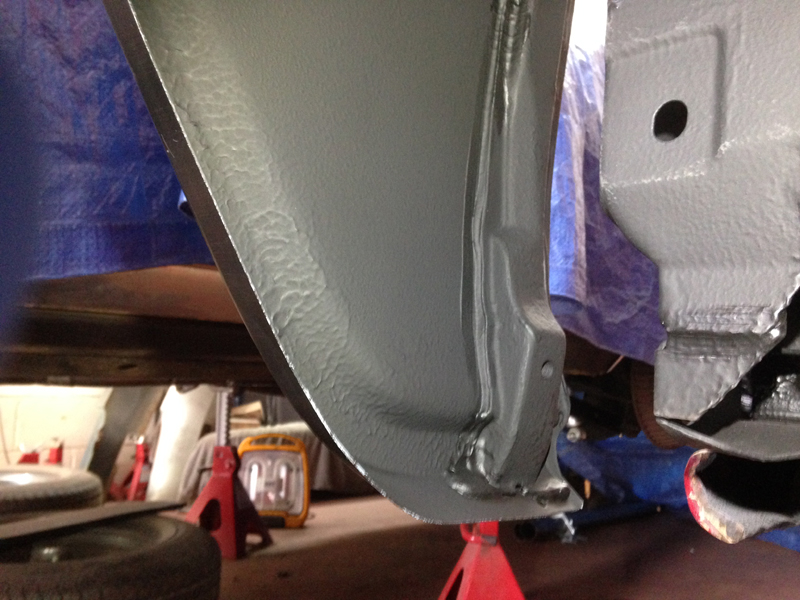
Once happy with the posistion we fully welded the wing repair panel into place and then ground the welds. The wing isn't bolted back down in this photo as we need to underseal the rear of the wing still:
With the rust now taken care of in the passenger wing we can move our attention to this little area. Someone has removed the side trim pieces from the wings and used fibreglass to fill the holes. This is a bad idea as fibreglass and metal expand and contract in heat and cold at different rates and then eventually the fibreglass sinks in the steel and can crack. Here you can see exactly where the factory holes in the wing are:
And using a punch and hammer with a gentle tap, the fibreglass comes away from the wing:
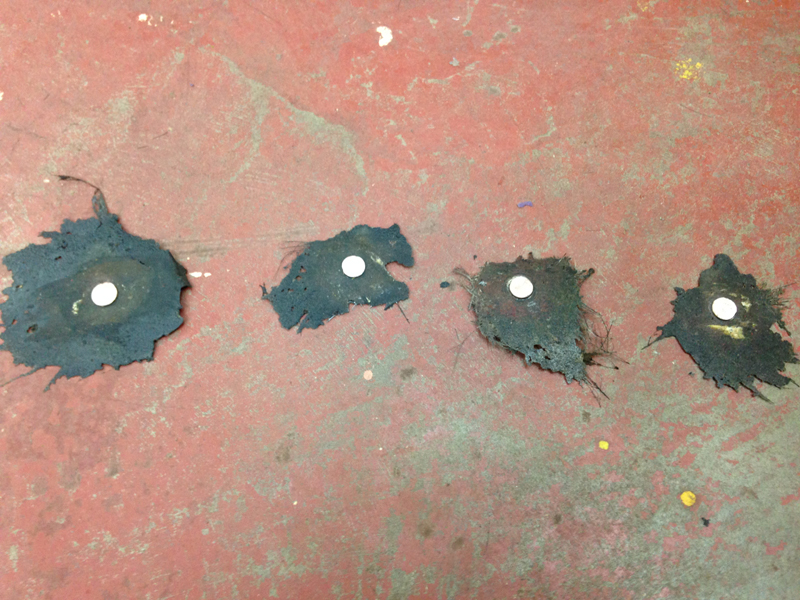
Leaving you with 4 holes in the wing which will need to be welded up. This process would have eventually happend by itself over time so we are fixing it now:
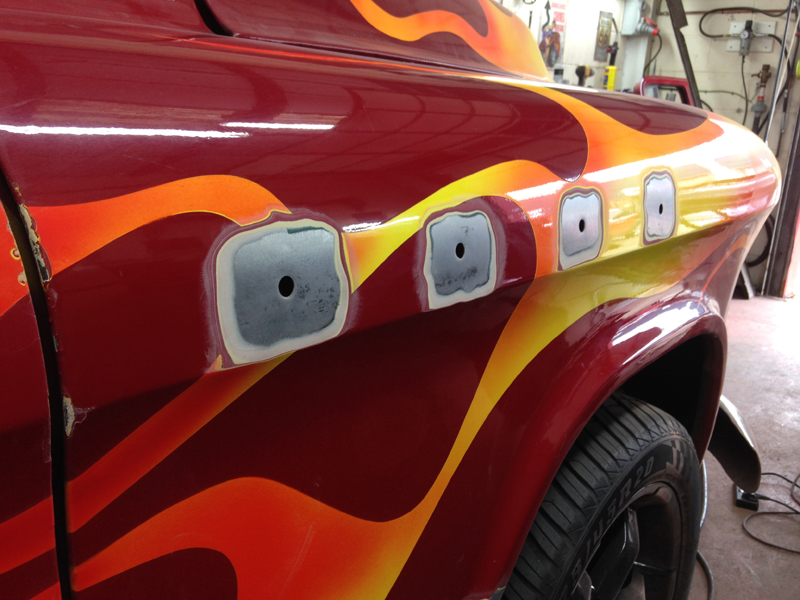
All 4 holes are welded up and ground down front and rear of the wing creating a permanent repair:
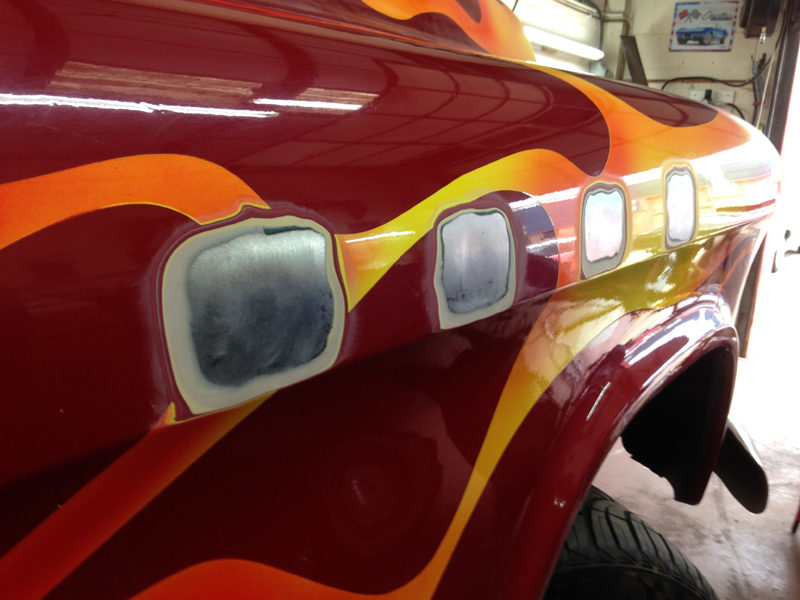
We applied a rust proof primer to this 4 areas just to protect the metal until its painted properly:

Then we primed, seam sealed and undersealed all of the repaired areas on the rear of the wing:
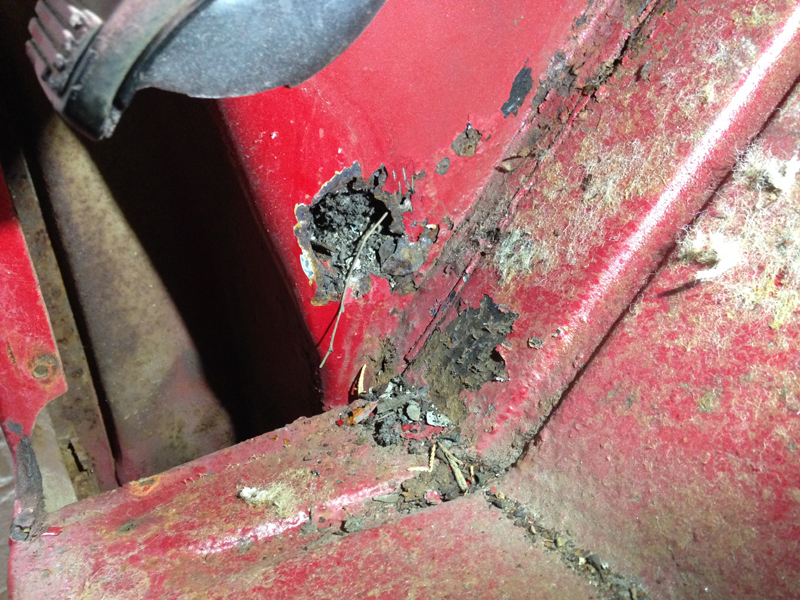
The bottom edge of the inner A pillar access cover had rusted away:
So we cut the bottom of it off:
And fabricated a new section which we welded in place:
Before bolting the door back on the truck we had to address to the slop in the door hinges. We decided to rebuild the hinges with a new bush and pin kit:
Stripping down the hinges:
And then re-assembling them. This removed all the slop from the passenger door hinges:
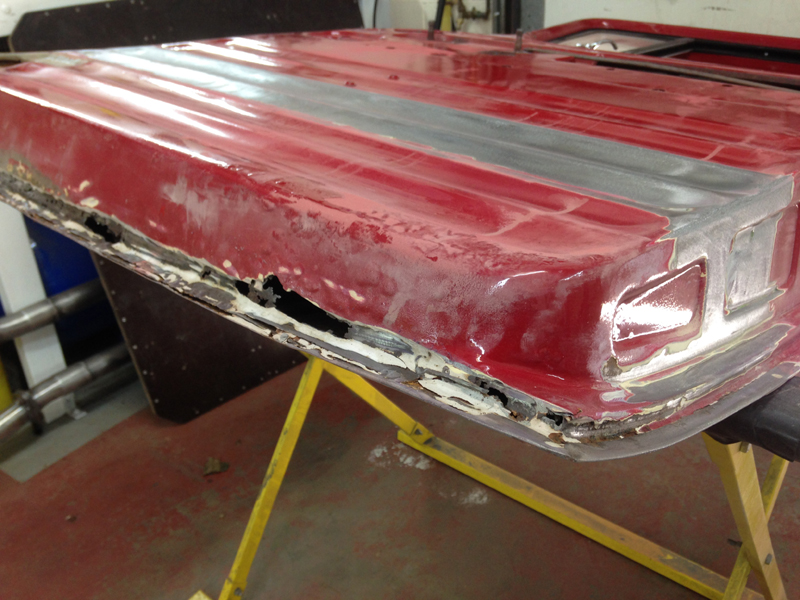
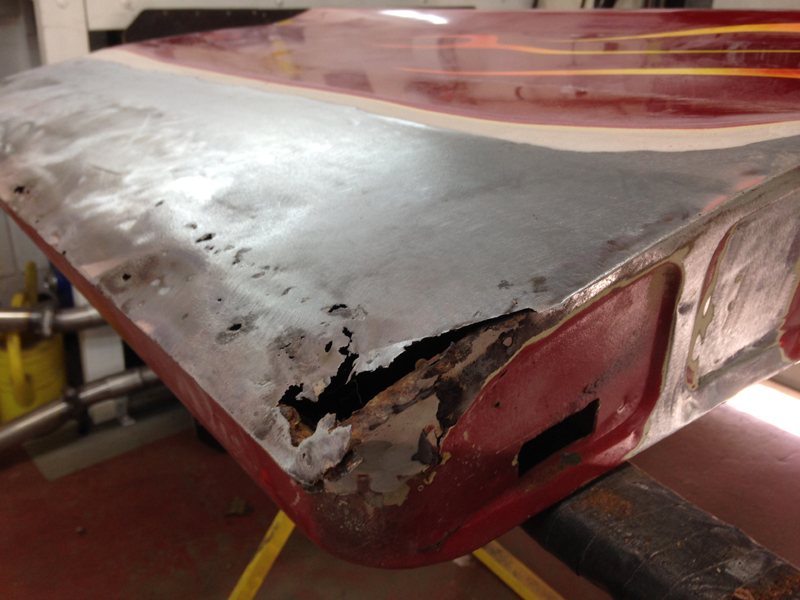
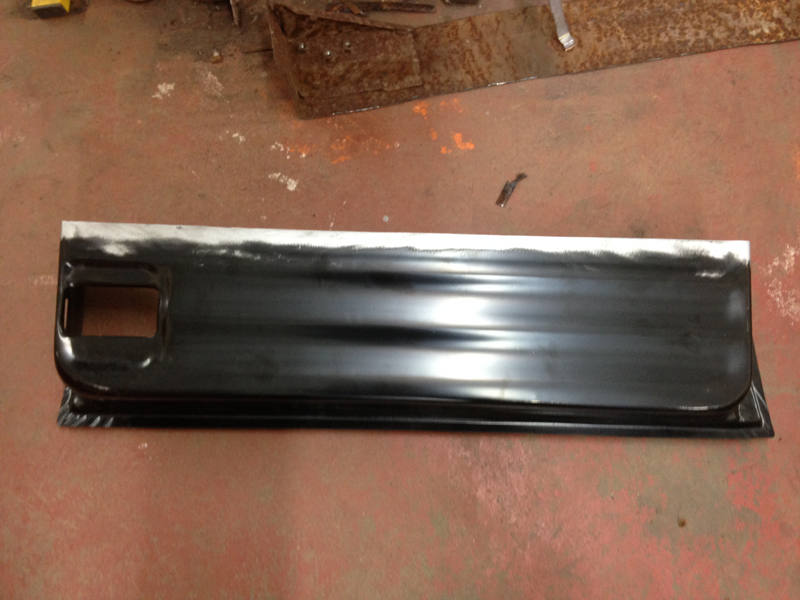
With the passenger side complete, we can now make a start on the driver's side. The driver's door looked in a much worse a state than the passenger side did. The entire bottom edge of the door was made of body filler:
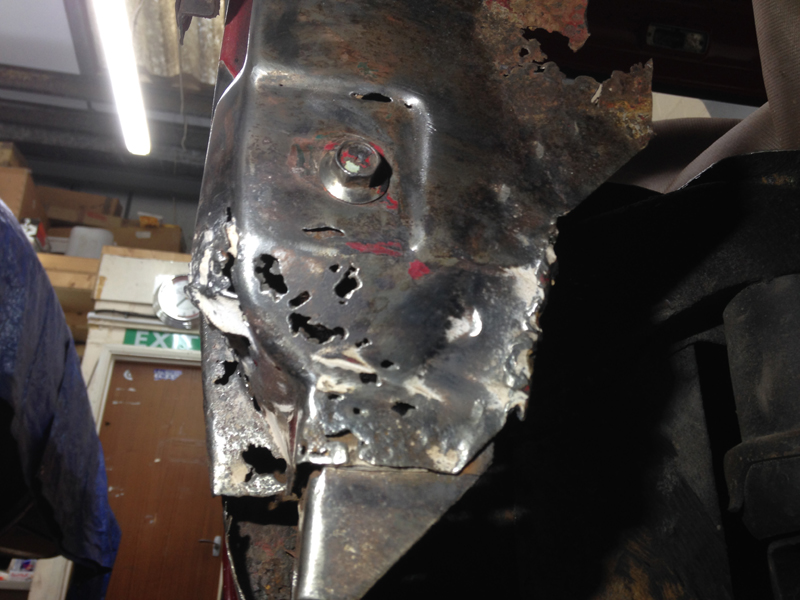
The lower door hinge mounting point on the door was cracked and rusted through:
The upper hinge mounting point had completly broken away from the door in several places:
One of the upper hinge mounting bolts had snapped off inside the door and was jammed in there not actualy holding the hinge on, also where the spot welds that secure the mounting point to the door had broke, someone had just fitted sheet metal screws to them to try and hold the thing together:
And the same story for the lower hinge mounting point, broken welds that had been fixed with sheet metal screws and lots of cracks and rust:
With all these problems and the hinge mounting points not being available as replacements, after speaking with the customer we decided to source a replacement door to use. Don't be fooled by appearances, this replacement door is in excellent condition and much better than the trucks original door:
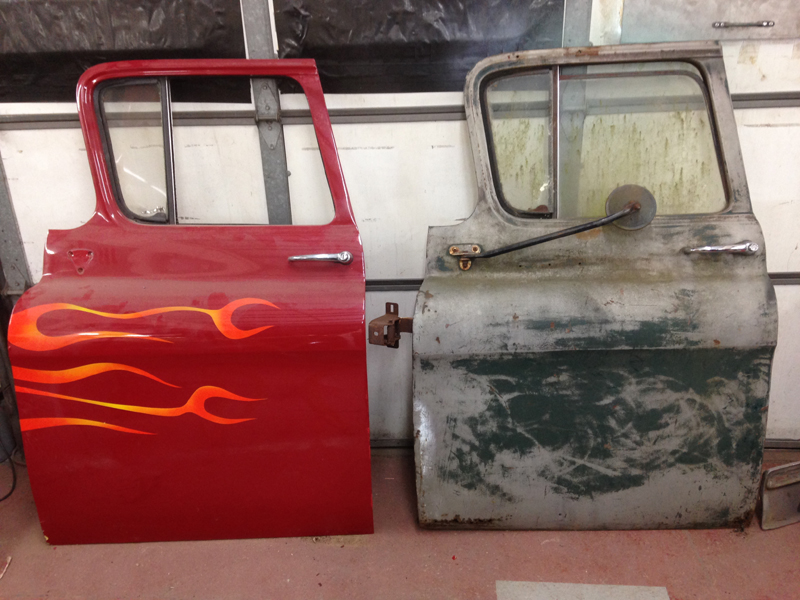
It does need the same rust repairs as the passenger door needed but it will still work out cheaper to purchase this door and repair it rather than try to salvage the original door:
First up was to cut off the inner frame and trial fit the repair section:
Once happy with the fit we welded it into place and ground the welds. Note the condition of the metal on this door after sanding back that old paint. The metal on this door is like new:
The lower hinge mounting point was slightly rusty and one of the welded on nuts had broke off and there was a small crack in it:
So we welded the nut back on and strengthend the other nuts and welded up the cracks then cleaned all the rust up on it:
Then painted it in weld through primer:
And once the paint had dried, welded it into place in the door frame:
At this point we had allready test fitted the outer door skin repair section to the frame. With no access this time to inside the lower half of the door once the outer section we had to use a different method to hold the repair section in place. So we joggled the original door skin so that the new section can sit on top of it and be secrued to it but still sit flush with the original door skin, leaving a seamless repair:
With the work to the inner door frame finished, we ground all the welds inside the door frame. It just takes some extra weight back out the door and is less places for water to get trapped:
We then painted the inside of the door with etch primer followed by high build primer:
Then seam sealed over the welds and joins:
Then undersealed inside the door frame:
With the outer skin repair section allready tried on, we cleaned up the areas what will be welded on the repair section and the original door and painted on weld through primer:
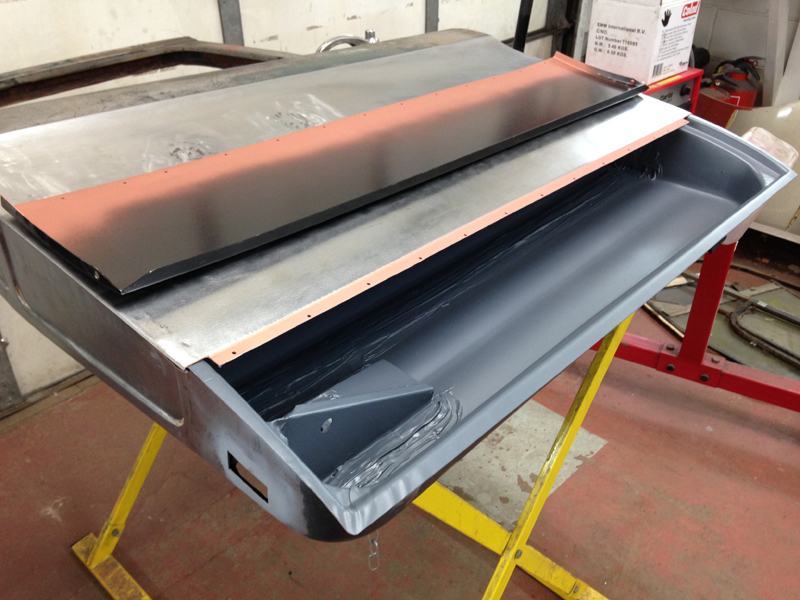
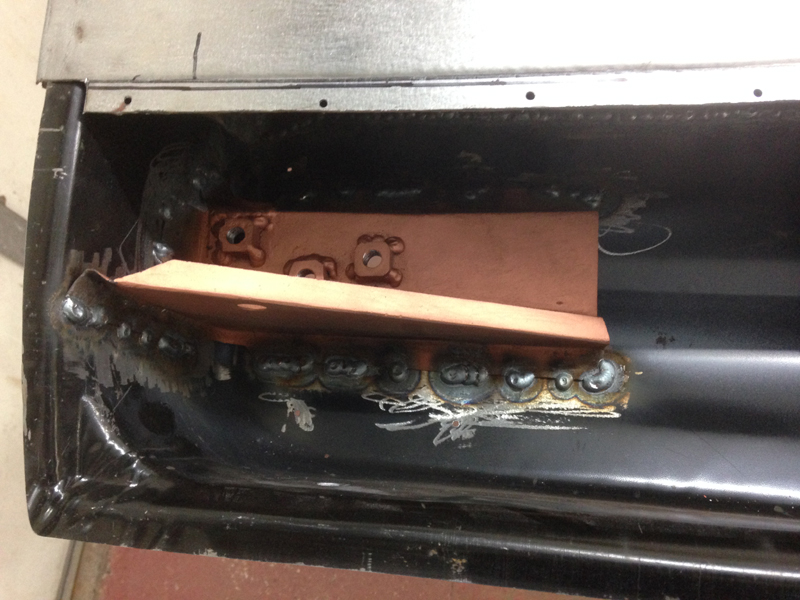
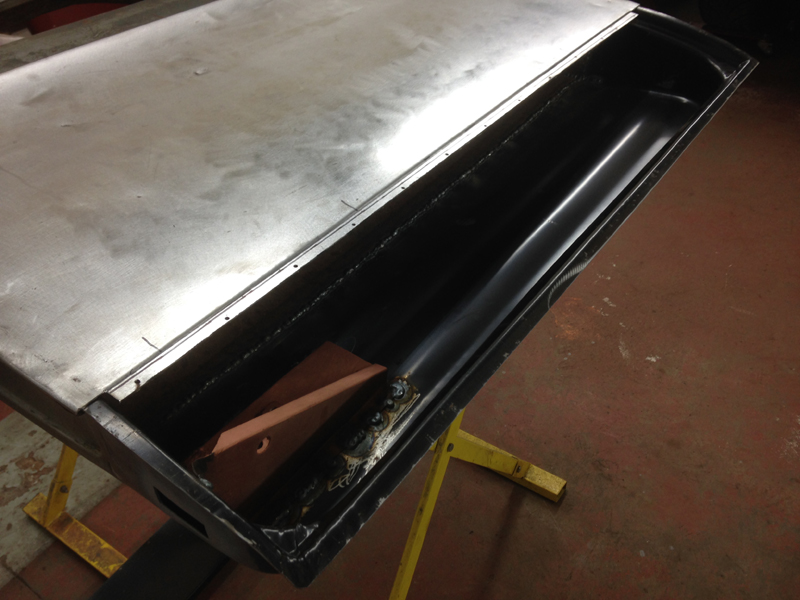
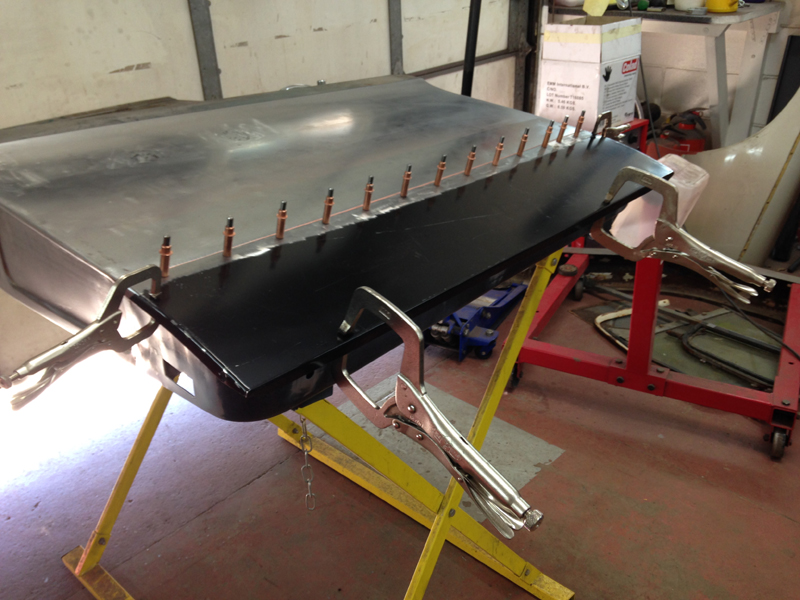
Then we attached the repair section to the door:
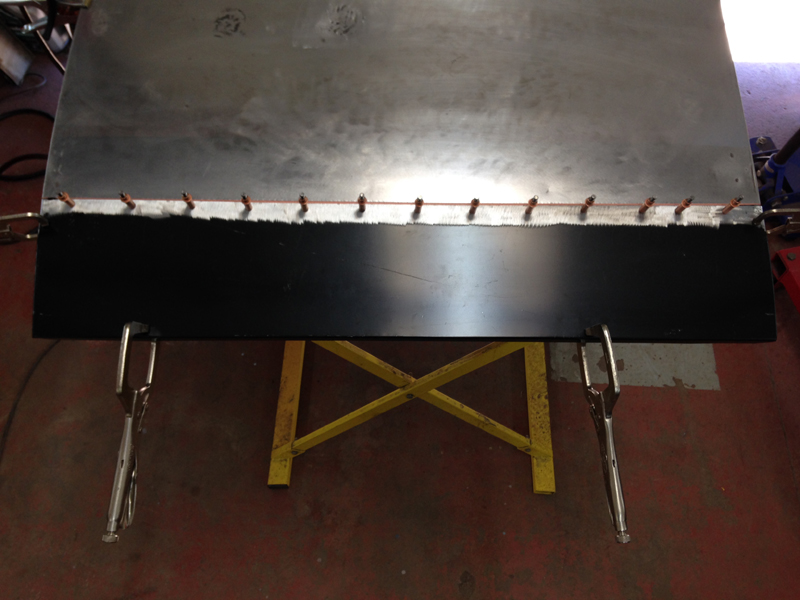
The small copper coloured fastners are like rivets but are re-usable and have a quick release mechanism with a spring inside them, we use these to pull the 2 pieces of metal tight towards eachother and can then weld everything into place and roll over the folded edge of the door:
The door mirror mounting bolts were rusted in the door and sheared off when we tried to remove the mirror and the original badge holes were no longer needed:
So we welded up the badge holes and ground the welds and then drilled out the broken door mirror bolts and re-tapped the holes to the correct factory size thread:

Someone had mounted a towing mirror to the upper door frame at some time in the doors life, this was no longer present and the holes for it no longer needed. The holes went right through both sides of the upper frame and needed welding up:
First the inner frame, welded and ground down. The other holes here are where the door seal rubber attaches too:
And then onto the outside:
Welded up and ground down:
This area of the door frame was dented and cracked:
So welded heated up the metal and pulled out the dent and then welded up the crack and ground the welds:
The opposite end of the door had a small crack in a similar place:
So again we welded it up and ground the welds flush:
Pretty much all of the mounting bolts for the inner door panel sheared off when trying to remove the inner door panel:
So we drilled the bolts out:
And then re-tapped the threads to the correct size:
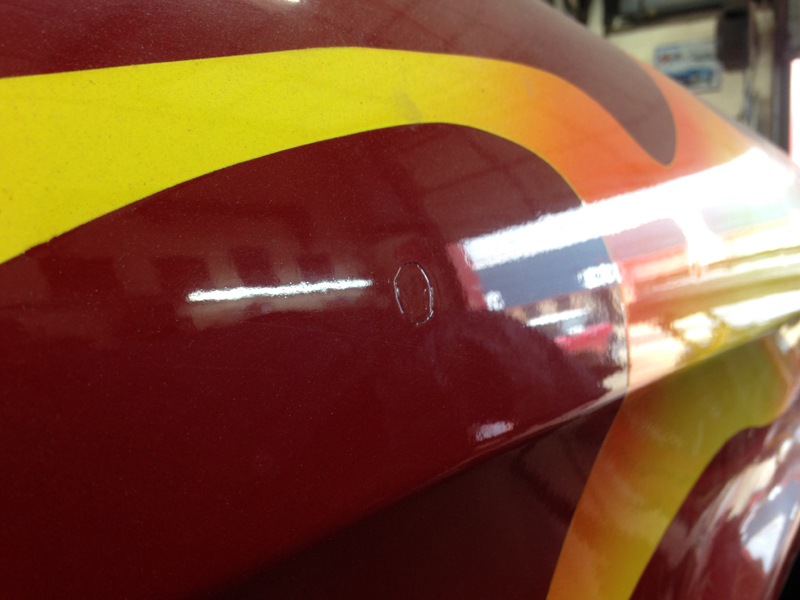
There was a large dent in the outer door skin towards the top that looked like it had been shot with a rubber bullet:
We were able to pull the dent out and work the metal so that very minimal filler would be needed to fill this dent:
The last thing left to do on this door was to address the upper hinge mounting point. Similar to the passenger door and the original driver's door, some of the spot welds had broken away:
We clamps the door back together, welded it up, adding some extra re-inforcement welds:
And then ground it all down. This door is now finihed and will fit the truck correctly and last for many years to come:
Next up was onto the driver's front wing. The same thing had been done to this wing to fill the badge mounting holes, as had been done on the passenger side:
And the lower section of the wing was full of thick body filler:
We cut away the bottom section of the wing and knocked the fibreglass out of the badge mounting holes:
Then welded up the holes properly and ground the welds:
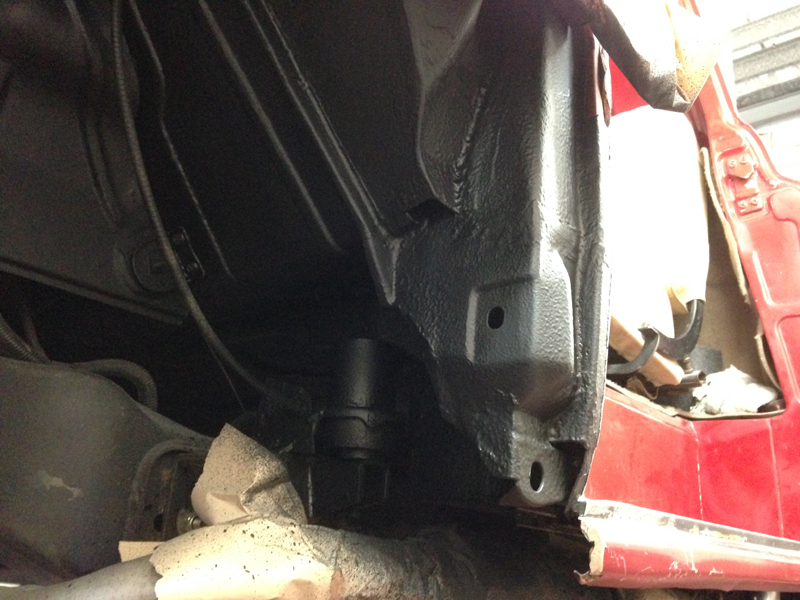
Before we could weld the lower repair section of the wing back into place, we had to carry out the repairs to the cab front corner, the same as the passenger side. Luckily the floor itself on this side was in good shape, but the rest still needed replacing. The hinge mounting area had broken away in several places, was rusted out, the welded on nuts were missing and there was lots of body filler hiding rust holes:
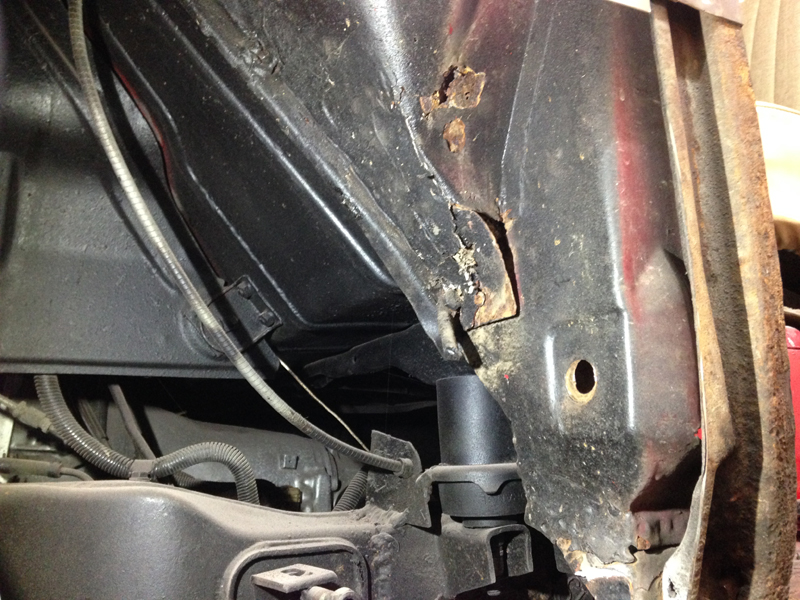
This is the driver's footwell/inner A pillar area. Thats a rust hole caused by a blocked scuttle panel drail that over the years has filled up with mud and dirt causing moisture to live in the box section slowly eating away at the metal:
This photo shows the scuttle panel drain area. From the factory the drain area was almost sealed shut, this causes a problem as when larger bits of dirt get in there the cloggs the hole completly and creates the start of the rust process. Many car restoration shops, our's included don't seal this area shut like the original design as it stop the drains blocking up, letting the water exit the box section scuttle panel area rather then letting it build it. Nothing actualy get into the truck's cabin by leaving this open so it doesn't hold any purpose to seal it shut:
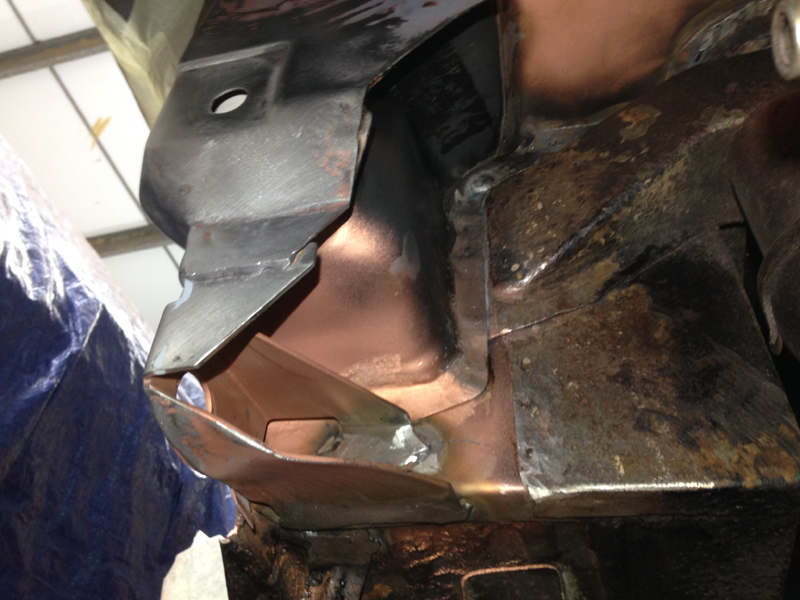
The first step to repairing all this was to cut away the first side of the 4 sided box section lower hinge mounting point, clean up all the rust in the area and paint it all in weld through primer. Note the wind repair panel is only clamped in place at this point for alignment purposes:
Then we clamped the first repair section in place and welded it in:
With the first section in place adding strength back into the area we could cut away the rest of this box section to carry out the next step of repairs:
We bolted the lower door hinge into place so that we can use it to to align the rest of the box section with:
With the door hinge box section area welded back together, we can now move on to the lower scuttle panel and A pillar area. Both the outer:
And the inner parts of this box section have rusted through:
We fabricated our own repair sections and welded them in place, after grinding the welds we primed in weld through primer and seam sealed over the welds before sealing up the box section:
We applied a second coat of weld through primer after seam sealing to add extra protection and to stop dirt getting stuck to the sticky seam sealer:
The repairs to the inner A pillar where completed, while the floor does have some pitting on it, its actually very solid and will clean up nicely:
Someone had filled in a rust hole in the door step with fibreglass, so we knocked the fibreglass out:
And cleaned up the area then welded up the hole and ground it flush:
Then ground the rest of the welds on the door hinge area and scuttle panel and A pillar area. Note the finished scuttle panel drain that we have left open at the bottom:
Then we prepared all the fresh metal and surrounding areas for paint and sealing:
Then etch primed followed with high build primer, then seam sealer and then undersealed the entire area:
We applied the same treatment to the inside of the cab too. The grey primed area will be painted body colour once the truck is in the paintshop for its repaint which is why we didn't underseal it:
With the cab itself now repaired we could move onto finishing the driver's wing. First was to repair the wing support bracket:
We welded up all the holes, welded on new pieces that were missing and cut of the welded on nut with the snapped bolt in it and then welded on a new nut and ground out all the rust and cleaned the whole thing up:
And then painted it in weld through primer:
Then welded it back onto the rest of the wing support and ground the welds:
Then painted the welded area in more weld through primer:
Then finally we could weld on the lower wing repair section and grind the welds:
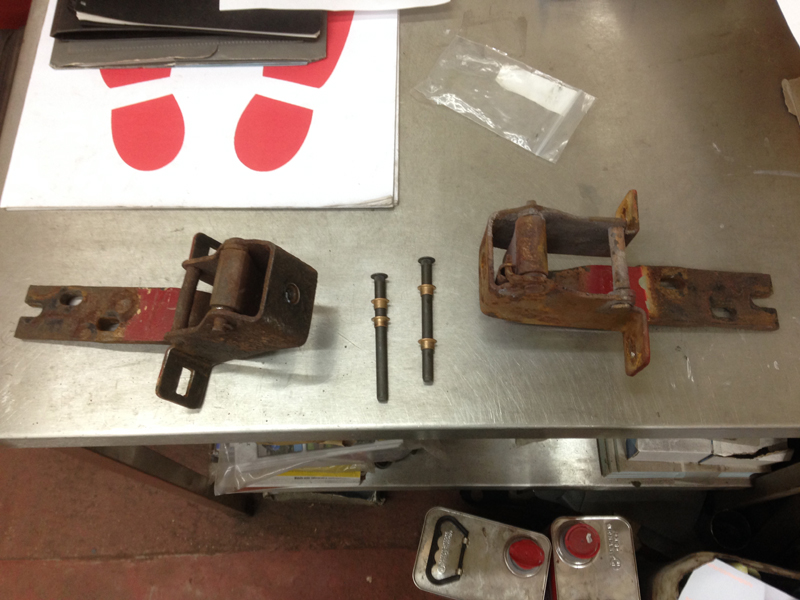
Both door hinges on this side had so much play and wear in them that they were beyond rebuilding so we got 2 new ones for this side so that we could hang the door back on the cab correctly without any slop in the hinges:
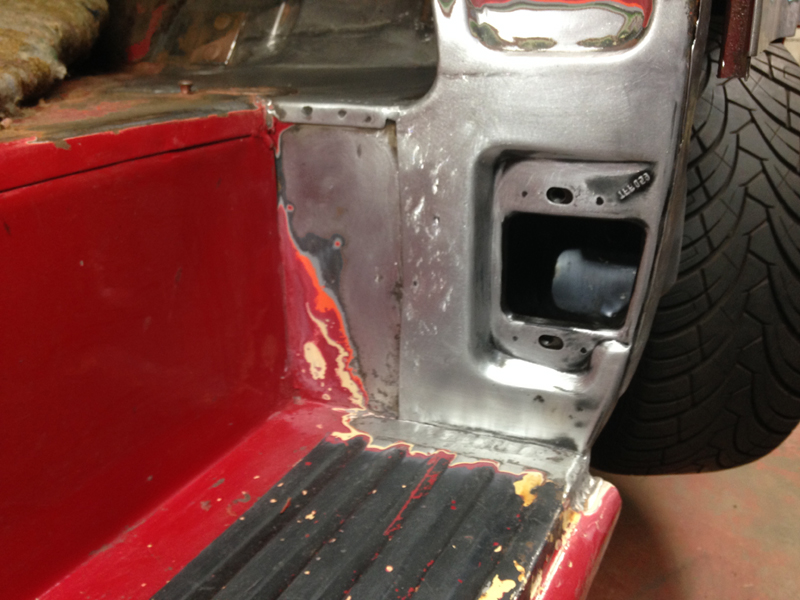
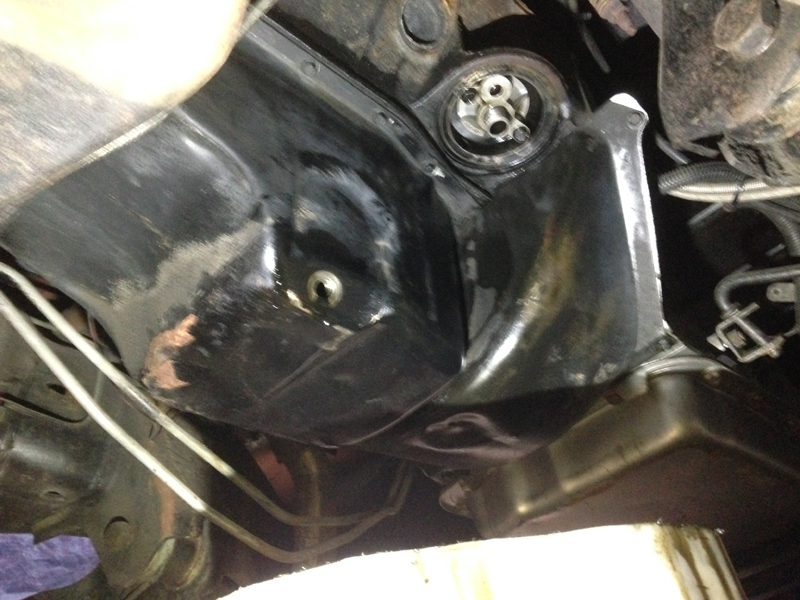
Because the cab is mounted onto a modern chassis with modern bed the truck had 2 petrol caps but only 1 tank, which was the tank under the bed that the tank filler cap was connected to. The original tank in the original cab was missing inside the fuel cap was just a large hole into the cab:
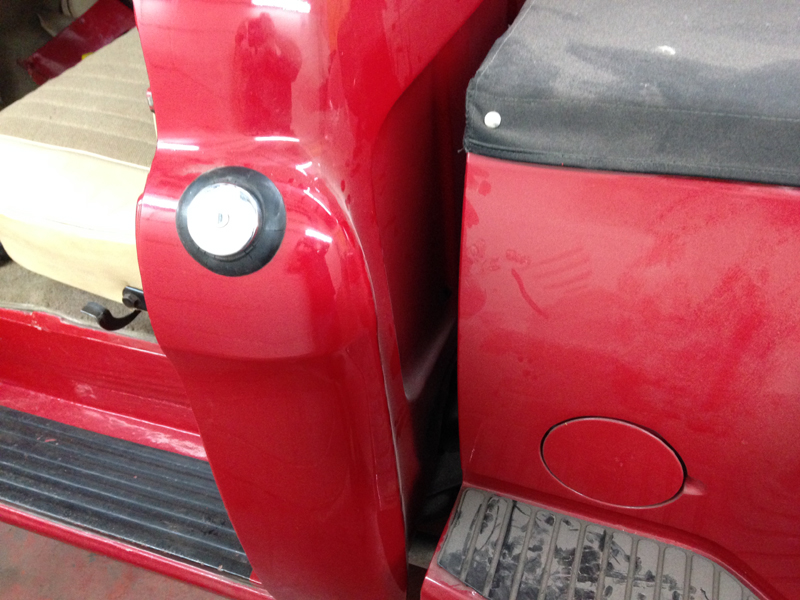
So we discussed with the owner about welding up the cabs original fuel filler neck hole and he agreed. First was to remove the filler neck and cap:

Then clean up the area:
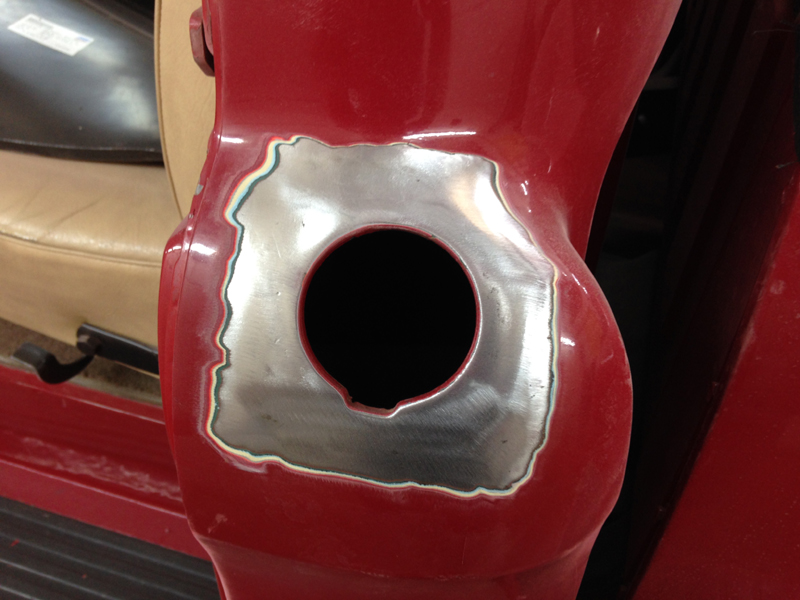
And fabricate a blanking plate and weld it in and grind the welds down:
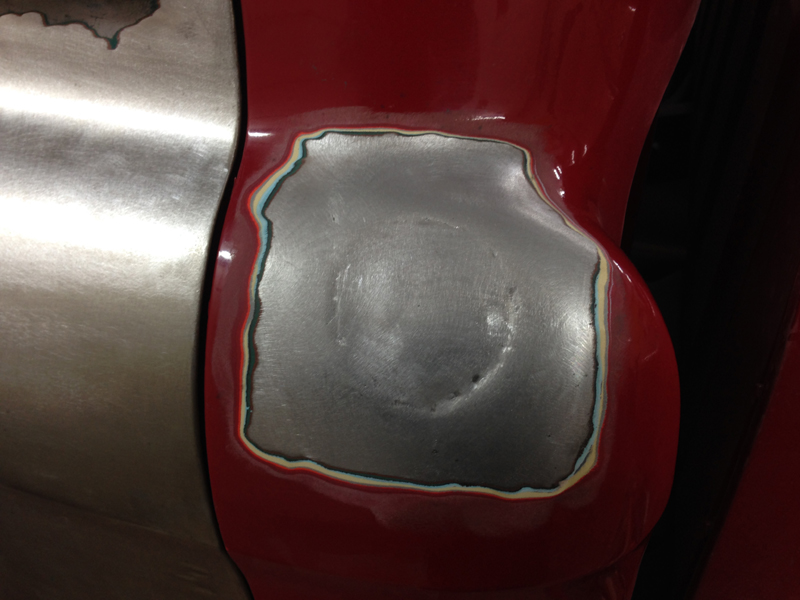
We gound the welds on the rear down too:

Then painted and seam sealed:
Followed by underseal:
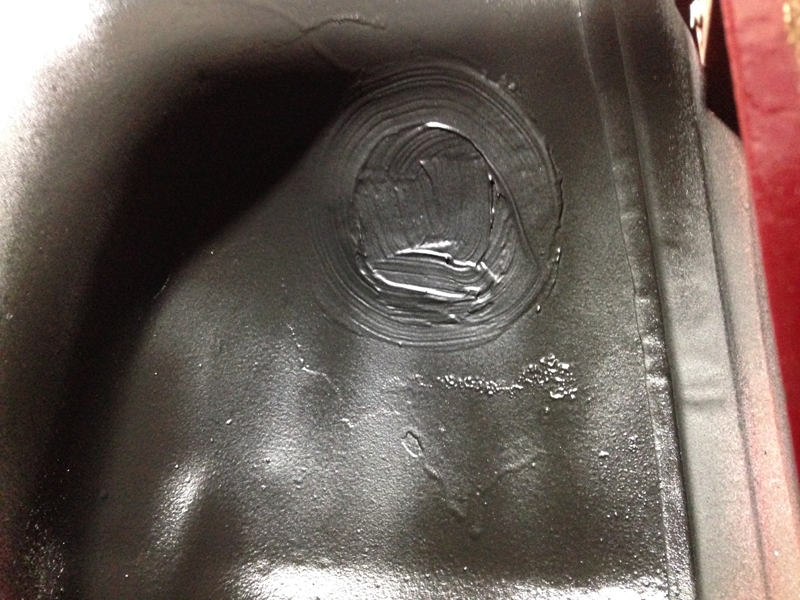
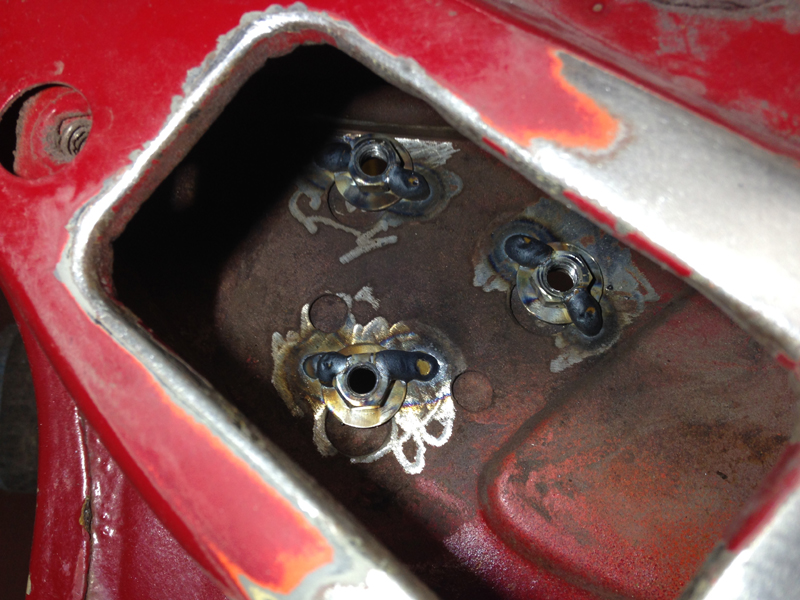
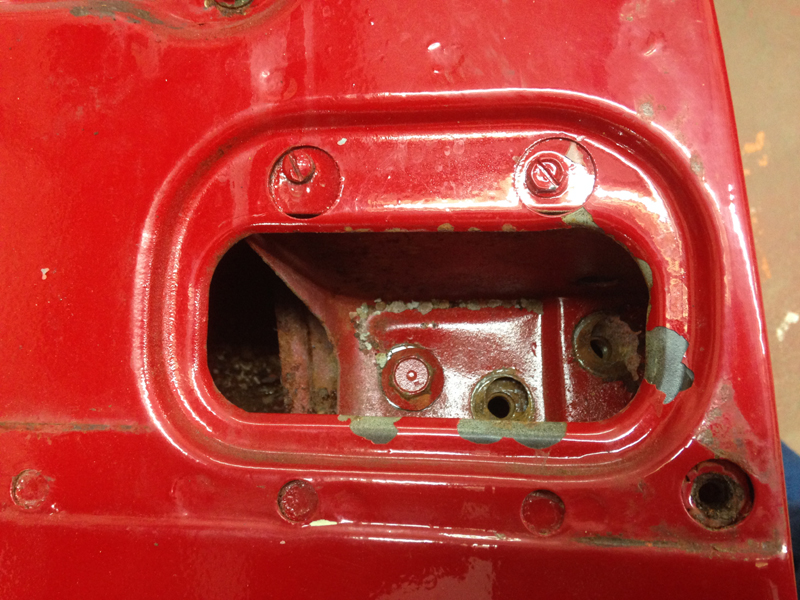
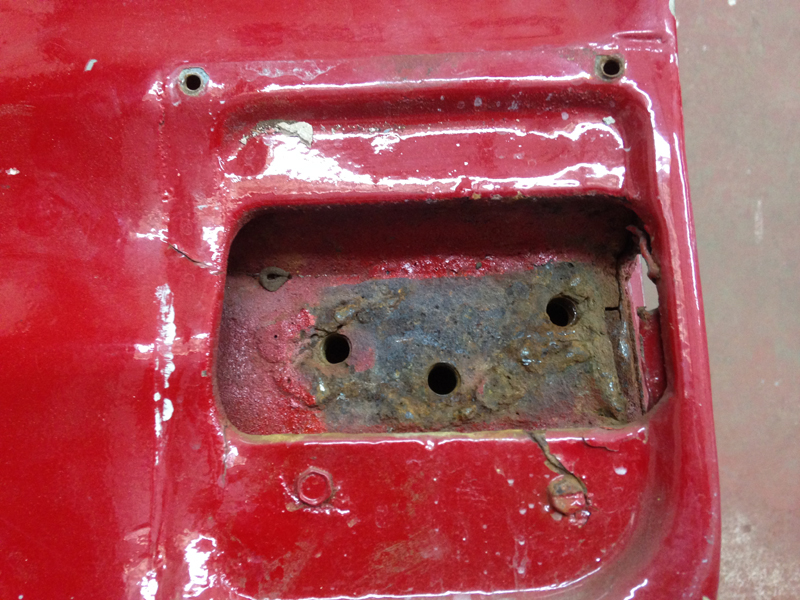
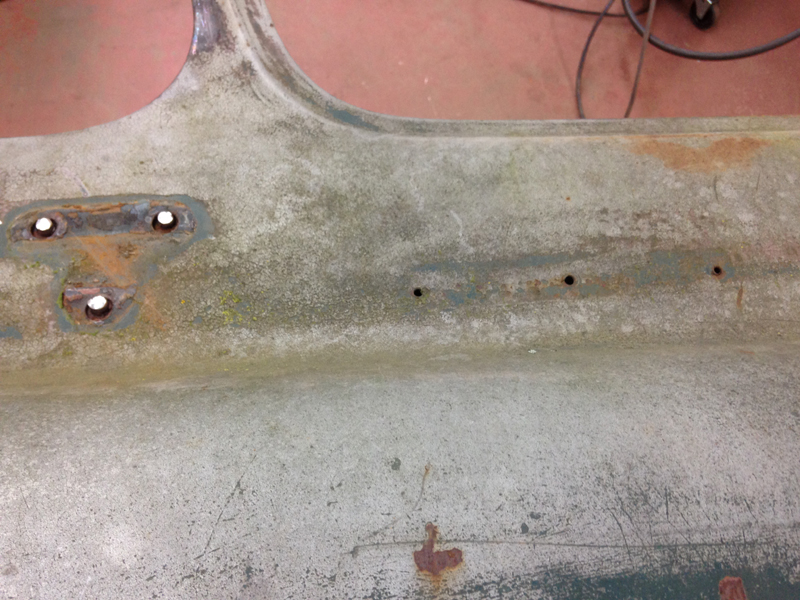
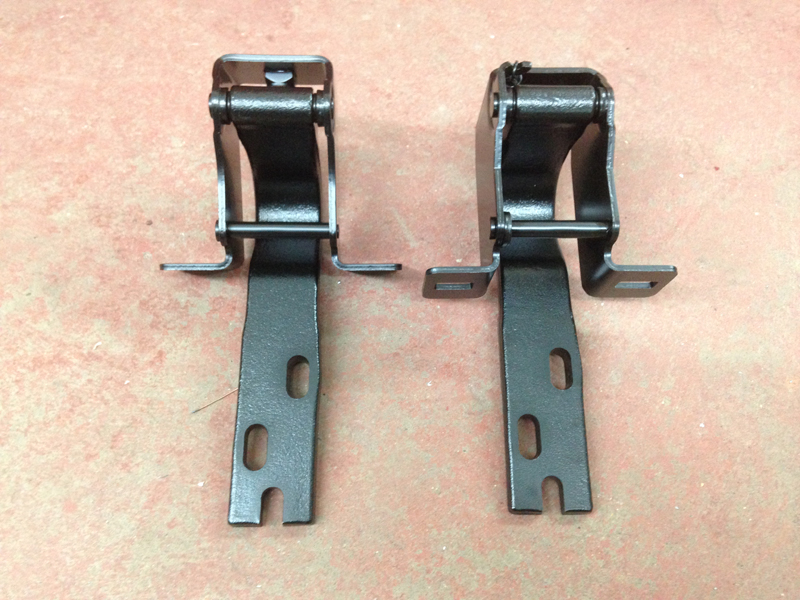
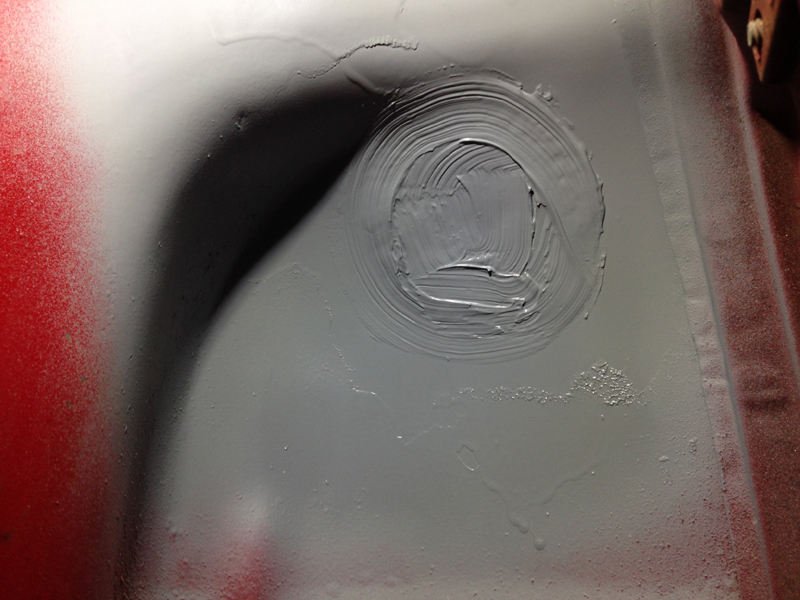
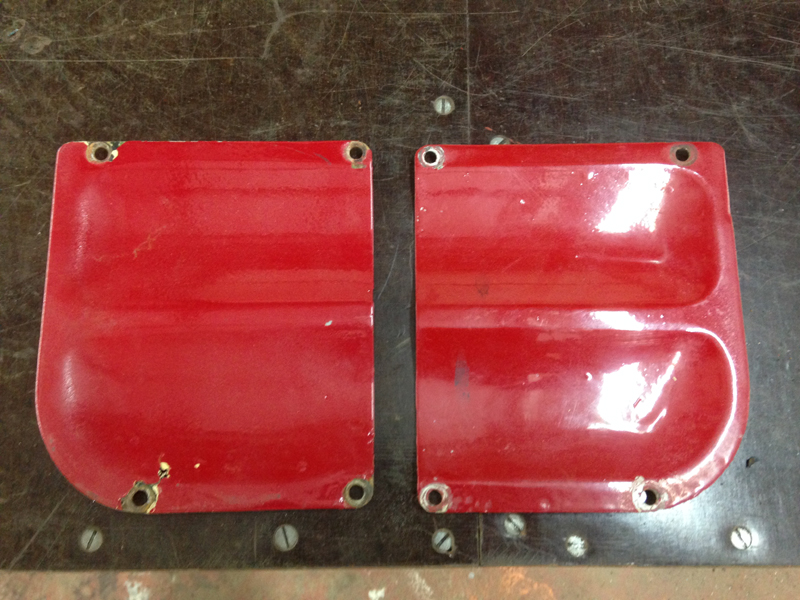
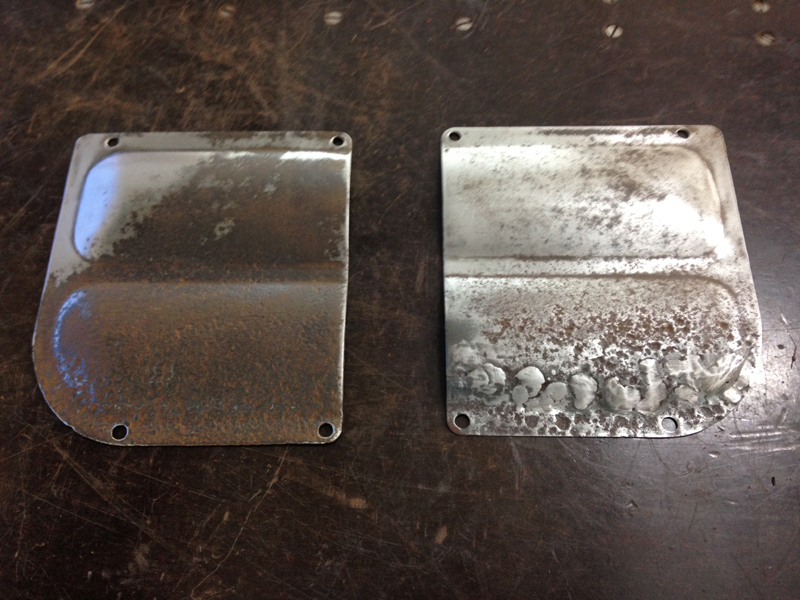
These 2 covers are for the doors, 1 for each door and they cover the lower hinge mounting bolt areas:
We noticed a couple of small holes in them, so stripped them back to bare metal:
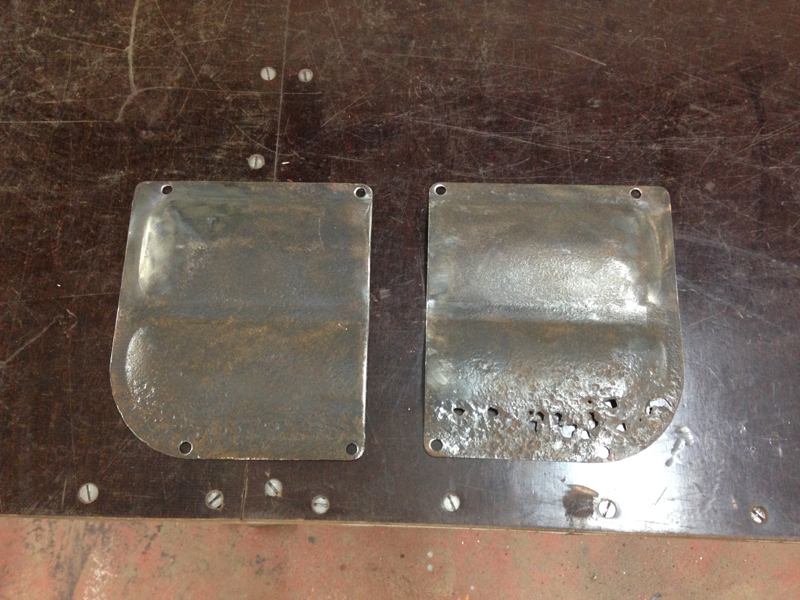
Which revealed lots of holes in one of them which had been covered up again by body filler:
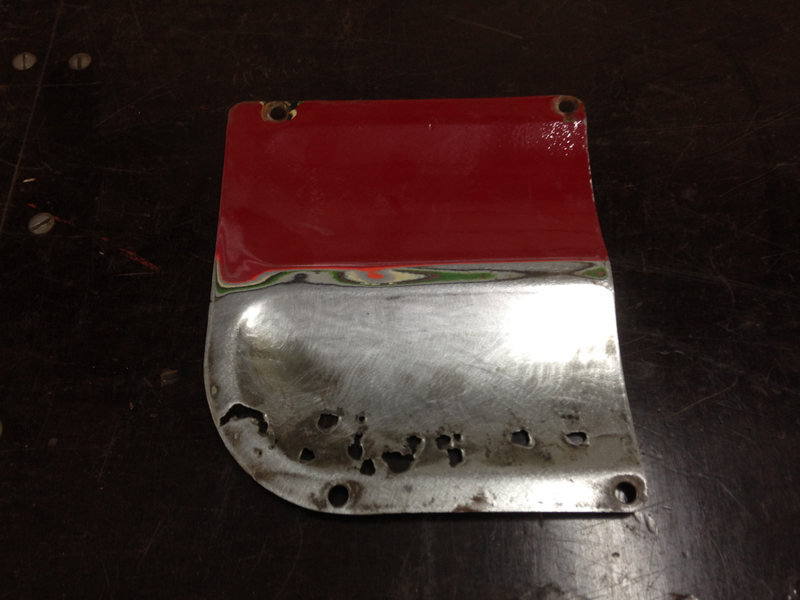
So we welded up the holes and ground the welds. The fronts will be filled and painted with the truck, the rears, we etch primed, high build primed, seam sealed and them undersealed, the same as the rest of the trucks repairs:
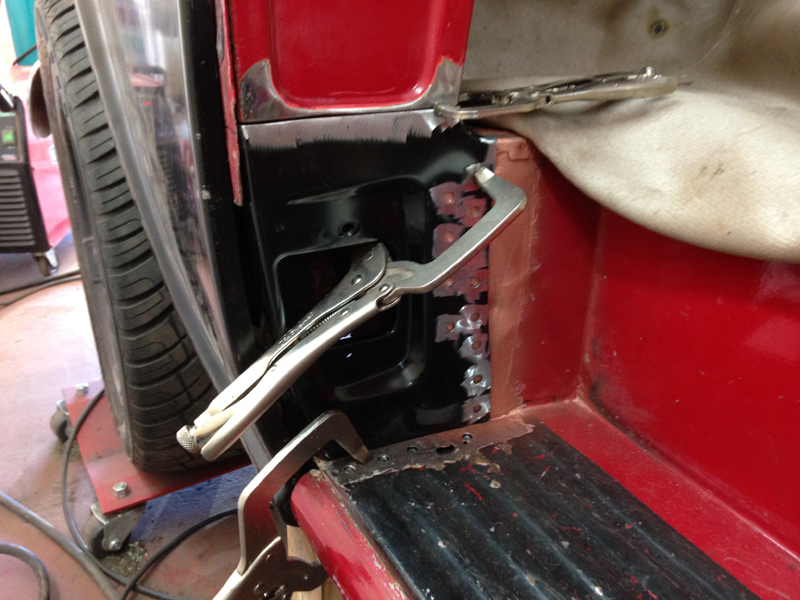
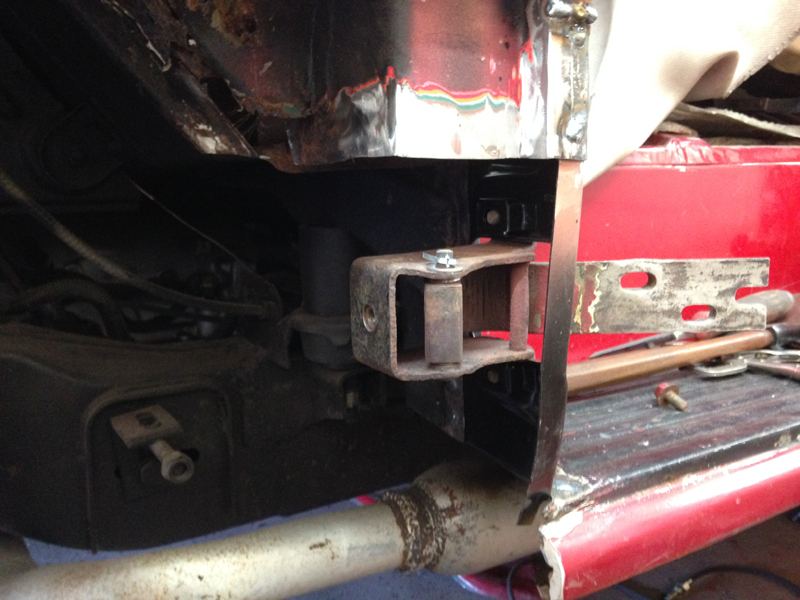
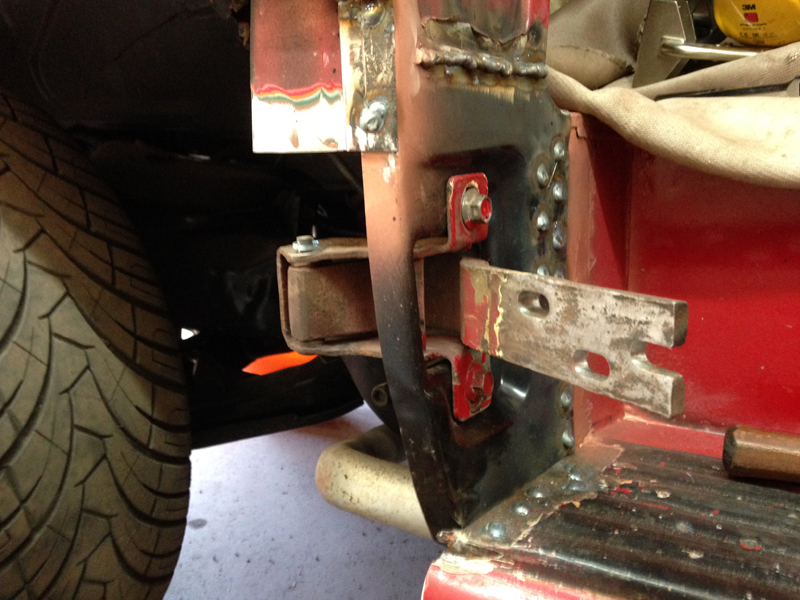
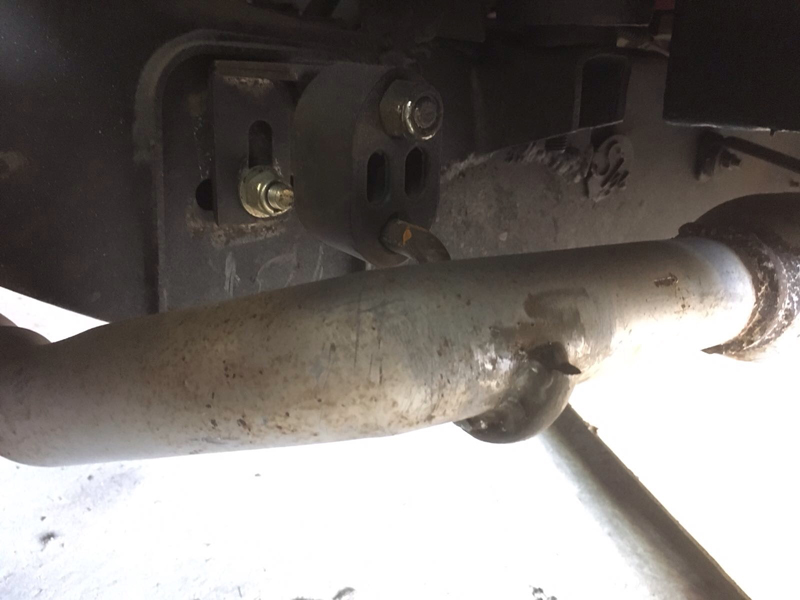
With the metal work on the truck complete, we had a few small jobs to do before sending the truck off for its new paintjob. First was the exhaust. The front section of the exhaust wasn't supported at all:
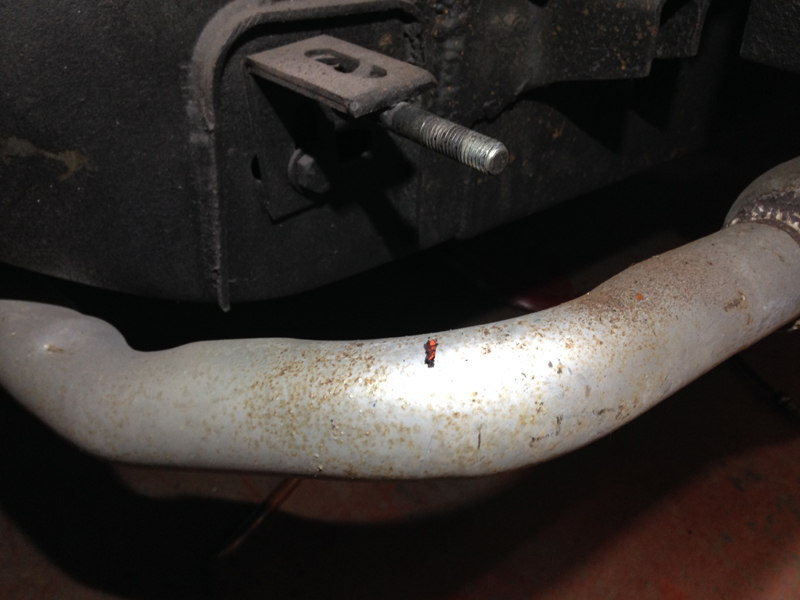
So we fabricated some hangers and welded them on to the exhaust pipes and secured them with new rubber mounts:
The owner of the truck also asked us to modify the side exit exhaust system to run upwards behind the cab and exit behind the roof, this was the exhaust as it came into us:

And this is what we did to it. We cut the side pipes off after the silencers and welded on some 90 degree bends and had the upright pieces made for us. Then all we had to do was fabricate some small support brackets to secure the new exhausts half way up the upright pipes onto the cabs body out of sight between the bed and body:

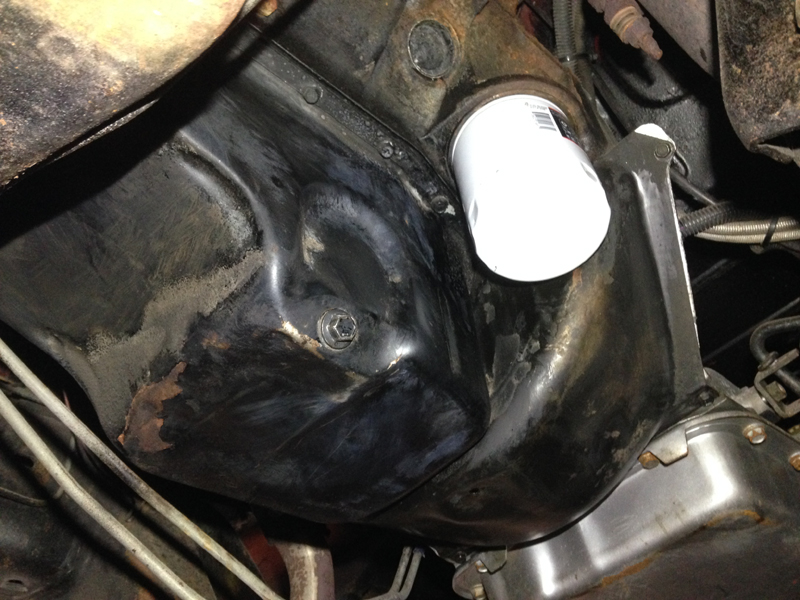
We also had to carry out an oil and filter change:
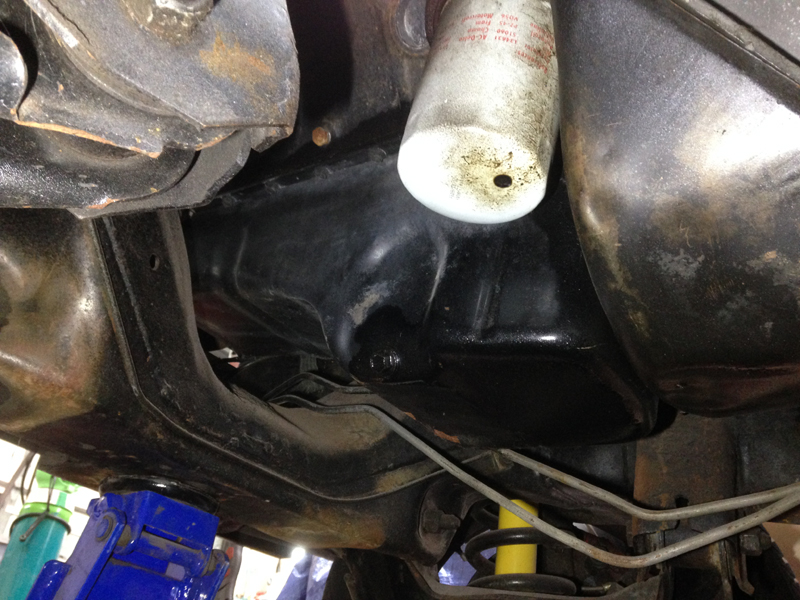
So we drained the oil and removed the filter:
Then installed a new filter and drain plug seal, added fresh oil and cleaned up the oil that had been leaking from the old filter for some time:
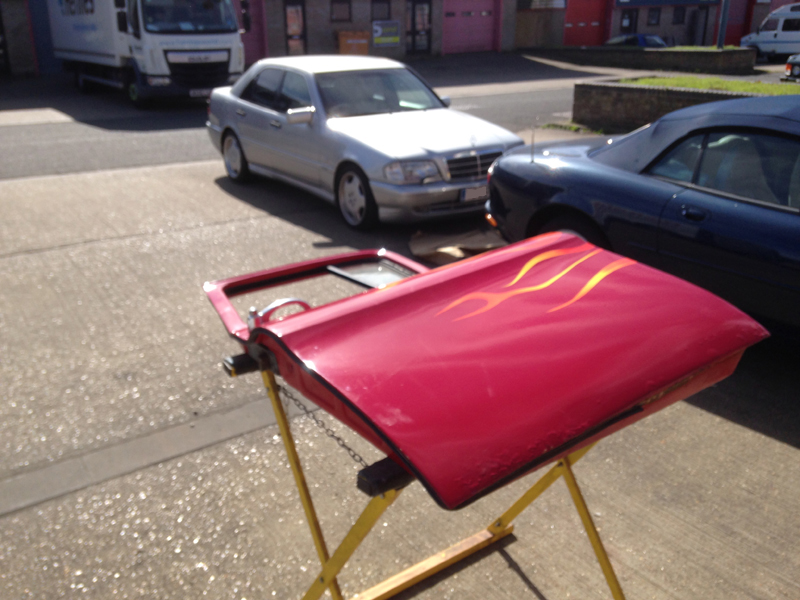
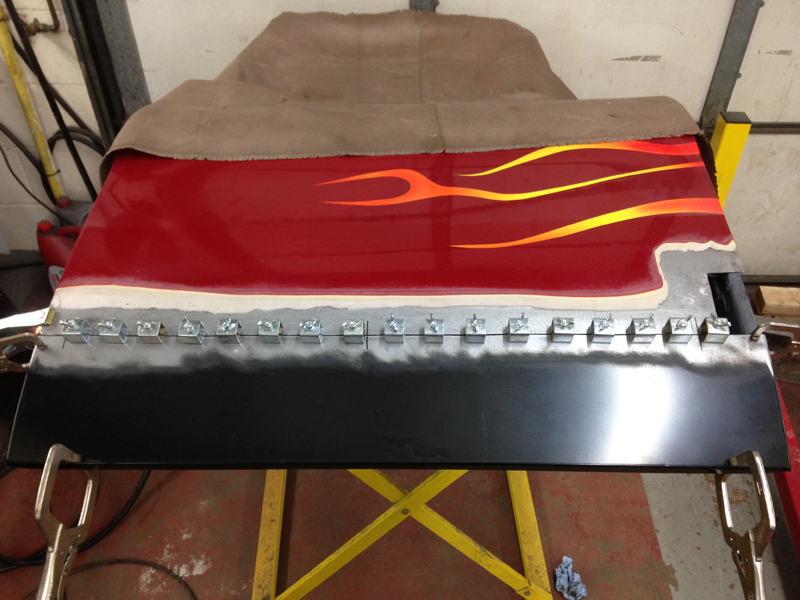
For now that was us done with the truck and it was ready to go to the bodyshop to have the paintwork done, we took a few photos outside in the sunlight just to show the finished work, first the passenger side:
And then the driver's side. Note how that rusty looking second hand door has cleaned up like new:
The last little job for this time round was to fix the oil leak from the rear axle, but knowing the bodyshop would be removing the truck's bed, we had arranged to do the oil leak on site at the body shop, as with the bed out the way we had full access to the rear axle from on top of the axle, so this made life easier for us:
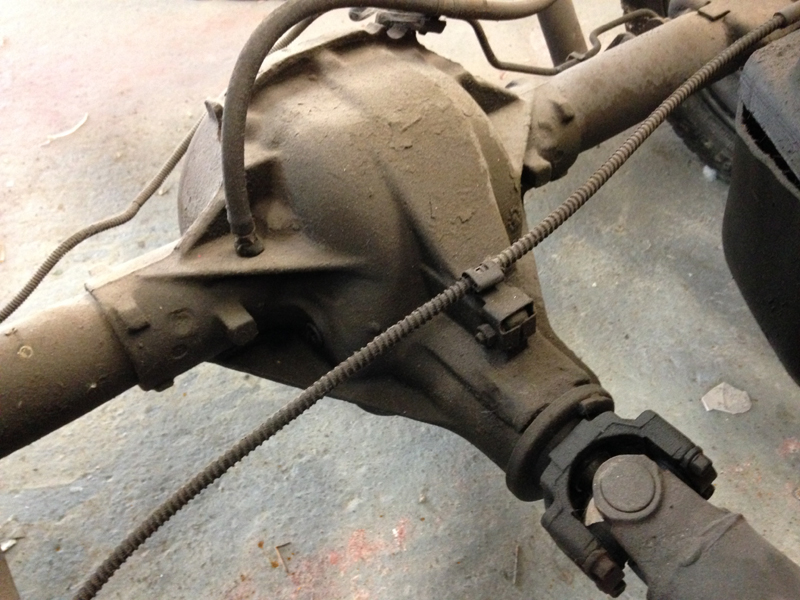
The oil was leaking from the pinion oil seal:
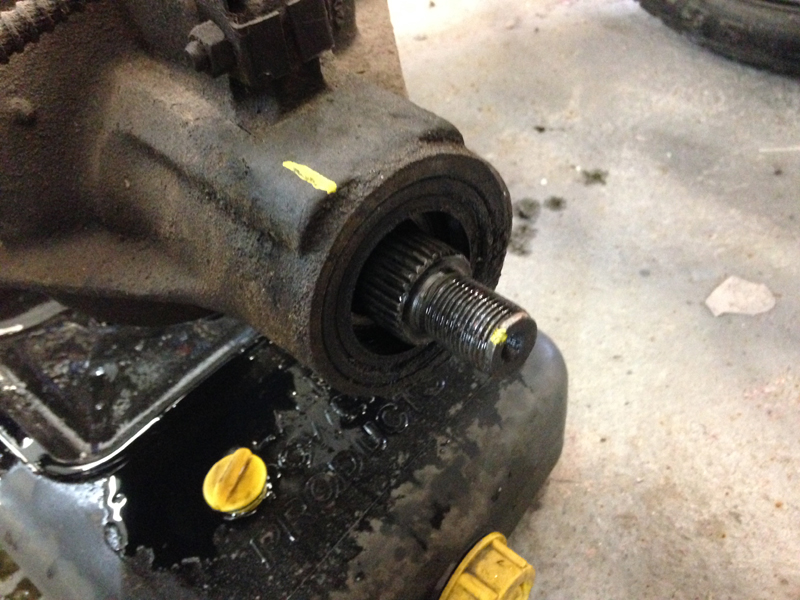
We stripped the pinion oil seal end down:

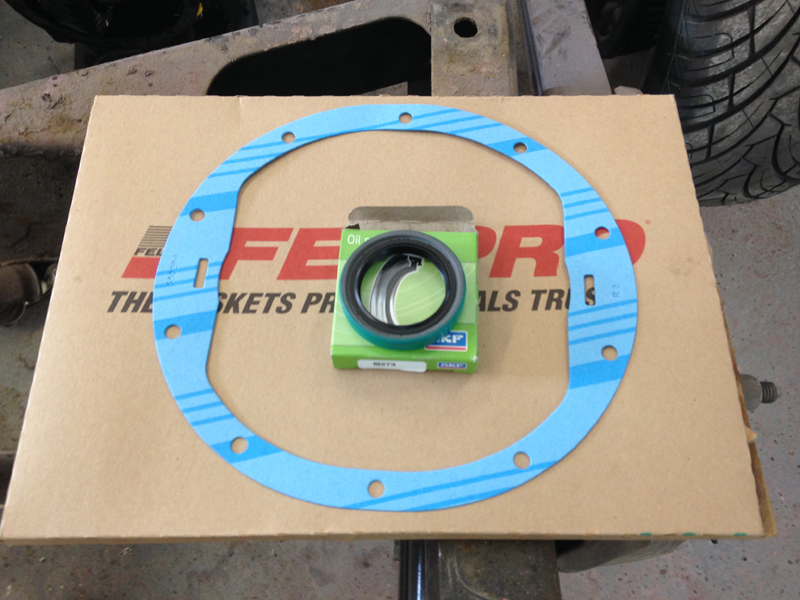
The oil was also leaking from the differential cover gasket:

So we stripped that down too:
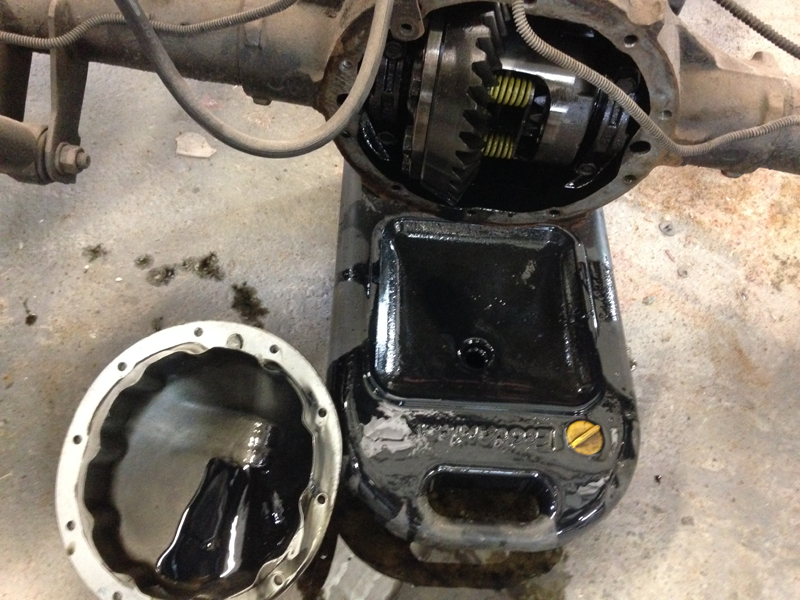
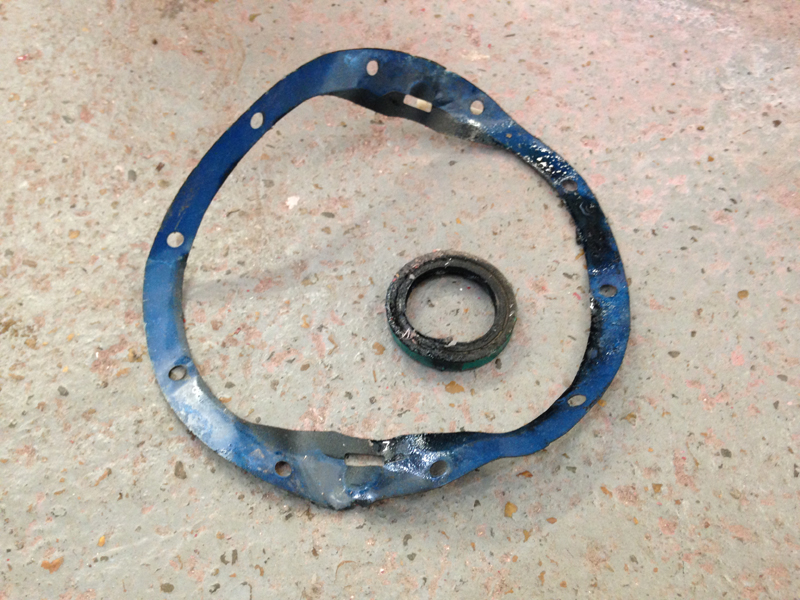
Here is the old oil seal and gasket:
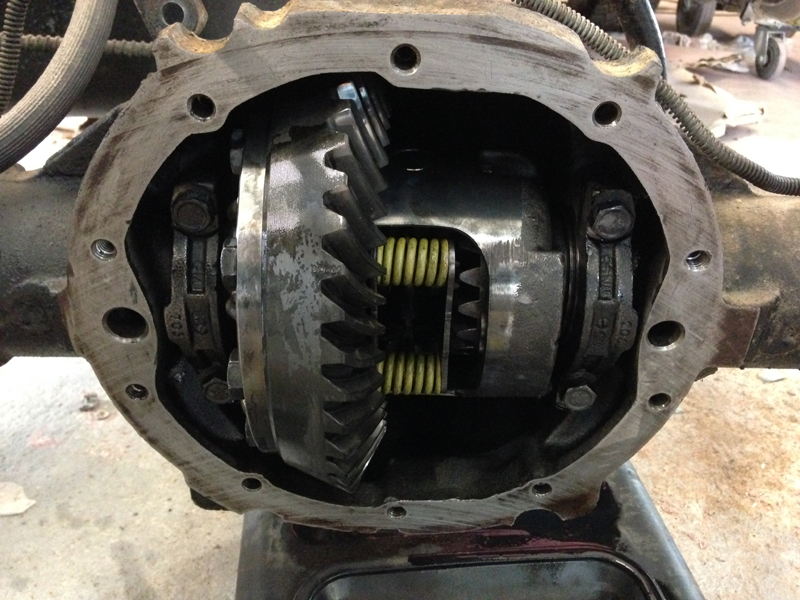
We cleaned up the rear axle:
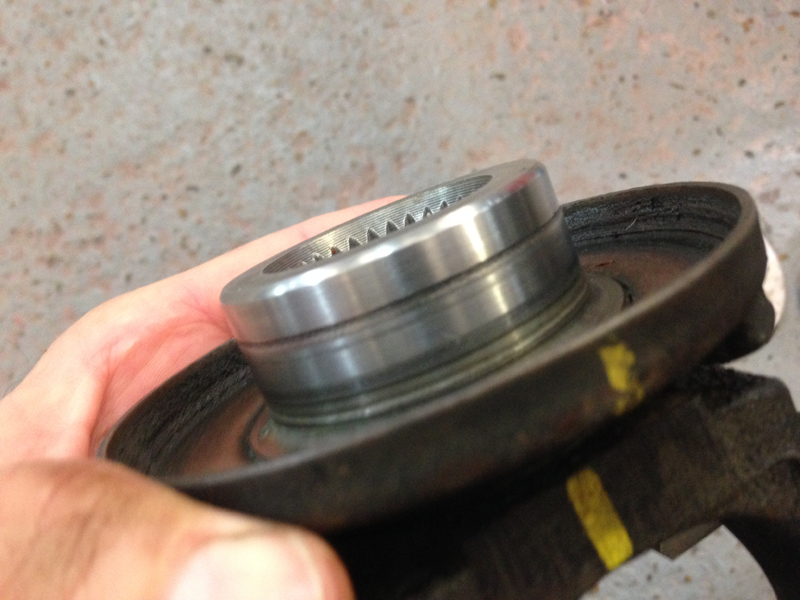
The driveshaft yoke. There is a small groove starting to form on the yoke but not bad enough to warrent it being replaced or sleeved just yet:
And finally, cleaned up the differential cover:
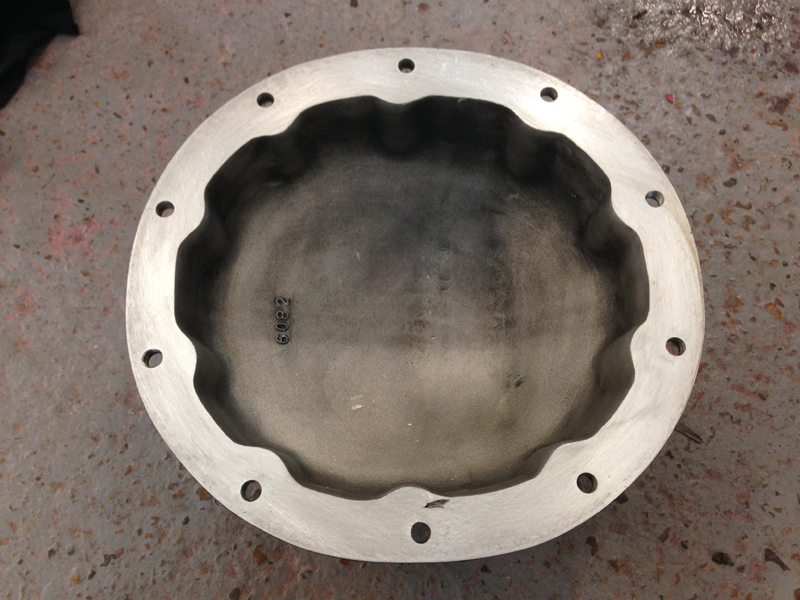
Then installed a new oil seal and gasket along with fresh differential gear oil. This was now our part of the job completed: